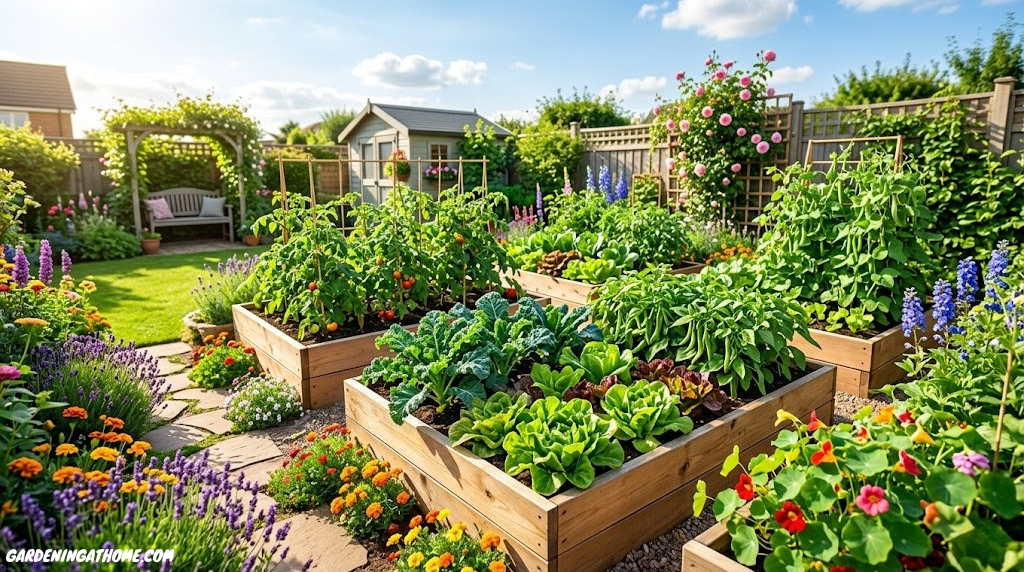
Gardening at Home: Everything You Need to Know to Grow, Thrive, and Harvest
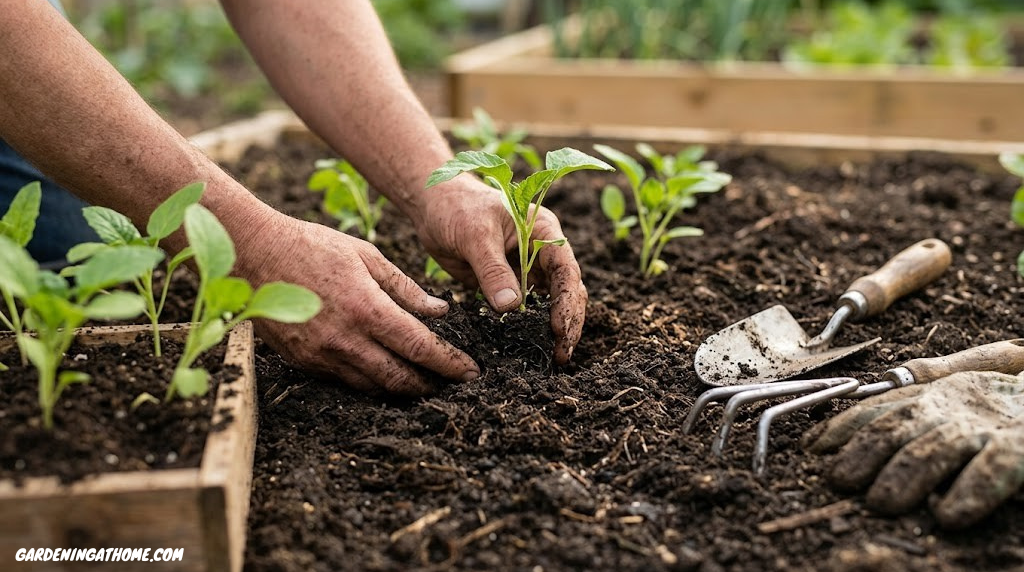
There’s something quietly revolutionary about growing your own food, tending your own flowers, and turning a neglected windowsill or patch of earth into something alive and productive. Gardening at home isn’t just a hobby — it’s a practice. One that rewards patience, connects you to natural rhythms, and gives back in every season. Whether you’re working with a sprawling backyard, a city balcony, or nothing more than a sunny kitchen counter, this guide covers every dimension of home gardening with depth and clarity so you can actually get growing.
1 Why Garden at Home? The Benefits Are Bigger Than You Think
The case for home gardening has never been stronger. Beyond the obvious satisfaction of eating something you grew yourself, the documented benefits span mental health, physical wellness, household economics, and even community connection. Millions of people discovered or rediscovered gardening in recent years and found it to be one of the most rewarding decisions they made.
Mental Health and Stress Relief
Gardening has a measurable effect on psychological wellbeing. Contact with soil — specifically with a harmless bacterium called Mycobacterium vaccae found in healthy earth — has been shown to trigger serotonin production, improving mood and reducing anxiety. The act of tending plants, a repetitive, sensory-focused activity, has the same cognitive effect as mindfulness meditation for many people. Watching something grow under your care, however slowly, builds a quiet sense of agency that combats modern-world overwhelm.
Fresh Food That Tastes Better
Store-bought tomatoes are designed to survive transport, not to taste extraordinary. A tomato ripened on the vine in your own garden, harvested the morning you eat it, is a different experience entirely. The same is true of fresh herbs, just-picked salad greens, and strawberries eaten still warm from the sun. Home-grown food has higher nutritional value because nutrients degrade rapidly after harvest — something you eliminate entirely when your kitchen garden is steps away.
Financial Savings Over Time
The economics of home gardening are compelling once you get past the initial investment. A single packet of herb seeds — basil, parsley, cilantro, or chives — costs a fraction of what you’d pay for fresh bunches at a supermarket every week. A pot of self-watering tomatoes on a balcony can produce pounds of fruit across an entire summer from minimal investment. Cheap gardening ideas for beginners can reduce startup costs to almost nothing using recycled containers, free compost, and seed swaps.
Environmental Connection and Biodiversity
Even a small home garden contributes to local biodiversity. Flowering plants attract pollinators — bees, butterflies, and hoverflies — that are under enormous pressure in urban environments. Growing native varieties and avoiding chemical pesticides gives your garden ecological value far beyond its size. A balcony planted with lavender, marigolds, and herbs does measurable good for the insects that live nearby.
✅ Pros of Gardening at Home
- Fresh, flavourful produce any time
- Significant reduction in grocery bills
- Documented stress reduction and mood benefits
- Physical activity built into daily life
- Environmental contribution through pollinators
- Creative and therapeutic outdoor practice
- Educational for children and families
⚠️ Things to Be Aware Of
- Initial time investment in setup
- Learning curve for soil and watering balance
- Some startup costs for pots and tools
- Weather and pest setbacks possible
- Seasonal limitations in some climates
- Space constraints in apartments
🌿 The bottom line: The challenges of home gardening are real but small. The rewards — nutritional, emotional, financial, and environmental — compound every season you continue.

Raised Garden Bed Starter Kit — Get Growing Fast
Cedar raised beds set up in minutes and create the perfect growing environment for vegetables, herbs, and flowers. Ideal for beginners.
Shop on Amazon2 Getting Started: Planning Your Garden Space
The number one mistake new gardeners make isn’t choosing the wrong plant or forgetting to water — it’s skipping the planning stage entirely. Understanding your space before you buy a single seed or pot saves enormous time, money, and frustration. A well-planned home garden, even a tiny one, thrives because everything in it is matched to its environment.
If you’re completely new to this, our guide on how to start a garden from scratch walks through the foundational decisions step by step. Here, we’ll give you the planning framework.
Step 1: Assess Your Available Space
Map out every potential growing spot
Walk through your home and outdoor areas with fresh eyes. A south-facing windowsill, a balcony railing, a strip of garden bed along a fence, a sunny corner of a deck — each of these is a potential growing zone. Don’t dismiss small areas; a 60cm windowsill can produce enough herbs to season meals all summer.
Observe how sunlight moves through your space
Spend a full day, ideally on a clear day, noting which areas receive sun in the morning, midday, and afternoon. Photograph or sketch this. Most edible plants need at least 6 hours of direct sun. Shade-tolerant greens and many houseplants are happy with 3–4 hours. This observation step is the most important planning investment you’ll make.
Decide between in-ground, raised bed, or container growing
Each method has advantages. In-ground beds offer the most soil volume for roots but require workable land. Raised beds give you control over soil quality and drainage, with less bending. Containers are the most flexible — they work on balconies, patios, indoors — and let you move plants to follow the sun or protect them from cold. Most home gardeners use a combination of all three over time.
Start smaller than you think you should
New gardeners reliably overestimate what they can manage in their first season. Begin with three to five plants or a couple of containers. Master the basics — watering rhythm, light requirements, feeding — before expanding. A well-tended small garden will always outperform a neglected large one.
Planning for Apartments and Small Spaces
Apartment dwellers and those without gardens aren’t excluded from home growing. Balcony gardening, window box setups, and indoor growing stations open up an entire world of possibilities. If you have an outdoor balcony, even a modest one, you can grow tomatoes, peppers, lettuce, herbs, strawberries, and flowers in containers. For inspiration and proven methods, balcony gardening ideas for apartments covers creative solutions for every layout and budget.
A single 30cm pot can grow one tomato plant or three herb varieties. A 60cm window box produces enough salad greens for regular harvests. A half-barrel planter (about 65cm diameter) can support a compact zucchini, two pepper plants, and a ring of basil around the edge. Constraints are creative prompts, not obstacles.
Understanding Your Climate and Microclimate
Your regional climate sets the broad parameters of what you can grow and when. But microclimate — the specific conditions created by your particular location within that region — matters just as much. A south-facing wall in a temperate climate absorbs heat during the day and radiates it back at night, creating a warmer-than-average growing zone that extends your season by weeks on either end. A frost pocket at the bottom of a slope can be significantly colder than a garden 20 metres uphill. An exposed rooftop terrace experiences wind stress that a sheltered courtyard never encounters.
Identifying and working with your microclimate is what experienced gardeners do intuitively. New gardeners can shortcut this by observing carefully during their first season. Where does frost settle last in spring? Where do heat-stressed plants appear first in a heatwave? Which corner of the garden smells damp and stays shaded the longest? These observations build a map of your specific conditions that no general guide can provide — and they transform your growing success in the seasons that follow.
Drawing Your Garden Plan
Before buying anything, sketch your growing space. It doesn’t need to be architectural — a rough diagram showing dimensions, where windows or walls face, where sun lands, and where permanent structures like sheds or fences sit is sufficient. Mark where you plan to put each growing zone. Then ask: will the taller plants shade the shorter ones? Do the heavy pots have a structurally sound surface to sit on? Is the watering point close enough to make daily watering practical without running a hose across a living room?
This planning step takes twenty minutes and saves hours of frustration later. Many beginners buy pots, fill them with soil, plant things, and then discover the position doesn’t work — the light is wrong, the space is too cramped, the area floods in heavy rain. Drawing first means discovering these issues on paper, where they’re easily solved.
Companion Planting from the Start
Companion planting — placing mutually beneficial plants together — is one of the oldest and most validated practices in home gardening. The classic ‘Three Sisters’ combination of sweetcorn, climbing beans, and squash demonstrates this beautifully: the corn provides a climbing structure for the beans, the beans fix nitrogen that feeds all three, and the squash’s broad leaves shade the soil to retain moisture and suppress weeds. Even in containers, the principle applies. Basil planted with tomatoes repels many pests and is said to improve fruit flavour. Marigolds at the base of almost any vegetable container earn their space through pest deterrence and pollinator attraction. Planning companion planting from the start, rather than retrofitting it later, integrates these benefits into your garden’s design rather than leaving them as an afterthought.
3 Choosing the Right Plants for Your Home Garden
Plant choice is where home gardening becomes personal. Your climate, your space, your cooking habits, and your aesthetic preferences all shape what makes sense to grow. But there’s one principle that applies universally: match the plant to your conditions, not your conditions to the plant. Start with what naturally suits your environment, then expand from there as your confidence grows.
Best Vegetables for Home Gardening
For most beginners with limited space, the priority is choosing vegetables that produce a lot from a small footprint, grow relatively quickly, and forgive minor cultivation mistakes. Easiest vegetables to grow in pots provides a detailed breakdown, but here’s a foundational overview:
Herbs: The Smartest Starting Point
If you’re completely new to gardening, herbs are the ideal entry point. They grow quickly, require relatively little space, tolerate minor neglect, and pay you back in the kitchen almost immediately. A pot of basil on a windowsill costs virtually nothing to start and saves you buying fresh herbs every week indefinitely. Parsley, chives, mint (keep in its own pot — it spreads), thyme, and rosemary are all excellent choices. For a structured plan, how to start an indoor herb garden covers setup, positioning, and care in detail.
Flowers That Do More Than Look Beautiful
Including flowering plants in your home garden isn’t just aesthetic. Marigolds repel aphids and whitefly when planted near vegetables. Nasturtiums attract beneficial insects and are entirely edible — leaves, flowers, and seeds. Lavender attracts pollinators while deterring pests. Borage supports tomatoes by drawing pollinators and repelling tomato hornworm. Strategic flowering plants make your edible garden healthier and more productive while adding colour and scent.
Matching Plants to Your Growing Conditions
| Condition | Ideal Plants | Avoid |
|---|---|---|
| Full Sun (6+ hrs) | Tomatoes, peppers, basil, squash, melons | Ferns, hostas, shade-lovers |
| Partial Shade (3–5 hrs) | Lettuce, spinach, parsley, cilantro, mint | Tomatoes, peppers, aubergine |
| Deep Shade (<3 hrs) | Peace lily, snake plant, pothos (ornamental) | Any food crops |
| Hot, Dry Conditions | Rosemary, lavender, thyme, sage, succulents | Lettuce, cilantro (bolt quickly) |
| Cool, Humid Conditions | Kale, spinach, brassicas, mint, parsley | Basil, peppers (dislike cold) |
| Very Small Containers | Herbs, chillies, lettuce, radishes, strawberries | Courgettes, sprawling cucumbers |
Understanding the distinction between full sun and partial shade is one of the most impactful things a new gardener can learn. If you’re unsure what your space offers, understanding full sun vs partial shade breaks it down in simple, practical terms.

Herb Garden Starter Kit — Seeds, Pots & Soil Included
Everything you need to grow 10 varieties of culinary herbs from seed indoors. Perfect for windowsills and kitchen counters.
Shop on Amazon4 Soil, Containers & Raised Beds: The Foundation of a Thriving Garden
Plants don’t grow in soil — they grow in the ecosystem within soil. The difference between healthy, biologically active growing medium and dead, compacted dirt is the difference between plants that thrive and plants that struggle. Getting your soil right is the most important investment you can make, and it pays dividends for every subsequent season.
Why Potting Mix Is Not Optional
For any container gardening, never use regular garden soil in pots. Garden soil compacts under repeated watering in a confined container, cutting off oxygen to roots and causing root rot. A quality potting mix is formulated to stay aerated even when wet, drains well while retaining the right amount of moisture, and is free from pathogens and weed seeds. For a detailed guide to what makes a great mix, best potting soil mix for indoor plants covers ingredients, brands, and DIY blending.
What to Look for in a Potting Mix
- Perlite or vermiculite for aeration and drainage
- Coir (coconut fibre) for moisture retention without waterlogging
- Compost for biological life and baseline nutrients
- Bark or wood fibre for structure
- Worm castings if available — supercharge nutrient availability
- A neutral to slightly acidic pH (6.0–7.0 for most plants)
Choosing the Right Container
Container material, size, and drainage all affect plant health significantly. Terracotta pots are porous — they breathe well and dry out faster, which suits Mediterranean herbs like rosemary and thyme but can stress moisture-loving plants. Plastic and glazed ceramic pots retain moisture longer, which suits tomatoes, lettuce, and most vegetables. Self-watering planters are a major upgrade if you tend to forget watering or travel frequently — they maintain consistent moisture from a reservoir below.
Size is critical. Roots need room to develop, and undersized containers mean plants hit their ceiling quickly, becoming pot-bound and stressed. As a general guide, our article on how to choose the right pot size for plants explains the relationship between plant type, root depth, and container dimensions in detail.
| Plant Type | Minimum Pot Size | Ideal Volume | Notes |
|---|---|---|---|
| Herbs (single) | 10–15 cm | 1–2 litres | Can grow multiple herbs in 20cm pots |
| Lettuce & Salad Greens | 15–20 cm depth | 4–8 litres | Shallow roots; wide is better than deep |
| Cherry Tomatoes | 30 cm diameter | 10–15 litres | Dwarf varieties need less; standard need more |
| Beefsteak Tomatoes | 40–50 cm diameter | 20–30 litres | Larger plants need more root space |
| Peppers & Chillies | 25–30 cm | 8–12 litres | Deep roots; good drainage essential |
| Courgette / Squash | 45 cm+ | 25+ litres | Vigorous plants need lots of room |
| Dwarf Beans | 25 cm | 8–10 litres | Plant 3–4 per container |
Raised Beds: The Gold Standard
If you have any outdoor space — even a small patio — a raised bed delivers outstanding results for the investment. You control the soil entirely, filling it with a perfect growing medium. Drainage is inherently better than in-ground garden beds. Pests like slugs have a harder time reaching plants. Maintenance is easier because you never step on the soil, so it doesn’t compact. And aesthetically, raised beds look intentional and attractive in any garden.
Cedar is the gold standard wood for raised beds — naturally rot-resistant, safe for food growing, and beautiful as it weathers to silver. Avoid treated timber near food crops. Galvanised metal beds are equally popular and extremely durable. A 120cm x 60cm bed is large enough to be productive and small enough to be manageable — the perfect starter size.
5 Essential Gardening Tools: What You Actually Need
The gardening industry would have you believe you need dozens of specialist tools before you can grow anything. The reality is that five core tools cover the vast majority of home gardening tasks, and most beginners can start with fewer. The key is quality over quantity — a sharp, well-made hand trowel outperforms a cheap toolkit of ten mediocre implements. For a full breakdown, essential gardening tools for beginners reviews specific products and explains what each is for.
| Tool | Primary Use | Priority Level | What to Look For |
|---|---|---|---|
| Hand Trowel | Planting, transplanting, scooping soil | 🔴 Essential | Stainless steel blade, comfortable grip handle |
| Pruning Shears | Harvesting, deadheading, shaping plants | 🔴 Essential | Bypass blades; sharp and easy to clean |
| Watering Can | Precise watering of containers and seedlings | 🔴 Essential | Long rose spout; 5–8 litre capacity |
| Gloves | Hand protection from thorns, soil, chemicals | 🔴 Essential | Nitrile or leather-tipped; fits snugly |
| Kneeling Pad | Comfort during ground-level work | 🟡 Recommended | Thick foam; waterproof cover |
| Hori Hori Knife | Digging, dividing plants, weeding | 🟡 Recommended | Serrated edge; depth markings useful |
| Garden Fork | Loosening soil, turning compost | 🟢 Useful Later | Stainless steel tines; medium length |
| Dibber | Making precise planting holes for seeds | 🟢 Useful Later | Wooden or metal; depth markings |
💡 Budget tip: Start with just a hand trowel, pruning shears, and a watering can. That’s genuinely all you need to begin. Add tools as specific needs arise — not before.

Complete Garden Tool Set — Trowel, Pruners, Gloves & More
A well-reviewed starter set with stainless steel tools that will last for years. Comes in a carry case — ideal for beginners or as a gift.
Shop on Amazon6 Understanding Sunlight: The Make-or-Break Factor
Light is the single most important variable in plant growth. Plants convert light into energy through photosynthesis — without adequate light, nothing else you do can compensate. Too many beginner gardeners choose plants they love and find the best soil and pots, only to place them in inadequate light and wonder why they struggle. Understanding your space’s light conditions before choosing what to grow prevents this entirely.
Defining Light Levels
The labels you’ll see on plant labels and seed packets refer to specific light thresholds. Full sun means at least 6 hours of direct sun exposure per day. Partial sun or partial shade means 3–6 hours. Full shade means fewer than 3 hours of direct sun. These aren’t vague categories — they’re measurable, and observing your space on a clear day tells you exactly what you’re working with. For a complete breakdown with photographic examples, understanding full sun vs partial shade is essential reading before you plan your first garden.
How Seasonal Changes Affect Light
The sun’s angle changes dramatically across the year. A balcony or window that receives full sun in summer may be entirely shaded in winter as the sun sits lower in the sky. Neighbouring buildings, trees with seasonal foliage, and even the angle of your building’s eaves will affect this. The most accurate assessment is made during the growing season you’re planning for — midsummer observation is most useful for summer crops.
Indoor Light and Grow Lights
Indoor rooms vary enormously in light quality. A south-facing window in a low-rise building receives genuinely good light for sun-loving herbs. A north-facing room or one obscured by other buildings may receive so little light that only deep-shade houseplants are viable without supplementation. If your indoor space is limiting, full-spectrum LED grow lights have become affordable, efficient, and effective. They extend the range of what you can grow indoors dramatically, enabling year-round herb production, microgreen cultivation, and even compact vegetable growing regardless of your window situation.
Stand at your proposed growing spot at 10am, 1pm, and 4pm on a clear day. Count how many of those times the spot is in direct sun. Two or three suggests full sun; one suggests partial shade; none suggests you need grow lights or shade-tolerant plants. This three-observation method is the fastest way to assess any growing position.
Using Reflective Surfaces to Maximise Light
In urban environments where direct sunlight is partially obstructed by buildings, there are clever ways to increase the light your plants receive. Positioning pots near white walls or painting a fence white dramatically increases reflected light reaching plants. Mirrors and metallic surfaces have the same effect but require careful placement to avoid concentrating light into hot spots. Choosing light-coloured containers and pot saucers also reflects light back up into the undersides of plant canopies, where photosynthesis occurs on both leaf surfaces. None of these approaches replace direct sunlight for sun-hungry crops, but for herbs and salad greens in partially shaded spots, maximising ambient and reflected light can make a meaningful difference to growth rate and plant health.
When and How to Use Grow Lights
LED grow lights have transformed indoor gardening in the past decade. Where incandescent and fluorescent grow lights were inefficient and generated problematic heat, modern full-spectrum LEDs run cool, consume modest electricity, and deliver the precise light wavelengths that drive photosynthesis and fruiting. Red wavelengths (around 640–680nm) promote flowering and fruiting. Blue wavelengths (around 450–470nm) drive vegetative growth and compact, stocky stems. A full-spectrum light covers both, making it suitable for all plant types and growth stages.
Position grow lights 15–30cm above seedlings and young plants to avoid light stress, raising them as plants grow taller. A timer is essential — most edible plants need 14–16 hours of light per day under artificial lighting to compensate for the lower intensity compared to direct sunlight. Plugging your grow light into an inexpensive outlet timer eliminates the daily on/off routine and gives your plants the consistent light cycle they need.
How Grow Lights Expand What’s Possible
With a good grow light setup, the list of what you can grow indoors expands dramatically. Beyond herbs and microgreens — which grow well under even modest supplemental lighting — you can successfully produce compact chilli plants, dwarf tomato varieties, and even strawberries entirely indoors. Seedling propagation under grow lights produces stronger, more compact seedlings than the leggy, light-starved seedlings grown on a windowsill in winter. Starting tomato and pepper seeds under grow lights six to eight weeks before your last frost date gives you significantly more advanced transplants than garden centre seedlings, with a head start that translates directly into earlier and heavier harvests.
7 Watering and Moisture Management: The Art of the Right Amount
More plants are killed by overwatering than by any other single cause. This is a counterintuitive truth for new gardeners, who often assume that more water equals more growth. The reality is that plant roots need both water and oxygen — roots drowned in waterlogged soil can’t access either and begin to rot. Learning to read your plants and your soil is a skill that transforms your gardening results.
The Finger Test: Simple and Reliable
Before watering any container plant, push your finger into the soil to the first knuckle (approximately 2–3cm deep). If it feels moist or cool, the plant doesn’t need water yet. If it feels dry and crumbly, it’s time to water. This simple test works for virtually all plants and all container types, and it overrides any schedule-based watering system. Soil dries at different rates depending on pot size, material, weather, plant size, and humidity — a schedule can’t account for all of these variables, but your finger can.
How to Water Properly
When you water, water thoroughly. Apply water slowly until it flows freely from the drainage holes at the bottom of the pot — this ensures the entire root zone receives moisture and flushes accumulated mineral salts from the soil. Shallow watering — just dampening the surface — encourages roots to stay near the surface where they’re vulnerable to heat and drought. Thorough, less frequent watering trains roots to grow deeper and makes plants more resilient.
Signs That Something Is Wrong
Yellowing lower leaves, mushy stems at the base, and a sour or rotting smell from the soil all indicate overwatering. Wilting despite moist soil is a classic sign of root rot — the plant can’t take up water because its roots are damaged. Conversely, dry, crispy leaf edges, curling leaves, and soil pulling away from the pot walls indicate underwatering. To understand the full spectrum of symptoms, signs of overwatering vs underwatering provides a visual diagnostic guide.
Tools and Systems to Help
Self-watering planters maintain a reservoir below the growing medium and allow plant roots to draw moisture upward as needed — they’re particularly useful for tomatoes, which are sensitive to irregular watering and develop blossom end rot when moisture fluctuates. Moisture meters are inexpensive and remove all guesswork. Drip irrigation systems and soaker hoses work well for outdoor raised beds and eliminate the daily watering task for larger gardens.
💧 Remember: Water when the top 2–3cm of soil is dry. Water slowly and deeply until it drains. Don’t water again until the top inch is dry. This rhythm keeps most plants perfectly healthy.

Self-Watering Planters — No More Guessing When to Water
Built-in water reservoirs maintain consistent moisture for tomatoes, peppers, and herbs. Reduces watering frequency by up to 50%.
Shop on Amazon8 Feeding Your Plants: Fertilising for Maximum Growth and Harvest
Healthy soil feeds plants, but container soil has one significant limitation: it’s a finite resource. Unlike an in-ground garden bed that exchanges nutrients with the broader soil ecosystem, a pot contains everything a plant will ever access. After the initial nutrients in the potting mix are used up — typically within 4–6 weeks for fast-growing plants — you need to resupply them. This is where fertilising becomes essential, and where many beginners who don’t fertilise wonder why their plants stall.
The NPK Basics
Every fertiliser label shows an NPK ratio — three numbers representing the proportions of nitrogen (N), phosphorus (P), and potassium (K). Nitrogen drives leafy, vegetative growth — it’s what makes herbs and salad greens lush and green. Phosphorus supports root development and flowering. Potassium (potash) strengthens stems, improves disease resistance, and enhances fruit development. For a complete reference on when and how to use different fertilisers, how and when to fertilize house plants explains the full system.
| Fertiliser Type | How It Works | Best For | Frequency |
|---|---|---|---|
| Balanced Liquid (e.g., 10-10-10) | Diluted in water; fast-acting | Most plants; general feeding | Every 2 weeks during growth |
| Slow-Release Granules | Mixed into soil; releases over months | New plantings; low-maintenance gardens | Once per season |
| High-Nitrogen Feed | Promotes leafy growth | Herbs, lettuce, spinach, grass | Monthly or fortnightly |
| Tomato Feed (High-K) | Promotes flowering and fruiting | Tomatoes, peppers, strawberries | Weekly once flowering begins |
| Worm Castings | Organic slow-release; adds biology | All plants; seedlings; houseplants | Monthly top-dressing |
| Seaweed Extract | Micronutrients and plant hormones | All plants; stress recovery | Monthly or as a soil drench |
Signs of Nutrient Deficiency
Plants communicate nutrient shortages clearly if you know what to look for. Yellowing leaves with green veins (chlorosis) typically indicates iron or magnesium deficiency. Uniformly pale, yellow older leaves suggest nitrogen deficiency. Purple tinges on leaves and stems can indicate phosphorus deficiency. Weak, leggy growth despite good light often means nitrogen or general nutrient depletion. When you see these signs, don’t panic — apply a balanced liquid feed, reassess your watering (overwatering blocks nutrient uptake even when nutrients are present), and the plant will usually recover within a week or two.
9 Dealing with Pests and Disease: Natural Solutions First
Every home gardener will encounter pests and disease at some point. This is not a sign of failure — it’s a sign that you have a living garden with organisms in it. The goal isn’t to eliminate all insects (most are beneficial) but to maintain a balance where your plants thrive despite the presence of a manageable pest population. A chemical-free, prevention-first approach is the most effective long-term strategy.
The Most Common Home Garden Pests
Aphids cluster on soft new growth, particularly on roses, herbs, and young vegetable shoots. They’re controlled easily with a jet of water or insecticidal soap spray. Spider mites thrive in hot, dry conditions and cause stippled discolouration on leaves — increase humidity and use neem oil. Fungus gnats, those tiny flies around your indoor plants, breed in moist soil and indicate overwatering or poorly drained soil. Their larvae damage roots. For specific treatment protocols, how to get rid of fungus gnats naturally covers the most effective natural methods.
Natural Pest Control Methods That Work
- Neem oil: A broad-spectrum organic pesticide that disrupts insect life cycles without harming beneficial insects when used correctly. Dilute and apply to affected plants, especially the undersides of leaves.
- Insecticidal soap: Suffocates soft-bodied insects like aphids, mites, and whitefly on contact. Safe, inexpensive, and effective.
- Diatomaceous earth: A fine powder made from fossilised algae that damages the exoskeletons of crawling insects. Apply around the base of plants for slugs, beetles, and fungus gnat larvae.
- Companion planting: Marigolds near tomatoes repel nematodes. Basil deters thrips and flies. Nasturtiums act as a sacrificial crop, attracting aphids away from your vegetables.
- Physical barriers: Fine mesh netting over brassicas prevents cabbage white butterflies from laying eggs. Copper tape around pots deters slugs.
- Encourage beneficial insects: Ladybirds, lacewings, and hoverflies consume aphids voraciously. Planting flowers like dill, fennel, and yarrow attracts them.
Preventing Disease with Good Cultivation Habits
Most plant diseases — fungal blights, mildews, root rots — are prevented rather than cured. Avoid overhead watering late in the day, which leaves foliage wet overnight and creates ideal conditions for fungal growth. Ensure adequate spacing between plants for air circulation. Remove dead leaves and spent plant material promptly. Don’t over-fertilise with nitrogen, which produces lush but disease-susceptible growth. Water at the base of plants, not the leaves. These habits alone prevent the majority of disease problems before they start.

Organic Neem Oil Spray — Safe, Natural Pest Control
Cold-pressed neem oil concentrate controls aphids, mites, fungus gnats, and more without chemicals. Safe for food crops and beneficial insects.
Shop on Amazon10 Indoor Gardening: Growing Plants Inside Your Home
Indoor gardening has evolved from keeping houseplants alive to a full discipline in its own right. Modern home growers cultivate herbs, salad greens, microgreens, air-purifying plants, and even fruiting crops entirely indoors — year-round, in any climate, with no outdoor space required. The indoor garden is one of the most democratically accessible forms of home growing there is.
Best Plants for Indoor Growing
Not all plants adapt equally well to indoor conditions. The most successful indoor plants share certain traits: tolerance for lower and more stable light levels, adaptability to indoor humidity and temperature ranges, and manageable size. For low-light rooms, best indoor plants for low light provides a curated list with care notes. If you want plants that actively improve air quality, indoor plants that purify the air covers the scientifically-supported options.
Microgreens: The Indoor Gardener’s Superpower
Microgreens are one of the most rewarding things you can grow indoors. These are seedlings of edible plants harvested at 7–14 days, just after the first true leaves emerge. Sunflower, pea shoots, radish, mustard, broccoli, and amaranth microgreens are among the most popular and easiest to grow. They require no soil (they can be grown on a growing mat or coir substrate), no special equipment beyond a shallow tray and a bright window, and they’re ready to eat in less than two weeks. For a soil-free approach, growing microgreens at home without soil walks through the full process.
Setting Up an Indoor Herb Station
A windowsill herb station is the gateway drug to home gardening for most people. The setup is simple: a few pots on a south-facing windowsill (or any good light source), a quality potting mix, and seeds or seedlings of your favourite culinary herbs. The key to success is choosing a window that gets at least 4–6 hours of light, watering carefully (herbs hate wet feet), and harvesting regularly — which actually stimulates bushier, more productive growth.
For a productive indoor kitchen garden, you need: a bright south-facing window or LED grow light, a quality potting mix with good drainage, pots with drainage holes (always), a small watering can with a fine rose, and a liquid fertiliser for monthly feeding. That’s the entire kit for a thriving indoor herb and salad garden.
Tomatoes on a Balcony or Patio
Growing tomatoes in containers is more achievable than most people expect, and the flavour reward is extraordinary. Choose compact or determinate varieties specifically bred for containers — ‘Tumbling Tom’, ‘Balcony’, ‘Maskotka’, or ‘Tumbler’ are all excellent choices that produce prolifically in large pots. A detailed guide to variety selection, staking, feeding, and harvesting is available at how to grow tomatoes on a balcony.

Full-Spectrum LED Grow Light — Grow Herbs & Greens Year-Round
Energy-efficient LED panel with adjustable timer and spectrum settings. Replaces or supplements natural light for indoor herbs, microgreens, and seedlings.
Shop on Amazon11 Seasonal Planting Calendar: What to Grow and When
Home gardening is a year-round practice, not a summer-only activity. Each season brings different opportunities — different crops that thrive in its conditions, different tasks that prepare the garden for what comes next. Working with the seasons rather than against them is what separates gardeners who are perpetually busy and consistently productive from those who have one rushed spring and then nothing until autumn.
- Sow tomatoes and peppers indoors
- Direct sow salad greens and radishes outdoors
- Plant pea seeds in deep containers
- Divide and repot houseplants
- Start herb seeds on windowsills
- Prepare raised beds with compost
- Begin hardening off seedlings
- Transplant tomatoes and peppers outdoors
- Succession sow lettuce every 3 weeks
- Begin weekly tomato feeding
- Harvest herbs regularly to prevent bolting
- Grow microgreens and fast crops indoors
- Water containers daily in heat
- Deadhead flowers for continued bloom
- Sow winter salads and hardy greens
- Plant garlic and onion sets
- Harvest and preserve summer produce
- Pot up herbs to bring indoors
- Start spring bulbs in containers
- Clear spent crops and compost waste
- Mulch raised beds for winter protection
- Grow microgreens and sprouts indoors
- Maintain herbs under grow lights
- Plan next year’s garden on paper
- Order seeds from catalogues
- Tend houseplants with reduced watering
- Begin seed orders and inventory
- Start early tomato seeds in late winter
Succession Sowing: The Key to Continuous Harvest
One of the most valuable techniques for home gardeners is succession sowing — planting small amounts of fast-growing crops every two to three weeks rather than all at once. Without succession planting, you’ll have a glut of lettuce for two weeks and then nothing. With it, you harvest a small but steady amount every week through the season. This technique works especially well for salad greens, radishes, coriander (which bolts quickly), and baby spinach.
12 Budget-Friendly Gardening: Getting Maximum Results for Minimum Spend
The perception that gardening is expensive stops many people before they start. The truth is that home gardening can be extraordinarily affordable — arguably one of the most cost-effective hobbies and food production methods available. With the right strategies, you can build a productive, beautiful home garden for very little money. Cheap gardening ideas for beginners explores this territory in depth — here are the highest-impact approaches.
Start from Seed, Not Seedlings
A single packet of tomato seeds costing less than the price of one seedling from a garden centre will yield dozens of plants — far more than any home gardener could use, making seed swaps with neighbours an easy next step. Seeds of most herbs, salad greens, and fast-growing vegetables germinate easily without specialist equipment. A simple propagator (or a plastic bag over a pot on a warm windowsill) is all you need to start most seeds successfully.
Repurpose Containers
You don’t need to buy expensive pots. Colanders, old wooden crates lined with burlap, large yoghurt tubs, olive oil tins, washing-up basins, and even shoes all make functional planters for herbs and small vegetables. The only requirements are drainage holes (drill or punch them if needed) and a size appropriate for the plant. Recycled containers add character and cost nothing — a row of mismatched tins growing herbs along a kitchen windowsill has charm that matching terracotta simply can’t replicate.
Make Your Own Compost
A kitchen compost bin transforms vegetable peelings, coffee grounds, and eggshells into rich compost that you would otherwise pay significant money for. Even apartment dwellers can use a small countertop worm bin (vermicomposting) to convert kitchen scraps into the most concentrated, biologically active soil amendment available. This closes the loop from kitchen to garden and back again — the fundamental cycle of home food growing.
Regrow from Kitchen Scraps
Some plants you’re already buying can be regrown from scraps at zero cost. Spring onion roots regrow in a glass of water on a windowsill indefinitely — cut and come again. Celery hearts placed in shallow water regrow leaves within days. Lettuce stumps sprout new leaves when placed in water. Ginger and turmeric rhizomes planted in pots produce new plants and eventually a harvest. Chilli and tomato seeds saved from supermarket fruits germinate successfully. These don’t replace a full garden plan, but they’re an immediate, free way to start engaging with home growing.
A simple starter garden — three herb pots in recycled containers, one bag of potting mix, and one seed packet — can cost under £10 / $12. That setup will produce more fresh herbs in a single summer than most people would buy in two years. The return on investment from home gardening, particularly from herbs and salad greens, is exceptional even by frugal standards.
Share, Swap, and Community Garden
The gardening community is unusually generous. Seed swaps — in person at local events or online through forums and Facebook groups — allow you to access dozens of plant varieties at no cost. Many gardeners have more seedlings than they can use and give them away freely in spring. Community gardens and allotment associations often offer mentoring, shared tools, and experienced growers happy to share knowledge. Plugging into this network early accelerates your learning and slashes your startup costs simultaneously.
Vegetable & Herb Seed Collection — 15 Varieties to Get Started
A curated collection of popular non-GMO seed varieties for home gardens. Includes tomatoes, peppers, basil, lettuce, radishes, and more.
Shop on Amazon13 Composting & Building Living Soil: Turning Waste into Garden Gold
Composting is the single most transformative practice a home gardener can adopt. It converts kitchen scraps, garden waste, and organic materials into dark, crumbly, nutrient-rich humus that supercharges soil biology, improves water retention in sandy soils, loosens clay soils, and feeds plants with a slow, steady release of nutrients that synthetic fertilisers cannot replicate. If healthy soil is the foundation of a thriving garden — and it is — then compost is the cornerstone of that foundation.
Yet composting remains one of the most misunderstood aspects of home gardening. Many beginners imagine it requires large outdoor bins, complicated layering ratios, and weeks of fiddly management. The truth is far simpler. Composting happens naturally in every forest floor on earth without any human intervention. Your job is simply to create the right conditions and let biology do the work. Whether you have a sprawling garden or a compact apartment kitchen, there is a composting method that fits your space and lifestyle.
Why Compost Matters for Home Gardens
Compost does far more than add nutrients to soil. It introduces billions of beneficial microorganisms — bacteria, fungi, protozoa, and nematodes — that form a living soil food web. This biological community breaks down organic matter into plant-available nutrients, suppresses soil-borne diseases through competitive exclusion, improves soil structure by binding particles into aggregates that hold both water and air, and creates a buffering capacity that moderates pH fluctuations. No bag of synthetic fertiliser can replicate this breadth of benefits.
For container gardeners, compost is particularly valuable. Potting mixes are essentially sterile growing media — they contain minimal biological life when fresh. Adding compost to your potting mix or using it as a regular top-dressing introduces the microbiology that container soils otherwise lack. This makes nutrients more available to plant roots, improves the soil’s ability to retain moisture without becoming waterlogged, and creates conditions where roots can access a wider range of trace minerals than the potting mix alone provides.
Hot Composting vs Cold Composting
There are two fundamental approaches to composting, and understanding the difference helps you choose the right method for your situation. Hot composting is the active, managed approach. You build a pile with a balanced ratio of carbon-rich “brown” materials (dried leaves, cardboard, straw) and nitrogen-rich “green” materials (kitchen scraps, fresh grass clippings, coffee grounds), keep it moist, and turn it regularly to introduce oxygen. A well-managed hot compost pile reaches internal temperatures of 55–70°C, which kills weed seeds and pathogens, and produces finished compost in 4–8 weeks. The disadvantage is that it requires regular attention and a minimum pile volume of roughly one cubic metre to generate sufficient heat.
Cold composting is the passive approach. You add materials to a bin or pile as they become available, without worrying about ratios or turning. Organic matter breaks down slowly through the action of fungi, worms, insects, and bacteria at ambient temperature. This method takes 6–12 months to produce finished compost but requires virtually no effort beyond occasional watering during dry periods. For most home gardeners with limited time, cold composting in a simple bin is the practical choice — and the results are still excellent.
Vermicomposting: Worm Bins for Every Space
Vermicomposting uses composting worms — specifically red wigglers (Eisenia fetida) rather than common earthworms — to consume kitchen scraps and produce worm castings, which many soil scientists consider the single most valuable soil amendment available. Worm castings contain plant-available nutrients in concentrations far exceeding ordinary compost, along with beneficial microbes, plant growth hormones, and humic acids that stimulate root development.
The beauty of vermicomposting for home gardeners is that it scales down to any space. A compact worm bin fits under a kitchen sink, in a cupboard, on a balcony, or in a garage. It processes vegetable scraps, coffee grounds, tea bags, crushed eggshells, and small amounts of shredded paper or cardboard. A well-managed worm bin produces no odour (the worms consume material before it can rot and smell), processes roughly half its weight in food scraps per week, and produces a steady supply of worm castings and worm tea — a liquid fertiliser made by steeping castings in water.
Bokashi Composting: Fermentation for Small Spaces
Bokashi composting is a Japanese method that uses anaerobic fermentation — the action of effective microorganisms (EM) in an airtight container — to break down all types of kitchen waste, including meat, dairy, and cooked food that traditional composting bins cannot handle. You layer food scraps in a sealed bucket with a sprinkle of bokashi bran (wheat bran inoculated with beneficial bacteria), press out air, and seal the lid. After two weeks of fermentation, the material is pickled rather than composted — it still needs to be buried in soil or added to a traditional compost pile to finish breaking down, but the fermentation stage happens entirely indoors with no odour, no flies, and no outdoor space required.
Bokashi is particularly popular with apartment gardeners who want to compost everything — including the scraps that worm bins reject — without any outdoor infrastructure. The fermented material breaks down in soil within two to four weeks of burial, and the bokashi leachate (liquid that collects at the bottom of the bucket) can be diluted and used as a potent liquid fertiliser for houseplants and containers.
What to Compost and What to Avoid
| Category | Compost These (Green/Nitrogen) | Compost These (Brown/Carbon) | Avoid These |
|---|---|---|---|
| Kitchen | Fruit & vegetable scraps, coffee grounds, tea bags, crushed eggshells | Shredded cardboard, paper towels, newspaper, dried pasta | Meat & dairy (traditional bins), oils, diseased plants |
| Garden | Grass clippings, fresh weeds (without seeds), green leaves | Dried leaves, straw, wood chips, sawdust (untreated) | Weed seeds, invasive root fragments, treated wood |
| Household | Cotton & wool rags, hair, pet fur, natural fibre lint | Cardboard boxes, paper bags, cotton wool, cork | Synthetic fabrics, glossy magazines, plastic-coated paper |
Using Compost in Your Garden
Finished compost is dark, crumbly, and smells earthy — like a forest floor after rain. If you can still recognise individual materials (a banana peel, a piece of cardboard), it needs more time. When ready, use it in several ways: mix it into potting soil at a ratio of roughly one part compost to three parts potting mix for new plantings. Spread a 2–5cm layer as a top-dressing around established plants in containers or raised beds — worms and rain will carry it down to the root zone. Brew compost tea by steeping a shovelful of compost in a bucket of water for 24–48 hours, then use the strained liquid as a foliar feed or soil drench. Each application delivers biology and nutrition that synthetic products cannot match.
Testing and Improving Your Soil
Before amending garden soil, it helps to understand what you’re working with. Home soil test kits — available at garden centres and online — measure pH, nitrogen, phosphorus, and potassium levels in minutes. More comprehensive laboratory tests provide detailed analysis including micronutrient levels, organic matter percentage, and cation exchange capacity (a measure of the soil’s ability to hold nutrients). These tests cost modestly and provide specific recommendations for amendment.
Most vegetables and herbs thrive in slightly acidic to neutral soil (pH 6.0–7.0). If your soil is too acidic, garden lime (calcium carbonate) raises pH gradually. If it’s too alkaline, elemental sulphur or acidic organic matter (pine needles, composted oak leaves) lowers it. Compost itself acts as a pH buffer, moderating extremes in either direction — another reason it’s the universal soil improver. For clay soils that drain poorly, compost and coarse organic matter open up the structure. For sandy soils that drain too fast, compost increases water and nutrient retention. In every case, the answer starts with compost.
♻️ Composting closes the loop: Your kitchen produces scraps, your garden produces waste, and composting transforms both into the material that feeds next season’s growth. It is the most sustainable practice in home gardening, and it costs nothing beyond a bin and a little patience.
14 Seed Starting Indoors: From Packet to Transplant
Starting plants from seed is one of the most satisfying and cost-effective skills a home gardener can develop. A single packet of seeds — typically containing dozens or hundreds of individual seeds — costs a fraction of what you’d pay for a single nursery seedling. The range of varieties available by seed dwarfs anything sold as transplants. And the experience of watching a tiny seed germinate, develop its first leaves, and grow into a productive plant creates a connection to the process that buying a half-grown plant from a shop simply cannot replicate.
But seed starting also has a reputation for being fussy, and some beginners struggle with leggy seedlings, damping off disease, or poor germination rates. These problems are almost always caused by a handful of correctable mistakes: starting seeds at the wrong time, using the wrong growing medium, providing insufficient light, or watering incorrectly. Understanding the fundamentals eliminates these issues and sets you up for success from the first packet you open. For indoor herb growing specifically, how to start an indoor herb garden provides step-by-step guidance that applies broadly to all indoor seed starting.
When to Start Seeds: Timing Is Everything
The timing of seed starting depends on your local climate, specifically your last expected frost date in spring and your first frost date in autumn. Most seed packets state something like “start indoors 6–8 weeks before last frost” or “direct sow after all danger of frost has passed.” Counting backwards from your frost date gives you the correct sowing window. Starting too early produces overgrown, pot-bound seedlings that struggle when transplanted. Starting too late means your plants don’t have enough time to reach maturity and produce a full harvest before autumn cold arrives.
Warm-season crops — tomatoes, peppers, aubergines, and basil — are the primary candidates for indoor seed starting because they need a long growing season and cannot tolerate frost. Cool-season crops — lettuce, spinach, peas, brassicas, and many root vegetables — can often be direct-sown outdoors because they germinate in cool soil and mature quickly. However, starting cool-season crops indoors gives you a head start that translates into earlier harvests, particularly in climates with short springs that transition quickly into hot summers.
Equipment You Actually Need
Seed starting does not require expensive equipment. At minimum, you need shallow containers with drainage holes (seed trays, recycled yoghurt pots with holes drilled in the bottom, or even egg cartons for the first few weeks), a fine-textured seed starting mix (lighter and more sterile than standard potting mix, to give delicate seedling roots easy passage and prevent damping off), a spray bottle for gentle watering, and a warm, bright location.
A heat mat is a worthwhile investment for warm-season seeds. Tomato and pepper seeds germinate best at 22–27°C, and a heat mat maintains this temperature range even in cool rooms, dramatically improving germination speed and success rates. Without a heat mat, placing trays on top of a refrigerator or near a warm appliance can work, but consistency matters — fluctuating temperatures slow germination and can cause seeds to rot before they sprout.
Grow lights, as discussed in the sunlight section, transform seed starting results. Seedlings grown on a windowsill in late winter or early spring — when day length is short and light intensity is low — almost invariably become leggy: tall, thin, pale stems stretching desperately toward inadequate light. Under grow lights positioned 10–15cm above the seedlings, running 14–16 hours per day, seedlings develop compact, sturdy stems and vibrant green foliage. The difference in transplant quality is dramatic.
The Seed Starting Process Step by Step
Moisten your seed starting mix
Before filling containers, add water to the dry mix in a bucket or bowl and stir until it’s evenly damp — like a wrung-out sponge. Dry mix repels water and creates air pockets around seeds that prevent germination. Pre-moistening ensures consistent contact between seed and medium.
Fill containers and sow seeds at the correct depth
Fill trays or pots to within 1cm of the rim with the moistened mix, press it down gently to eliminate large air pockets, then sow seeds at the depth indicated on the packet. A general rule: sow seeds at a depth roughly two to three times their diameter. Tiny seeds like basil and lettuce sit on the surface and receive a barely-there dusting of mix. Larger seeds like tomatoes and peppers are pushed 5–8mm below the surface.
Cover, label, and maintain moisture
Cover trays with a clear plastic lid or cling film to create a humid microclimate that prevents the surface from drying out during germination. Label every tray with the variety and date — you will forget which is which otherwise. Check daily and mist the surface if it begins to dry. Remove the cover as soon as the first seedlings emerge to prevent damping off.
Provide strong light immediately after germination
The moment seedlings emerge, they need light — as much as you can provide. Move them under grow lights or to the brightest windowsill available. If using grow lights, position them close (10–15cm above the seedling tops) and raise them as seedlings grow. Insufficient light in the first week after germination is the most common cause of leggy, weak seedlings.
Thin, transplant up, and harden off
Once seedlings develop their first set of true leaves (the second pair of leaves, which look different from the initial seed leaves), thin crowded seedlings to one per cell or pot by snipping extras at the soil line rather than pulling them, which disturbs neighbouring roots. When roots fill the initial container, transplant seedlings into larger individual pots to continue development. Two weeks before you plan to plant them outdoors, begin hardening off — gradually exposing seedlings to outdoor conditions by placing them outside for increasing periods each day, starting with a sheltered, shaded spot and slowly introducing direct sun and wind.
Common Seed Starting Mistakes and How to Avoid Them
Damping off — the sudden collapse of seedlings at the soil line — is caused by fungal pathogens in overly wet, poorly ventilated conditions. Prevent it by using sterile seed starting mix (not garden soil), watering from below rather than overhead, removing covers as soon as germination occurs, and ensuring good air circulation around seedlings. A small fan running on low nearby strengthens stems and reduces humidity at the soil surface.
Starting seeds too early is a common enthusiasm-fuelled mistake. A tomato seedling started twelve weeks before last frost instead of six will be a stressed, overgrown plant by the time conditions allow planting out — far worse than a seedling started at the right time. Resist the temptation and follow the timing on your seed packets. Patience at the sowing stage pays dividends at harvest time.
🌱 Seed starting rule of thumb: Warm-season crops (tomatoes, peppers, basil) start 6–8 weeks before last frost. Cool-season crops (lettuce, broccoli, kale) start 4–6 weeks before last frost. When in doubt, start later rather than earlier — compact, well-timed seedlings outperform overgrown ones every time.
15 Vertical Gardening: Growing Up When You Can’t Grow Out
When horizontal space is limited, the only direction left is up. Vertical gardening is the practice of growing plants on upright structures — trellises, wall-mounted planters, hanging pockets, tower systems, and living walls — rather than in traditional ground-level beds and pots. It transforms fences, walls, balcony railings, and even the backs of doors into productive growing surfaces, multiplying your planting area without expanding your footprint. For apartment gardeners, balcony growers, and anyone working with a small patio or courtyard, vertical gardening is the strategy that makes the difference between growing a few token plants and cultivating a genuinely productive home garden.
Why Grow Vertically?
Beyond the obvious space advantage, vertical growing offers several benefits that aren’t immediately apparent. Plants grown vertically receive better air circulation around their foliage, which reduces fungal disease pressure significantly. Many vining crops — cucumbers, climbing beans, small melons, and even some squash — produce cleaner, straighter fruit when grown upright because they hang free of soil contact rather than sprawling across wet ground. Vertical growing puts plants at a more comfortable working height, reducing bending and kneeling during planting, maintenance, and harvesting. And aesthetically, a living wall of herbs or a trellis covered in flowering sweet peas creates a visual feature that no collection of ground-level pots can match.
Vertical Growing Systems for Home Gardeners
The simplest vertical system is a trellis. A bamboo tripod, a metal obelisk, or even a panel of wire mesh leaned against a wall provides climbing support for beans, peas, cucumbers, and small-fruited melons. Tie young plants loosely to the structure with soft twine or plant clips, and they’ll quickly find their own way up. Trellises work equally well in large pots on a balcony — a single container with a climbing bean and a 150cm trellis produces an impressive quantity of beans from a floor area smaller than a dining chair.
Wall-mounted planters and pocket systems attach to fences, walls, or balcony railings and create growing pockets for herbs, strawberries, lettuce, and flowers. Fabric pocket planters with multiple tiers are inexpensive and surprisingly productive — a single vertical pocket unit on a sunny fence can hold fifteen or more herb or lettuce plants. Ensure the mounting surface can support the weight when the pockets are wet (saturated soil is heavy) and that the system includes adequate drainage.
Tower gardens — cylindrical or pyramid-shaped planters with planting holes at multiple levels — are the most space-efficient vertical system. Plants grow outward from the sides of the tower while the central column holds soil and moisture. Commercial tower systems range from simple stackable pots to elaborate hydroponic towers with built-in water circulation. DIY versions using stacked pots, stacked pallets, or even a column of plastic bottles are effective and nearly free to build.
Best Plants for Vertical Growing
- Climbing beans and peas: The classic vertical crops — vigorous, productive, and attractive. French beans on a tripod in a large pot produce all summer with regular picking.
- Cucumbers: Climbing varieties grown on a trellis produce straighter, cleaner fruit than ground-grown plants. Choose compact varieties for container growing.
- Tomatoes: Indeterminate (vining) varieties naturally climb and can be trained up strings, stakes, or trellises. This is actually their preferred growth habit.
- Strawberries: In wall-mounted pockets or tiered planters, strawberries cascade beautifully and keep fruit off the ground where slugs and rot can’t reach it.
- Herbs: Basil, thyme, oregano, parsley, and chives all thrive in wall-mounted herb gardens on sunny walls or fences. A vertical herb garden near your kitchen door is both ornamental and extraordinarily practical.
- Lettuce and salad greens: Compact and fast-growing, lettuce fills vertical pocket planters within weeks and can be succession-sown for continuous harvest.
- Nasturtiums and morning glories: Flowering climbers that cover vertical structures in colour while attracting pollinators to your edible garden.
Living Walls and Green Walls
A living wall — a vertical structure entirely covered in growing plants — is the ultimate expression of vertical gardening. While large-scale green walls on buildings require professional installation and irrigation systems, home-scale versions are surprisingly achievable. A simple frame of pocket planters on a sunny fence, watered by hand or with a simple drip line, creates a living tapestry of herbs, lettuce, and flowers. Modular living wall systems using interlocking trays allow you to build a green wall of any size, adding modules as your confidence and ambition grow.
For indoor spaces, living walls transform blank walls into lush growing areas. A set of mounted planters on a kitchen wall, positioned near a window or supplemented with grow lights, creates an indoor herb garden that doubles as a striking design feature. The practical benefits — fresh herbs within arm’s reach while cooking — are matched by the visual and atmospheric impact of a wall of living green in an interior space.
When building any vertical structure, always consider the weight when fully loaded with wet soil and mature plants. A wall-mounted planter that feels light when empty can weigh 20–30kg or more when planted and watered. Ensure your mounting points are structurally sound, and always drill into studs or masonry rather than relying on drywall anchors alone. For balcony railings, check weight limits before loading them with heavy planters.
16 Choosing the Right Gardening Gloves: Protection, Comfort & Dexterity
Gardening gloves are listed in virtually every beginner’s guide as an essential tool, yet many gardeners underestimate how much difference the right pair makes. Hands are your primary tools in the garden — they plant seeds, pull weeds, prune branches, turn soil, and harvest produce. Without proper protection, these activities expose your skin to thorns, splinters, blisters, irritant sap, soil-borne bacteria, and chemical residues. But the wrong gloves — too thick, too loose, too hot — are almost worse than none, because they reduce the tactile feedback and dexterity that make precise garden work possible. Choosing the right gloves for your specific tasks transforms the experience of working in the garden from uncomfortable to genuinely enjoyable.
For a comprehensive guide to every type and use case, our dedicated resource on the best gardening gloves reviews top-rated options across every category. Here, we’ll cover the fundamentals of glove selection so you can make informed choices for your garden.
Why Proper Gardening Gloves Matter
Thorns from roses, brambles, and hawthorn can puncture skin deeply and cause painful infections if not cleaned properly. Soil harbours bacteria — including Clostridium tetani, the cause of tetanus — that enters through cuts and scrapes. Repeated contact with damp soil strips natural oils from skin, causing cracking and dermatitis. Many ornamental plants produce sap that irritates skin — euphorbias, foxgloves, and hogweed are notorious. And for those who use any pest control products, even organic ones like neem oil, gloves prevent skin absorption and sensitisation over time. A good pair of gloves is not optional protection — it’s basic garden safety.
Glove Materials and Their Strengths
| Material | Best For | Dexterity | Durability | Key Considerations |
|---|---|---|---|---|
| Nitrile-coated | General tasks, weeding, planting, seed sowing | Excellent | Good | Best all-round choice; breathable; tactile feel |
| Leather | Thorny work, heavy digging, rough handling | Moderate | Excellent | Requires break-in period; improves with age |
| Rubber/Latex | Wet conditions, pond work, chemical handling | Good | Moderate | Waterproof but can cause sweating |
| Cotton | Light tasks, seed handling, indoor potting | Good | Low | Not thorn-proof; washes easily |
| Goatskin | Precision thorn work, rose pruning | Very good | Excellent | Softer than cowhide; excellent tactile sensitivity |
| Neoprene | Wet and chemical-resistant tasks | Good | Good | Flexible; resists degradation from oils and chemicals |
The nitrile-coated garden glove has become the default recommendation for general home gardening, and for good reason. The thin nitrile coating on the palm and fingers provides grip in wet conditions, protects against thorns and splinters, and maintains enough tactile sensitivity to handle seeds and small transplants. The breathable fabric back keeps hands cool in warm weather. They’re inexpensive, widely available, and work for roughly 80% of home gardening tasks. For most beginners, starting with a good pair of nitrile-coated gloves and adding specialist pairs as specific needs arise is the smartest approach.
Gloves for Thorny Work
If you grow roses, blackberries, hawthorn hedges, bougainvillea, or any other thorny plants, standard nitrile gloves won’t provide sufficient protection. Thorn-resistant gardening gloves use thicker materials — leather, reinforced synthetic fabrics, or layered composites — and often extend up the forearm as gauntlets to protect against scratches when reaching into dense, thorny growth. For a detailed selection guide, the best gardening gloves for thorny roses covers the top options for anyone who works regularly with sharp, prickly plants.
The key factors in thorn-resistant gloves are puncture resistance (the material must stop a thorn, not just slow it down), forearm coverage (gauntlet-style cuffs extend protection to the wrist and lower arm where scratches are most common during pruning), and fit (too loose and the glove rotates on your hand, reducing control; too tight and it causes fatigue and restricts circulation).
Gloves for Weeding
Weeding involves prolonged contact with soil, repeated gripping of small stems, and frequent contact with moisture. The ideal weeding glove combines waterproof palm protection with enough dexterity to grasp small weed stems at soil level. Nitrile-coated gloves work well for light weeding in dry conditions, but for prolonged sessions in damp soil, waterproof-backed gloves or thin rubber gloves protect against the moisture that causes skin irritation and cracking over time. Our guide to the best gloves for weeding covers options across different soil conditions and weed types.
Gloves for Children
Including children in gardening is one of the most rewarding aspects of home growing, but small hands need protection too. Children’s gardening gloves should fit snugly (loose gloves catch on thorns and tools, creating more danger than they prevent), be made of breathable materials that don’t cause overheating, and be sized appropriately — adult gloves on small hands are a safety hazard. Best gardening gloves for kids reviews gloves specifically designed for young gardeners, with considerations for durability (children are harder on equipment than adults), fun colours and patterns that encourage wear, and materials safe for sensitive skin.
Leather Gardening Gloves: The Durable Classic
Leather gloves are the workhorses of serious garden work. They protect against thorns, splinters, blisters from tool handles, and rough materials like gravel and bark. Quality leather gloves — particularly those made from cowhide or goatskin — develop a personalised fit over time as the leather moulds to the shape of your hand. This break-in period is the primary disadvantage: new leather gloves can feel stiff and clumsy until the material softens. But once broken in, a good pair of leather gloves provides a combination of protection and comfort that synthetic alternatives struggle to match.
For a full comparison of top leather options, the best leather gardening gloves reviews options ranging from budget-friendly cowhide to premium deerskin. The choice depends on your primary tasks: heavy-duty cowhide for digging and rough work, softer goatskin for pruning and precision tasks, and lined leather for cold-weather gardening.
Sizing, Fit, and Gender-Specific Options
Glove fit matters more than most gardeners realise. Gloves that are too large bunch at the fingertips, reducing dexterity and creating catch points on thorns and tools. Gloves that are too small restrict circulation and cause hand fatigue during extended garden sessions. The ideal fit is snug across the palm with enough room at the fingertips to wiggle freely, and the cuff should be secure enough to prevent soil from falling in but loose enough to remove easily with dirty hands.
While many gardening gloves are unisex, hand shapes vary enough that gender-specific options provide better fit for many gardeners. Women’s gardening gloves typically feature narrower palms, longer fingers relative to palm width, and smaller overall sizing. Men’s gloves tend to have wider palms, broader fingertips, and larger cuff diameters. For a curated selection, the best gardening gloves for women and the best gardening gloves for men provide options specifically designed to fit comfortably and perform well.
The Nitrile vs Latex Decision
For gardeners choosing between nitrile-coated and latex-coated gloves, the differences are meaningful. Nitrile is a synthetic rubber that resists punctures better than natural latex, holds up longer against abrasive tasks, and doesn’t cause allergic reactions in most people. Latex provides a slightly better tactile feel and grip in dry conditions but degrades faster, can trigger latex allergies, and loses flexibility in cold weather. For most home gardeners, nitrile is the superior all-round choice. A detailed comparison with specific product recommendations is available at nitrile vs latex gardening gloves.
Cleaning and Maintaining Your Gloves
Gardening gloves accumulate soil, sweat, plant sap, and microbial contaminants with every use. Dirty gloves not only wear out faster but can harbour fungal spores and bacteria that transfer to your hands and to plants during subsequent use. Most fabric-backed, nitrile-coated gloves are machine washable — wash them on a gentle cycle in cool water and air dry. Leather gloves require different care: brush off dried soil, wipe with a damp cloth, and allow them to air dry completely away from direct heat (which causes leather to crack). Periodically applying a leather conditioner keeps the material supple and extends its life significantly. For a full care routine, how to clean leather gardening gloves provides step-by-step instructions for every leather type.
🧤 The beginner’s glove strategy: Start with one pair of quality nitrile-coated gloves for general use. Add leather gauntlets if you grow anything thorny. Add waterproof gloves if you garden in wet conditions. Replace any glove that develops holes — a compromised glove offers no protection at the point of failure.
17 Lawn Care Fundamentals: Growing and Maintaining a Healthy Home Lawn
For many home gardeners, the lawn is the largest single living element in their outdoor space — and often the most neglected. A healthy, well-maintained lawn provides a versatile surface for recreation, frames garden beds and borders beautifully, cools the surrounding environment through transpiration, prevents soil erosion, and supports a surprising diversity of beneficial organisms. But a struggling lawn — patchy, weedy, compacted, and brown — is a persistent source of frustration that consumes time and money without delivering the results you want.
The difference between a lawn that thrives and one that merely survives comes down to understanding a handful of fundamentals: choosing the right grass seed for your conditions, preparing the soil properly before seeding, establishing correct mowing and watering habits, and feeding the lawn at the right times with the right products. None of these steps is difficult, but each one makes a significant difference when done correctly.
Choosing the Right Grass Seed
Grass varieties are broadly divided into cool-season grasses (which thrive in temperate climates with cold winters and moderate summers) and warm-season grasses (which excel in hot climates with mild winters). Cool-season grasses — including perennial ryegrass, fescues, and Kentucky bluegrass — dominate lawns in northern regions. Warm-season grasses — Bermuda grass, zoysia, St. Augustine, and centipede grass — are the standard in southern climates. Choosing a seed blend appropriate for your climate zone is the first and most critical decision in lawn establishment.
Beyond climate, consider your lawn’s specific conditions. Does it receive full sun or partial shade? Is it a high-traffic play area or a low-traffic ornamental border? Do you want a fine-textured, manicured appearance or a resilient, rough-and-tumble surface? Shade-tolerant fescue blends work well under trees and beside buildings. Perennial ryegrass establishes quickly and handles heavy foot traffic. Kentucky bluegrass spreads by rhizomes to fill in bare patches naturally. Most quality lawn seed blends combine two or more varieties to cover a range of conditions within a single lawn.
Preparing Soil for a New Lawn
Successful lawn establishment begins below the surface. Grass roots need loose, well-drained soil with adequate organic matter to a depth of at least 15cm. If starting from scratch, remove existing weeds and debris, rototill or fork the soil to break up compaction, incorporate a 2–5cm layer of compost into the top 10cm of soil, rake the surface smooth and level (uneven soil means an uneven lawn forever after), and firm the surface by walking across it in overlapping passes or using a lawn roller. The surface should be firm enough that your footprints sink no more than 1cm, but not so compacted that a fork can’t penetrate easily.
A soil test at this stage is invaluable. It tells you the pH (most grasses prefer 6.0–7.0), nutrient levels, and any specific deficiencies to address before seed hits the ground. Correcting soil pH and nutrient levels before seeding is far more effective and less expensive than trying to fix problems after the lawn is established.
When to Spread Grass Seed
Timing depends on your grass type and climate. Cool-season grasses establish best in early autumn (late August through September in the northern hemisphere) when soil is still warm from summer but air temperatures are cooling, and weed competition is declining. Early spring (March through April) is the second-best window for cool-season lawns. Warm-season grasses should be seeded in late spring through early summer, when soil temperatures have risen above 18°C and the grass has the entire growing season to establish before winter dormancy.
For a complete breakdown of optimal timing by region and grass type, the best time to spread grass seed provides specific guidance based on climate zone and seasonal conditions. Getting the timing right is one of the highest-impact things you can do for lawn establishment success — seed sown at the wrong time germinates poorly, establishes slowly, and is vulnerable to heat stress, frost damage, or weed competition.
How to Spread Grass Seed Evenly
Even seed distribution is the difference between a uniform lawn and a patchy one. Broadcasting seed by hand works for very small areas but produces inconsistent coverage — heavy in some spots, bare in others. For anything larger than a few square metres, a lawn spreader delivers dramatically better results. Drop spreaders release seed directly below the spreader in a precise, controlled strip — excellent for edges and small areas where accuracy matters. Broadcast spreaders throw seed in a wide arc ahead and to the sides — faster for large areas and easier to achieve uniform coverage with proper technique.
Whatever method you use, the technique for even coverage is the same: apply half the seed walking in parallel passes north-to-south, then apply the remaining half walking east-to-west. This cross-hatching pattern eliminates the striping and gaps that occur with single-direction application. How to spread grass seed evenly provides detailed technique instructions for both hand and spreader application.
Overseeding an Existing Lawn
Overseeding — spreading new grass seed over an existing lawn to thicken it and fill bare patches — is the most cost-effective way to rejuvenate a tired lawn without starting from scratch. The process involves mowing the existing lawn short (to 2–3cm), raking vigorously to remove thatch and expose soil, spreading seed at the overseeding rate (typically half the rate recommended for new lawns), top-dressing with a thin layer of compost or quality topsoil, and keeping the area consistently moist until the new seed germinates and establishes.
Overseeding is most effective when combined with core aeration — using a mechanical aerator to pull plugs of soil from the lawn, relieving compaction and creating holes that seed falls into and germinates in. The combination of aeration and overseeding once per year (ideally in early autumn for cool-season lawns) maintains lawn density and vigour far more effectively than any amount of fertiliser or weed control applied to a thin, compacted lawn. For the full process, how to overseed a lawn with a spreader walks through each step.
Mowing Best Practices
Mowing height and frequency have a larger impact on lawn health than most people realise. Cutting grass too short — a practice called scalping — weakens roots, reduces the lawn’s ability to photosynthesise, exposes soil to sunlight (which germinates weed seeds), and stresses the grass during heat and drought. The general rule: never remove more than one-third of the grass blade height in a single mowing. For most cool-season grasses, this means maintaining a height of 6–8cm and mowing when the grass reaches 8–10cm. For warm-season grasses, slightly lower heights (4–6cm) are appropriate.
Sharp mower blades matter more than most homeowners realise. A sharp blade cuts grass cleanly, leaving a neat edge that heals quickly. A dull blade tears and shreds the grass blade tips, creating ragged edges that turn brown (giving the lawn a brownish cast even when adequately watered), lose moisture rapidly, and provide entry points for disease. Sharpen or replace mower blades at least once per season, more frequently if you mow a large area or hit debris regularly.
Watering a Lawn Properly
Lawn watering follows the same deep-and-infrequent principle as container watering. Water deeply enough to moisten the soil to a depth of 10–15cm (the root zone), then allow the surface to dry between waterings. This trains grass roots to grow deep, making the lawn more drought-resilient. Frequent shallow watering does the opposite — it keeps roots near the surface where they’re vulnerable to heat and drought, and creates conditions that favour weed germination and fungal disease.
The best time to water a lawn is early morning, before 10am. This gives the grass blades time to dry during the day, reducing disease pressure. Evening watering leaves foliage wet overnight — the ideal condition for fungal growth. If you can’t water in the morning, midday watering (despite some evaporation loss) is preferable to evening watering for disease prevention.
Lawn Fertilising
Lawns are heavy feeders that benefit from regular fertilisation. A well-fed lawn grows vigorously enough to outcompete weeds, recover from foot traffic and mowing stress, and maintain deep green colour. Cool-season lawns benefit most from fertilisation in autumn (September–November) when the grass is actively growing roots and storing energy for spring, and again in late spring if needed. Summer fertilisation of cool-season grasses during heat stress can cause more harm than good. Warm-season lawns are fertilised during their active growing season (late spring through summer) and left unfertilised during winter dormancy.
Using a lawn spreader to apply granular fertiliser ensures even coverage — hand-broadcasting granular fertiliser almost always results in uneven distribution, which produces visible stripes and patches of dark and light green across the lawn. The calibration and technique for spreader-based fertiliser application are covered in the next section, which addresses spreader use in detail.
🌿 Lawn care summary: Choose the right seed for your conditions, prepare the soil thoroughly before planting, seed at the correct time, mow high and frequently with sharp blades, water deeply but infrequently, and feed at least once per year (twice for vigorous lawns). These six practices, done consistently, produce a healthier lawn than any combination of products applied to a neglected one.
18 Using a Lawn Spreader: The Complete Guide to Even Application
A lawn spreader is one of those tools that seems like a luxury until you use one — and then you wonder how you managed without it. Whether you’re spreading grass seed over a new lawn, overseeding bare patches, applying granular fertiliser, or distributing lawn treatments, a spreader delivers even, consistent coverage that hand-broadcasting simply cannot match. The result is a lawn that grows uniformly — no dark stripes from over-application, no pale patches from under-application, and no wasted product from inconsistent distribution.
Spreaders come in several types, and choosing the right one depends on your lawn size, the products you’re applying, and how much control you need over the application pattern. For a detailed comparison of top models, the best lawn seed spreader reviews the leading options across every category. Here, we’ll cover how spreaders work, how to use them correctly, and how to maintain them for years of reliable service.
Types of Lawn Spreaders
| Spreader Type | How It Works | Best For | Typical Coverage |
|---|---|---|---|
| Handheld / Shoulder | Hand-crank throws material in a forward arc | Small lawns, spot treatments, tight spaces | Up to 200 sq m |
| Walk-Behind Broadcast | Spinning disc throws material in a wide pattern (up to 3m) | Medium to large lawns; fastest coverage | 200–2,000 sq m |
| Walk-Behind Drop | Material falls straight down through a slot at the bottom | Precise edges, small areas, stripe-free application | Up to 500 sq m |
| Tow-Behind / Pull-Behind | Attaches to a riding mower or ATV; large hopper capacity | Very large lawns, acreages, estates | 2,000+ sq m |
Walk-behind broadcast spreaders are the most popular choice for typical home lawns. They cover ground quickly, distribute material evenly with proper technique, and handle a wide range of products from fine grass seed to coarse granular fertiliser. For a detailed review of one of the best-selling models in this category, the Scotts Elite spreader review covers performance, build quality, and real-world handling.
How to Use a Broadcast Spreader Properly
Using a broadcast spreader is straightforward, but a few technique details make the difference between professional-quality results and visible mistakes. How to use a broadcast spreader provides a full walkthrough, but the key points are as follows:
Fill the hopper on a hard surface
Always load your spreader on a driveway, patio, or paved area — not on the lawn. Spillage on hard surfaces can be swept up; spillage on grass creates burn patches from concentrated fertiliser or dense seed clusters. Close the hopper before moving the spreader to the lawn edge.
Set the spreader to the recommended rate
Every product you spread — whether grass seed, fertiliser, or lawn treatment — lists a recommended spreader setting on its packaging. This setting number corresponds to the opening size on your spreader’s hopper. Match the setting exactly. If your specific spreader brand isn’t listed on the product label, the manufacturer’s website typically provides a cross-reference chart. When in doubt, start with a lower setting and make two passes — it’s better to under-apply and add more than to over-apply and burn your lawn.
Walk at a steady, consistent pace
The spreader distributes material based on your walking speed. Walking too fast means less product per square metre; walking too fast means too much. A comfortable, moderate walking pace — roughly the speed you’d walk a dog — is the standard. Maintain this pace consistently throughout the application.
Use the overlap technique for broadcast spreaders
Broadcast spreaders throw material in a fan pattern that’s densest near the spreader and thinner at the edges. To achieve uniform coverage, each pass should overlap the previous one by approximately one-third of the spread width. Walk in straight, parallel rows, using a lawn edge, driveway, or fence line as a reference for your first pass. At the end of each row, close the hopper before turning, then open it again once you’ve started the next pass. This prevents over-application at turning points, which causes visible dark patches.
Calibrating Your Spreader
Spreader calibration ensures that the setting on your spreader actually corresponds to the correct application rate. Over time, wear on the hopper gate, inconsistent product granule sizes, and even temperature (which affects how product flows) can cause drift from the intended rate. Calibrating involves spreading a known quantity of product over a measured area, then weighing how much remains in the hopper to calculate the actual application rate.
While this sounds technical, it’s a simple procedure that takes fifteen minutes and prevents costly mistakes — over-application of fertiliser burns lawns and wastes product; under-application gives poor results and requires re-treatment. How to calibrate a spreader provides step-by-step instructions with specific measurements for every spreader type. You only need to calibrate once per season, or whenever you switch to a significantly different product (grass seed and granular fertiliser have very different flow characteristics).
Popular Spreader Models Reviewed
The market offers several excellent spreader options for home gardeners, and choosing between them depends on your lawn size, budget, and how frequently you plan to use the spreader. For comprehensive reviews:
- The Earthway 2050P 80lb broadcast spreader review covers a popular commercial-grade model that handles large lawns with professional precision.
- The Agri-Fab pull-behind broadcast spreader review examines a tow-behind option ideal for riding mower owners with extensive lawn areas.
- The Scotts Elite spreader review evaluates one of the most popular home-garden spreaders, known for its edge guard feature and user-friendly design.
- The Vevor tow-behind broadcast spreader review assesses a budget-friendly pull-behind option that delivers solid performance for the price.
Cleaning and Maintaining Your Spreader
After every use, your spreader needs cleaning. Fertiliser granules are hygroscopic — they absorb moisture from the air and corrode metal components, clog the hopper gate mechanism, and create a sticky residue that prevents smooth operation on your next use. Grass seed left in the hopper germinates in the moist, warm environment, creating a messy growth inside the machine. And chemical treatments left on the spreader can contaminate the next product you apply, potentially causing unintended effects on your lawn.
The cleaning process is simple: empty any remaining product from the hopper back into its original bag (never onto the lawn — concentrated residue will burn grass), rinse the hopper and spreading mechanism with a garden hose, wipe down metal components with a dry cloth, and store the spreader in a dry location. For chemical treatments, wash with soapy water first, then rinse thoroughly. How to clean a lawn spreader provides a maintenance routine that extends the life of your equipment and ensures accurate application every time you use it.
After every use: empty the hopper, rinse with water, dry metal parts, and store indoors or under cover. Before each season: check the hopper gate mechanism for smooth operation, inspect wheels for wear, and calibrate against a known setting. This ten-minute routine keeps a quality spreader functioning accurately for a decade or more.
19 Harvesting, Curing & Preserving Your Home-Grown Produce
The moment of harvest is what every stage of home gardening builds toward — the satisfying culmination of planning, planting, tending, and waiting. But harvesting isn’t simply a matter of picking things when they look ready. Timing, technique, and post-harvest handling all affect the flavour, nutrition, and storage life of your produce. Harvesting too early sacrifices size and flavour; harvesting too late means overripe, mealy, or bolted crops. Learning to read your plants and pick at peak ripeness is a skill that develops with practice, and it makes a dramatic difference in the quality of what ends up on your plate.
When to Harvest Common Home Garden Crops
Each crop has its own harvest indicators, and recognising them prevents the two most common mistakes — picking too early because of impatience and missing the window because of inattention. Tomatoes are ready when they’re fully coloured (red, yellow, orange, or whatever the variety’s mature colour is) and yield slightly to gentle pressure. They continue ripening off the vine if picked at the “breaker” stage — when colour just begins to change — but peak flavour comes from vine-ripened fruit. Peppers can be harvested green (technically immature) or left to ripen fully to red, yellow, or orange, which develops significantly more sweetness and vitamin C.
Herbs are best harvested in the morning after dew has dried but before midday heat causes the essential oils to volatilise, reducing flavour intensity. Regular harvesting — cutting stems just above a leaf node — actually stimulates bushier, more productive growth. Basil, in particular, should never be allowed to flower if you’re growing for leaves; once it bolts, leaf production slows dramatically and flavour changes.
Lettuce and salad greens can be harvested as “cut and come again” — cutting outer leaves while leaving the growing centre intact for continuous regrowth. This extends the harvest period of a single planting from a one-time event to several weeks of repeated picking. Root vegetables like radishes and carrots are ready when their shoulders (the top of the root visible at the soil line) reach the expected diameter for the variety. Leaving them too long results in woody, fibrous texture.
Harvesting Techniques That Protect the Plant
How you harvest matters almost as much as when. Tomatoes should be twisted gently and lifted — or cut with pruning shears leaving a short stem attached, which reduces splitting and extends storage life. Peppers are best cut with shears rather than pulled, which can damage the plant’s branches. Herbs should be cut cleanly with sharp scissors or shears rather than torn or pinched, which creates ragged wound sites that are slow to heal and vulnerable to disease. Root vegetables benefit from loosening the soil around them with a fork before pulling to prevent the root snapping off in compacted soil.
Storing and Preserving Your Harvest
Fresh produce begins losing nutrients immediately after harvest. Vitamin C, in particular, degrades rapidly when exposed to light, heat, and air. Eating produce as soon as possible after picking gives you maximum nutritional value and peak flavour. But when your garden produces more than you can eat immediately — which it will, especially during peak summer — preservation methods ensure nothing goes to waste.
Freezing is the simplest preservation method for most garden crops. Blanch vegetables briefly in boiling water (30 seconds to 3 minutes depending on the vegetable), plunge into ice water to stop cooking, drain thoroughly, and freeze in airtight bags or containers. This preserves colour, texture, and nutritional value for 8–12 months. Herbs can be frozen in ice cube trays with a small amount of water or olive oil — drop the frozen cubes directly into soups, stews, and sauces.
Drying works exceptionally well for herbs, chillies, and some fruits. Air-drying bundles of herbs hung upside down in a warm, dry, well-ventilated space preserves them for months. A food dehydrator accelerates the process and handles tomatoes, peppers, mushrooms, and fruit slices that don’t air-dry well. Sun-drying works in hot, dry climates for tomatoes, chillies, and grapes — though it requires several consecutive days of strong sun and some protection from insects.
Saving Seeds for Next Season
Seed saving — collecting and storing seeds from your best plants for next year’s sowing — is the ultimate closed-loop gardening practice. It costs nothing, preserves varieties that perform well in your specific conditions, and connects you to a tradition as old as agriculture itself. The easiest seeds to save are those from open-pollinated (non-hybrid) varieties: tomatoes, peppers, beans, peas, lettuce, and herbs. Allow fruits to ripen fully on the plant, extract the seeds, dry them thoroughly on a paper towel in a cool, dry location, then store them in labelled envelopes inside an airtight container in the refrigerator. Properly stored seeds remain viable for 2–5 years depending on the species.
🧺 Harvest philosophy: Pick early, pick often. Regular harvesting signals most plants to produce more. A tomato plant that’s picked as fruits ripen will produce more total fruit over the season than one where fruits are left on the vine to weigh down branches and signal the plant to stop flowering.
20 Pruning, Training & Ongoing Plant Maintenance
Left entirely alone, most garden plants grow — but they don’t necessarily grow well. Pruning, training, and regular maintenance are the interventions that shape plants into their most productive, healthiest, and most attractive forms. These aren’t advanced techniques reserved for experienced gardeners. The basics are simple, the tools are minimal (sharp pruning shears cover most tasks), and the results are immediate and visible. A pruned tomato plant produces more fruit. A trained cucumber vine uses space more efficiently. A regularly maintained garden catches problems early, before they become crises.
Why Pruning Matters for Edible Plants
In edible gardening, pruning serves three purposes: improving air circulation (which reduces disease), redirecting the plant’s energy from vegetative growth to fruit production, and managing plant size within the available space. Tomatoes are the classic example. Indeterminate (vining) tomato varieties produce “suckers” — new shoots that emerge from the joint between the main stem and a branch. Left to grow, suckers become additional stems that produce fruit but also create a dense, tangled plant with poor air circulation and smaller individual fruits. Removing suckers below the first flower cluster redirects the plant’s energy into fewer, larger, earlier-ripening fruits.
Pruning Herbs for Bushier Growth
Herbs respond to pruning with increased branching, which means more leaves per plant and a more compact, attractive form. The technique is simple: always cut just above a leaf node (the point where a leaf or pair of leaves emerges from the stem). The dormant buds at that node will activate and grow into new branches. Basil, in particular, should be pruned aggressively and frequently — cut the main stem back by one-third every two to three weeks during the growing season, and it will respond with dense, bushy growth that produces far more leaves than an unpruned plant.
Mint, oregano, and thyme benefit from similar treatment. Chives should be cut to 5cm above the soil after flowering to stimulate fresh leaf growth. Rosemary and lavender should be pruned after flowering, cutting back by about one-third — but never cut into old, woody growth that lacks green shoots, as these sections won’t regrow.
Deadheading Flowers
Removing spent flowers — deadheading — prevents plants from putting energy into seed production and redirects that energy into producing more flowers. This is relevant for flowering plants in your edible garden (marigolds, nasturtiums, calendula) and purely ornamental flowers alike. Simply pinch or snip off faded blooms at the base of the flower stem. For annual flowers, regular deadheading extends the blooming period from weeks to months. For perennials, it promotes a second flush of bloom later in the season.
Training Climbing Plants
Climbing and vining plants — tomatoes, cucumbers, beans, peas, and squash — need physical support and gentle guidance to grow in the direction you want. Tomato clips or soft twine tied loosely around the main stem and attached to a stake, trellis, or string provide support as the plant grows. Cucumber tendrils naturally grip trellis wires and netting — guide the main stem toward the structure early, and the plant takes over. Climbing beans wind naturally around poles, strings, or netting — provide the structure at planting time so roots aren’t disturbed later.
The principle behind all training is the same: redirect growth upward and outward for better light exposure, air circulation, and space efficiency. Trained plants use vertical space that would otherwise be wasted, and their fruits hang free of soil contact, reducing rot and pest damage.
The Weekly Garden Walk
One of the most valuable habits a home gardener can develop is the weekly garden walk — a slow, attentive circuit of your entire garden, examining every plant, checking soil moisture, looking for pest damage, removing dead leaves, and noting what needs attention. This isn’t a chore; it’s a practice. Five minutes of observation prevents problems that would take hours to fix if left unchecked. You’ll notice the first aphid cluster before it becomes an infestation, the first yellow leaf that signals overwatering, the wilting herb that needs repositioning to a shadier spot. Over time, this weekly practice builds the observational skill that is the foundation of all good gardening.
✂️ Pruning golden rule: When in doubt, cut less rather than more. You can always remove more growth later, but you can’t reattach a branch you’ve cut. Start with conservative pruning and observe how the plant responds before cutting more aggressively.
21 Propagation: Growing New Plants for Free
Propagation — creating new plants from existing ones — is the gardening skill that delivers the most value for the least cost. Once you have one healthy basil plant, you can create dozens more from cuttings. A single strawberry runner produces multiple new plants every summer. Herbs divided at the roots in spring double or triple your stock without spending a penny. Propagation transforms a modest plant collection into an abundant garden, and it deepens your understanding of how plants grow at a fundamental level.
Growing from Stem Cuttings
Stem cuttings are the most versatile propagation method for home gardeners. Many herbs — basil, mint, oregano, rosemary, sage, and thyme — root readily from stem cuttings placed in water or moist growing medium. The process is simple: cut a 10–15cm stem just below a leaf node (where the leaf joins the stem, which is where root-forming cells concentrate), remove the lower leaves, and place the cutting in a glass of water on a bright windowsill or in a small pot of moist, well-draining potting mix. Within 1–3 weeks, roots emerge from the submerged node, and the cutting can be transplanted into a larger pot to grow as a new, independent plant.
Basil and mint are exceptionally easy — they root in water within a week and grow vigorously once potted up. Rosemary and thyme are slower and more reliable in a gritty growing medium (equal parts perlite and coir) rather than water, which can cause the woody stems to rot before roots form. Lavender, bay, and many ornamental shrubs also propagate from semi-hardwood cuttings taken in late summer, though these require more patience — rooting can take 6–12 weeks.
Division: Multiplying Perennials
Division is the simplest propagation method for clump-forming plants: you literally dig them up and pull or cut them into multiple pieces, each with roots and shoots, then replant the pieces as individual plants. Chives, mint, rhubarb, and many ornamental perennials (hostas, daylilies, irises) benefit from division every 2–4 years. Division not only creates new plants but also rejuvenates older clumps that have become congested and less productive at the centre.
The best time to divide depends on the plant. Spring-flowering plants are divided in autumn; autumn-flowering plants are divided in spring. This gives the divided plants time to establish roots in their new positions before they need to produce flowers or foliage growth. Some vigorous plants — mint in particular — can be divided at almost any time during the growing season with reliable success.
Layering: Roots Without Cutting
Layering is a propagation technique that creates a new plant while it’s still attached to the parent, ensuring it receives water and nutrients from the mother plant until it develops its own root system. Strawberries do this naturally — their runners (long, thin stems that extend from the parent plant) develop plantlets at their tips that root wherever they touch soil. Gardeners can encourage this by pinning runners to the surface of a pot filled with moist compost, allowing the plantlet to root, then severing the connection to the parent once the new plant is established.
Other plants that layer successfully include blackberries, raspberries, currants, and many ornamental shrubs. Low-hanging branches of woody plants can be bent to the ground, a section of bark scraped away at the contact point, the wounded section buried in moist soil, and the branch anchored with a stone or wire. Within a season, roots form at the buried point, and the new plant can be severed from the parent and transplanted.
Regrowing from Kitchen Scraps
As mentioned in the budget section, many common kitchen vegetables regrow from scraps, and this deserves deeper exploration as a propagation technique. Spring onions regrow indefinitely from their root bases — place the white root end in a glass of water on a windowsill, and new green shoots appear within days. Lettuce hearts, celery bases, and bok choy bases all regenerate from their cut bases when placed in shallow water. Ginger and turmeric rhizomes from the supermarket sprout readily when planted in a pot of moist compost in a warm, bright location, eventually producing full plants that can be harvested and re-planted in an endless cycle.
While these techniques won’t replace a deliberate planting programme, they provide free, instant engagement with plant growth and demonstrate the remarkable regenerative capacity of plants. For families with children, kitchen scrap propagation is one of the most accessible and educational gardening activities available — watching a spring onion regrow from a root stub in three days is a more powerful lesson in plant biology than any textbook.
🌿 Propagation tip: Always take cuttings and divisions from healthy, vigorous parent plants. Propagating from a stressed or diseased plant passes those problems to the new generation. Choose your best plants as parents — they’re the ones worth cloning.
22 Organic Gardening: Working with Nature, Not Against It
Organic gardening is less a set of specific techniques than a philosophy of growing: work with natural systems rather than overriding them with synthetic inputs. Instead of applying chemical fertilisers that feed plants directly, organic gardeners feed the soil — building a living ecosystem of microorganisms that break down organic matter and deliver nutrients to plant roots in a slow, balanced, biologically mediated process. Instead of spraying synthetic pesticides that kill pests and beneficial insects indiscriminately, organic methods focus on prevention, biological control, and creating conditions where pest populations are naturally moderated by predators and environmental balance.
The result is a garden that works as an ecosystem rather than a factory — one that becomes more self-sustaining and resilient over time, rather than increasingly dependent on external inputs. The produce from an organic garden contains fewer chemical residues, and the soil beneath it is richer, more biologically active, and better structured than soil maintained with synthetic products. For home gardeners growing food they’ll feed to their families, the organic approach aligns naturally with the desire for clean, healthy, home-grown nutrition.
The Pillars of Organic Garden Management
Organic gardening rests on four interconnected practices. Feed the soil, not the plant. Build organic matter through compost, mulch, and cover crops. Encourage biodiversity — diverse plantings attract beneficial insects that control pests naturally. And prevent problems through good cultural practices — proper spacing, appropriate watering, crop rotation, and variety selection — rather than treating them with products after they occur.
Composting, as covered in detail in Section 13, is the cornerstone of organic soil management. Regular addition of compost maintains organic matter levels, feeds soil biology, and provides a slow, balanced supply of nutrients that eliminates the boom-and-bust cycle of synthetic fertilisation. Mulching with organic materials — straw, shredded leaves, wood chips, or grass clippings — suppresses weeds, retains moisture, moderates soil temperature, and feeds soil organisms as it decomposes. Together, compost and mulch create the foundation of a self-fertilising garden system.
Organic Pest Control in Practice
The organic approach to pests begins with acceptance: some pest damage is normal, inevitable, and acceptable. A few aphids on your beans, some caterpillar nibbles on your cabbage — these are signs of a living garden, not a failing one. The goal is balance, not eradication. And balance is achieved primarily through biodiversity: a garden that includes flowering herbs, companion plants, and a mix of crop species attracts predatory insects — ladybirds, lacewings, parasitic wasps, hoverflies — that consume pest populations before they reach damaging levels.
When pest pressure exceeds what natural predators can manage, organic interventions are available. Neem oil disrupts insect feeding and reproduction without harming pollinators or beneficial insects when applied correctly (in the evening, when pollinators are inactive). Insecticidal soap kills soft-bodied pests on contact with minimal environmental impact. Bacillus thuringiensis (Bt), a naturally occurring soil bacterium, is highly specific to caterpillars and is approved for organic use. Diatomaceous earth controls crawling insects without chemicals. Each of these targets pests while leaving the broader garden ecosystem intact — a critical distinction from synthetic broad-spectrum pesticides that kill beneficial and pest insects alike.
Organic Fertilisers and Amendments
Beyond compost, several organic fertilisers serve specific needs. Fish emulsion provides a quick nitrogen boost for hungry leafy crops. Bone meal supplies phosphorus for root development and flowering. Blood meal is a high-nitrogen amendment for heavy feeders. Kelp meal delivers trace minerals and growth hormones. Worm castings, as discussed in the composting section, are among the most balanced and biologically rich amendments available. Each of these is derived from natural sources, breaks down through biological processes, and feeds plants through the soil food web rather than through direct chemical availability.
The key difference between organic and synthetic fertilisation is time. Synthetic fertilisers deliver nutrients immediately — plants respond within days, but the effect is short-lived, and repeated applications can build up mineral salts in the soil and disrupt microbial communities. Organic fertilisers release nutrients gradually over weeks and months as microorganisms break them down, providing a steady, balanced supply that matches plant uptake rates. This slower pace requires more planning — organic fertilisers need to be applied before the plant needs the nutrients, not after deficiency symptoms appear — but the results are more sustainable and the soil improves with each application rather than degrading.
Organic Seed Selection
Organic gardening extends to seed selection. Organic seeds are produced without synthetic pesticides or fertilisers, on certified organic land, from plants adapted to organic growing conditions. While organic seeds are sometimes slightly more expensive, they represent the full-circle commitment to chemical-free growing from the very first cell division. Many heritage and heirloom varieties — which predate the era of chemical agriculture — are naturally well-adapted to organic conditions, with strong natural disease resistance and vigorous growth without heavy fertilisation.
🌍 Organic gardening’s greatest strength is that it builds a garden that gets better over time. Each year, the soil improves, pest balance stabilises, and the garden becomes more self-sustaining. Chemical-dependent gardens, by contrast, require increasing inputs to maintain the same results, as synthetic products degrade soil biology and create dependency cycles.
23 Garden Design & Layout: Creating a Beautiful, Productive Space
Function and beauty are not opposing forces in a home garden — they’re complementary. A well-designed garden is more productive because plants are positioned for optimal light, drainage, and companion benefits. It’s easier to maintain because paths are accessible, watering points are convenient, and plantings are organised logically. And it’s more enjoyable to spend time in because the visual composition — the interplay of colour, texture, height, and structure — creates a space that nourishes the eye as well as the kitchen.
You don’t need landscape architecture training to design a beautiful garden. A few fundamental principles, applied thoughtfully, transform a random collection of pots and beds into a coherent, inviting outdoor space. Whether you’re arranging containers on a balcony or planning raised beds in a backyard, design thinking turns functional growing into a genuine garden experience.
Design Principles for Home Gardens
The first principle is focal point. Every garden needs a visual anchor — a feature that draws the eye and gives the space structure. In a small garden, a single large pot with a striking plant, a trellis covered in climbing flowers, or a small water feature serves this purpose. In a larger space, a specimen fruit tree, a beautifully planted raised bed, or a seating area framed by fragrant herbs creates the anchor. Without a focal point, the eye wanders without settling, and the space feels chaotic regardless of how many beautiful plants it contains.
The second principle is layering. Arrange plants in layers of height — tall plants at the back (or centre, if viewed from all sides), medium plants in the middle, and low growers and ground covers at the front. This creates depth and visual interest while ensuring every plant receives adequate light. In a container garden, this means using plant stands, wall-mounted planters, and hanging baskets to create vertical layers alongside ground-level pots.
The third principle is repetition. Repeating a colour, plant variety, or material at intervals throughout the garden creates visual cohesion and rhythm. Three identical terracotta pots along a balcony railing, each planted with the same herb variety, look intentional and elegant. Scattered, mismatched pots with random plants look cluttered — even if each individual plant is beautiful.
Colour in the Edible Garden
Edible gardens are naturally colourful, and using colour intentionally elevates the visual impact dramatically. Purple basil beside green lettuce, red-stemmed chard beside silver-leaved sage, golden marigolds beside deep green tomato foliage — these contrasts create visual excitement without any additional effort. Consider colour when planning plantings: group warm colours (reds, oranges, yellows) together for energy and excitement, or pair cool colours (purples, blues, silvers, greens) for calm and sophistication. A monochromatic scheme — all silver-leaved herbs (lavender, sage, rosemary, artemisia) in terracotta pots — has a refined, Mediterranean elegance that’s stunning in its simplicity.
Edible Landscaping
Edible landscaping is the practice of integrating food-producing plants into ornamental garden design rather than confining them to separate vegetable beds. Blueberry bushes with their brilliant autumn foliage, strawberry groundcovers with white flowers and red fruit, chives with purple pom-pom blooms, rainbow chard with its multi-coloured stems — each of these is as ornamental as any purely decorative plant, while also producing food. Replacing purely ornamental shrubs and borders with edible alternatives creates a garden that’s beautiful, productive, and ecologically valuable simultaneously.
Pathways, Access, and Flow
Even in a small garden, thinking about how you move through the space matters. Raised beds should be narrow enough (120cm maximum) that you can reach the centre from either side without stepping on the soil. Paths between beds should be wide enough for a wheelbarrow or at least comfortable walking. In a container garden, pots should be arranged so you can reach every plant for watering and harvesting without moving other pots out of the way. Watering points should be accessible without dragging hoses across walkways or through living spaces.
These practical considerations often get overlooked in the excitement of buying plants and pots, but they determine whether your garden is a pleasure to maintain or a daily frustration. Design for access first, beauty second — though in practice, a garden that’s easy to work in almost always looks better because it’s more consistently maintained.
Container Arrangement Strategies
For balcony and patio gardens, container arrangement is the design exercise. Group pots of varying sizes for visual interest rather than lining them up in a uniform row. Use tall, narrow pots at the back and wide, low bowls at the front to create the depth illusion. Place the most fragrant plants (lavender, rosemary, jasmine) near seating areas where you’ll enjoy their scent. Use trailing plants — ivy, trailing petunias, creeping thyme — in elevated positions where they cascade downward, softening hard edges and connecting vertical and horizontal planes.
Light-coloured pots reflect heat and light, which benefits plants in hot climates but can look stark in cooler, grey-toned environments. Terracotta and dark-glazed pots absorb heat, which extends the growing season in cooler climates but can overheat roots in scorching conditions. Match your container materials to your climate and your aesthetic — there’s no universally correct choice, only what works for your specific conditions and your personal sense of beauty.
🎨 Design is an ongoing conversation with your garden, not a one-time decision. Observe what works, rearrange what doesn’t, and let the garden evolve with your experience and taste. The most beautiful gardens are those that have been refined over multiple seasons of observation and adjustment.
24 Extending the Season: Growing Beyond Summer
For most home gardeners, the growing season feels frustratingly short. Spring planting leads to summer abundance, which leads to autumn decline, and then months of dormancy before the cycle begins again. But with the right techniques, you can extend your productive season at both ends — starting earlier in spring and continuing later into autumn and winter — effectively doubling the months during which your garden produces fresh food.
Season extension isn’t about fighting your climate. It’s about understanding the specific stresses that limit your season and using simple, inexpensive tools to buffer your plants against them. Cold, wind, and short day length are the primary constraints in cool climates; heat, drought, and intense sun are the limiting factors in hot climates. The techniques below address each of these specifically.
Cold Frames and Cloches
A cold frame is essentially a bottomless box with a transparent lid — a miniature greenhouse that sits over a section of garden bed or a set of containers. It traps solar heat during the day and insulates plants against cold at night, creating a microclimate that’s several degrees warmer than the surrounding air. This temperature buffer is enough to extend the growing season by 4–8 weeks on either end, allowing you to sow cool-season crops (lettuce, spinach, radishes, peas) weeks before outdoor conditions would otherwise permit, and to continue harvesting them weeks after unprotected plants have succumbed to frost.
Cold frames can be purchased as ready-made units or built easily from reclaimed windows, clear polycarbonate panels, or heavy-duty plastic sheeting stretched over a wooden or PVC frame. The key design considerations are: the lid must be transparent to allow maximum light penetration, the frame must be angled (higher at the back, lower at the front) to maximise solar exposure, and you must be able to ventilate it on sunny days — temperatures inside a closed cold frame can exceed 40°C on a mild spring day, which cooks plants as effectively as frost kills them.
Cloches are individual plant covers that provide the same cold-frame benefit on a smaller scale. Upturned clear plastic bottles with the bottom cut off, glass bell jars, or purpose-built plastic cloches each protect a single plant or a short row. They’re particularly useful for protecting newly transplanted seedlings in spring when nighttime temperatures still dip near freezing.
Row Covers and Fleece
Horticultural fleece — a lightweight, non-woven fabric — drapes directly over plants to provide 2–4°C of frost protection while allowing light, air, and rain to pass through. It’s the simplest and most versatile season extension tool available. Lay it over rows of crops in autumn to protect them from early frosts. Drape it over seedlings in spring for overnight protection. Use it as a physical barrier against insects during the growing season — cabbage white butterflies, flea beetles, and carrot flies can’t reach crops through fleece.
Heavier row cover fabrics and plastic tunnels (low hoops of PVC pipe or flexible metal covered with clear polyethylene film) provide even greater protection and can create conditions warm enough to grow tomatoes, peppers, and cucumbers in climates where outdoor conditions wouldn’t support them. A simple polytunnel over a raised bed extends the tomato growing season by a month or more in temperate climates — and the plastic can be removed in summer when it’s not needed, then replaced in autumn to ripen the last fruits.
Succession Planting for Continuous Harvest
Succession planting — sowing small batches of seed at regular intervals rather than all at once — is the simplest season extension technique because it requires no special equipment. By sowing quick-growing crops like lettuce, radishes, and baby spinach every two to three weeks from early spring through late summer, you maintain a continuous supply rather than having a single glut followed by bare soil. The math is simple: a packet of lettuce seed sown all at once gives you two weeks of abundance and then nothing. The same packet sown in six batches over twelve weeks gives you continuous harvest for three months.
Choosing Varieties for Extended Seasons
Variety selection is an underused season extension tool. Within any crop, some varieties are bred for cold tolerance, others for heat tolerance, and others for quick maturity. Choosing cold-tolerant lettuce varieties (like ‘Winter Density’ or ‘Arctic King’) allows you to harvest salad greens weeks later into autumn than heat-loving varieties. Quick-maturing radish varieties (21 days) can be squeezed into short spring windows before summer heat arrives. Heat-tolerant spinach varieties (like ‘Bloomsdale’) resist bolting through summer when standard varieties would bolt within weeks.
For autumn and winter growing, the focus shifts to crops that actively thrive in cool conditions: kale, Brussels sprouts, winter cabbage, leeks, parsnips, and certain varieties of broccoli and cauliflower. These crops not only tolerate cold — many of them taste better after exposure to frost, which converts starches to sugars and intensifies flavour. A winter garden of kale, leeks, and winter salads, protected by fleece and cold frames, provides fresh produce throughout the coldest months in all but the most extreme climates.
Bringing the Garden Indoors for Winter
As outdoor conditions become inhospitable, the garden transitions indoors. Tender herbs potted up from the garden and placed on a sunny windowsill or under grow lights continue producing through winter. Microgreens and sprouts grown on kitchen counters provide fresh greens in as little as seven days. Chillies and dwarf tomatoes brought indoors before the first frost continue fruiting for weeks in a warm, bright room. This indoor extension of the garden means that even in the coldest climates, the home gardener never fully stops growing — the methods and crops change, but the practice continues year-round.
🌡️ Season extension doesn’t require greenhouse-sized investment. A cold frame, a roll of horticultural fleece, and a few quick-maturing variety choices add months to your productive season for a total investment under £30 / $40. The return — weeks or months of additional fresh produce — is immediate and substantial.
25 DIY Garden Projects: Building Your Garden with Your Own Hands
Some of the most satisfying moments in home gardening come not from the plants themselves but from the structures you build to support them. A raised bed you constructed from reclaimed timber. A self-watering container you assembled from recycled materials. A herb spiral you designed and built in an afternoon. These DIY projects add personality to your garden, save significant money compared to buying commercial products, and give you exactly the dimensions, features, and aesthetic you want rather than settling for whatever a retailer offers.
You don’t need carpentry skills or specialist tools for most garden DIY projects. Basic hand tools — a saw, drill, screwdriver, and measuring tape — handle the majority of construction. Reclaimed materials from demolition sites, skips, or online free listings often provide everything you need at zero cost. And the sense of accomplishment from growing food in a structure you built yourself is a genuinely different experience from growing in a purchased pot.
Building a Raised Bed from Scratch
A raised bed is the most rewarding DIY garden project for the investment involved. The basic construction is four planks screwed together at the corners to form a rectangle, placed directly on the ground (or on a prepared surface), and filled with growing medium. Untreated cedar, larch, or Douglas fir are the best timber choices — naturally rot-resistant without chemical treatment, and safe for food production. Avoid railway sleepers, treated fence posts, or any wood with visible chemical preservative near food crops.
A practical beginner size is 120cm x 90cm x 30cm high — large enough to be productive, small enough to reach the centre from any side, and high enough to provide good root depth for most vegetables. Screw the corners with galvanised or stainless steel screws (ordinary steel screws rust and fail within a season). Line the bottom with cardboard to suppress weeds from below — it decomposes within a season and allows worms to migrate upward into the bed. Fill with a mix of roughly 60% topsoil, 30% compost, and 10% perlite or coarse sand for drainage. This combination provides structure, fertility, and drainage that outperforms any single-ingredient fill.
DIY Self-Watering Containers
Self-watering containers — pots with a built-in water reservoir that supplies moisture to the soil through capillary action — are surprisingly easy to build from two nested buckets or storage containers. The inner container holds the growing medium and has drainage holes at the bottom that also allow water to wick upward from the reservoir below. The outer container holds the water reservoir. A fill tube (a section of PVC pipe) allows you to add water to the reservoir without disturbing the soil surface. A overflow hole drilled in the outer container at the desired reservoir height prevents waterlogging.
These DIY self-watering containers dramatically reduce watering frequency — the reservoir holds enough water for several days even in warm weather — and provide the consistent moisture levels that tomatoes, peppers, and cucumbers need to produce well without blossom end rot. The materials cost a fraction of commercial self-watering planters, and the construction takes less than an hour with basic tools.
Pallet Gardens and Vertical Pallet Planters
Wooden pallets — freely available from many businesses that would otherwise pay for disposal — make excellent vertical garden structures. Laid flat against a wall and lined with landscape fabric stapled to the back and bottom, a pallet creates multiple planting pockets that hold soil and support herbs, lettuce, and strawberries growing vertically. Lean it against a sunny wall or fence, fill the slat gaps with soil and plants, and you have a productive vertical garden for the cost of a roll of fabric and a staple gun.
Ensure the pallet is stamped with “HT” (heat-treated) rather than “MB” (methyl bromide fumigated) — the latter is chemically treated and should not be used near food. Sand any rough surfaces to prevent splinters, and apply a food-safe wood oil or leave untreated for a natural weathered look. Pallet gardens work particularly well for herbs near the kitchen door — a living wall of basil, parsley, thyme, and chives within arm’s reach of where you cook.
Building a Herb Spiral
A herb spiral is a raised, spiral-shaped planting structure that creates multiple microclimates within a very small footprint. Built from bricks, stones, or reclaimed materials arranged in a 1.5–2 metre diameter spiral that rises from ground level at the outer edge to 60–90cm at the centre, the herb spiral creates different growing conditions at each level: the top is dry and well-drained (ideal for rosemary, thyme, and sage), the middle provides moderate moisture (perfect for basil, parsley, and coriander), and the base retains more moisture (suited to mint, chives, and watercress). The south-facing side receives more sun; the north-facing side is cooler and shadier.
Building a herb spiral is a weekend project that combines practical food production with genuine garden art. The structure becomes a focal point, a conversation piece, and a highly efficient growing system that packs an extraordinary diversity of herbs into a space smaller than a dining table. Fill the interior with a mixture of rubble at the base (for drainage), topsoil in the middle layers, and compost-rich growing medium at the surface. Plant your herbs according to their preferred conditions, and you have a self-contained herb garden that produces fresh flavour year-round.
Garden Markers and Labels
A small but deeply satisfying DIY project is creating your own garden markers. Painted stones, wooden lolly sticks, stamped copper tags, wine corks on sticks, or sections of broken terracotta pot written on with permanent marker — each provides clear labelling that prevents the universal gardener’s problem of forgetting what you planted where. For children, painting garden markers is one of the most engaging entry points into the gardening hobby — they create something functional and decorative that connects them to the growing process from the very first day.
Compost Bins from Pallets
A three-bin compost system — one bin filling, one bin maturing, one bin ready to use — is the gold standard for home composting, and it can be built entirely from reclaimed pallets. Stand four pallets on their edges and screw them together at the corners to form a square bin. Three such bins side by side create the three-stage system. The open slats allow air circulation (essential for hot composting) while containing the materials neatly. Add a hinged front panel made from a pallet cut to size for easy access when turning and removing finished compost. Total material cost: zero if you source free pallets and have screws on hand.
🔨 The DIY garden mindset: Before buying anything, ask “Can I build this from what I already have?” The answer is surprisingly often yes — and the result is usually more personalised, more functional, and more meaningful than anything you could buy.
Frequently Asked Questions
🌱 Your Home Garden Starts Now
Gardening at home is one of those pursuits where the barrier to entry is genuinely low and the rewards are genuinely high. You don’t need a garden, expensive equipment, specialist knowledge, or even a great deal of time to begin. A pot of basil on a kitchen windowsill, a cherry tomato plant on a balcony, a tray of microgreens on a counter — any of these is a fully legitimate starting point. The rest follows naturally as your confidence, knowledge, and enthusiasm grow season by season.
What you do need is a willingness to observe — your light, your water, your plants — and to adapt based on what you learn. The knowledge in this guide gives you a comprehensive foundation. The real learning happens in the garden itself, where the most important teacher is the plants themselves.
Start smaller than you think you should. Water less than you think you should. Feed regularly once the initial nutrients are gone. Choose plants for your conditions, not your wishlist. And above all, keep going — because every gardener’s first season involves setbacks, and every gardener’s second season is dramatically better.
Start Your Home Garden Today →