Beginner Gardening Guide
How to Start a Garden From Scratch, Step by Step
No yard experience, no inherited green thumb, and no idea where to begin — that’s exactly who this guide is for. Below is the same sequence we walk first-time gardeners through on Gardening at Home, broken into plain steps you can actually follow this weekend.
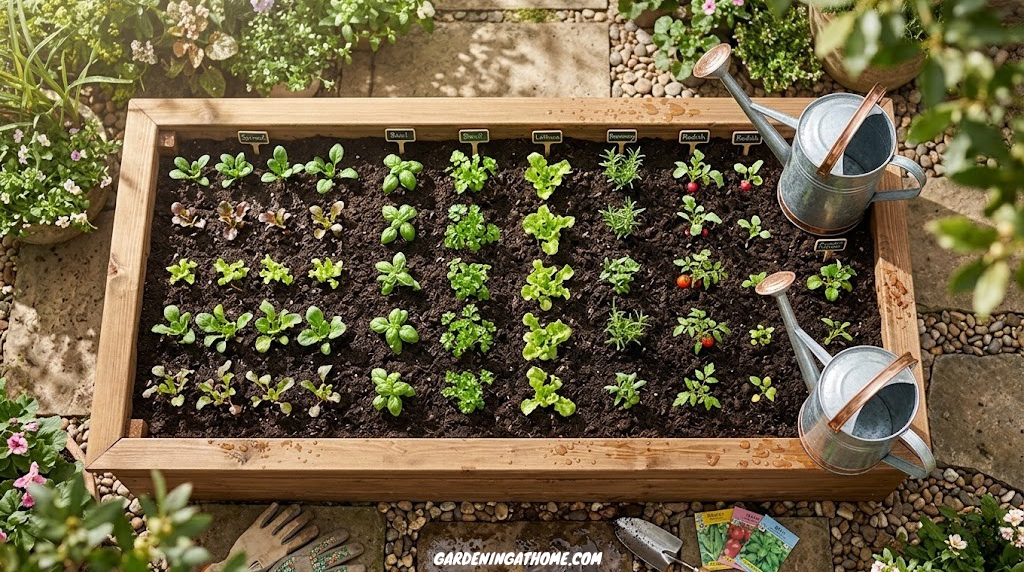
A first garden does not need to be large to be successful
Why Start a Garden From Scratch?
There is a particular kind of relief in starting completely from zero. You are not inheriting someone else’s half-finished raised bed, fighting weeds nobody pulled last season, or trying to guess what’s growing in an overgrown corner of the yard. A blank patch of lawn, a bare balcony, or an empty stretch of soil is, in a strange way, the easiest place to begin, because every decision from here is yours to make on purpose.
Most people who say they “don’t have a green thumb” have simply never been handed a clear sequence to follow. Gardening looks mysterious from the outside, people talk about soil pH, hardening off seedlings, and companion planting as though it’s a private language. In practice, a first garden comes down to a short list of decisions made in the right order: sunlight, soil, bed style, what to plant, and how to keep it watered. Almost everything else can be learned as you go.
There’s also a practical case for starting now rather than waiting for “someday.” A single raised bed or a row of containers on a sunny step can produce a genuinely useful amount of food: a handful of cherry tomatoes a day in midsummer, fresh herbs you would otherwise buy wrapped in plastic, lettuce you can cut an hour before dinner. None of that requires acreage. It requires picking a spot, preparing it properly once, and showing up with a watering can a few times a week.
Beyond the produce, a first garden tends to change how you notice things: weather, the angle of the sun through the seasons, which corner of the yard dries out first after rain. That attention is part of what makes gardening satisfying long after the first harvest. Whether you have a quarter acre, a tiny patio, or a single bright windowsill, the steps below scale down, or up, to fit what you actually have.
One more thing worth saying plainly: not every step will go perfectly the first time, and that’s fine. A poorly placed seed, a bed that dries out faster than expected, a tomato that splits after an uneven watering week, these are normal parts of learning a new skill, not signs you’ve failed at it. The goal of this guide is to get the big decisions right from the start so the smaller mistakes are easy to recover from. Here’s the order we’ll work through, and why it matters: skipping straight to planting before assessing sunlight and soil is the single most common reason a first garden underperforms, so the next two steps focus entirely on reading your space correctly before you spend a dollar on lumber or seeds.

Beginner Pick
All-in-One Garden Starter Kit
A trowel, gloves, hand fork, and pruning snips bundled together, the short list of tools most beginners reach for in week one.
Check Price on AmazonChoose Your Garden Location
Before you buy a single seed packet or board of lumber, spend a few days simply watching your space. The location you choose will matter more than soil amendments, fertilizer, or which variety of tomato you plant, because no amount of care can fully compensate for a spot that doesn’t get enough light.
Start by tracking sunlight hour by hour. Walk outside in the morning, at midday, and again in the late afternoon, and note which areas are in direct sun versus shade at each check-in. Most fruiting vegetables, tomatoes, peppers, cucumbers, squash, need what’s called full sun: roughly six to eight hours of direct, unobstructed light. Leafy greens, herbs, and many root vegetables are more forgiving and will still thrive with four to six hours, often described as partial sun or partial shade. If you have never mapped light this way before, our guide to understanding full sun versus partial shade walks through exactly how to read your yard’s pattern and match it to the right crops.
Fig. 1 — Track shade and direct sun from morning through evening before you build anything
Sunlight is not the only variable, though it is the most important one. A handful of other factors are worth checking during the same walk-through.
Drainage. After a hard rain, does water pool and sit for hours, or does it soak in within twenty to thirty minutes? Standing water is a strong signal that a spot will need raised beds or heavily amended soil rather than direct in-ground planting.
Distance from large trees. Tree roots compete aggressively for water and nutrients, often reaching far beyond the visible canopy. A bed planted within ten feet of a mature tree’s trunk will struggle no matter how good the soil looks on the surface.
Wind exposure. A little airflow is healthy and helps prevent fungal disease, but a spot caught in a constant wind tunnel, between two buildings, for example, can dry out soil quickly and snap young stems.
Water access. A hose that reaches comfortably, or a spigot within a short walk, removes one of the biggest reasons new gardens get neglected by midsummer. If you would be hauling water in buckets every single time, be honest with yourself about how sustainable that really is.
Visibility and accessibility. A bed you walk past daily, near a back door or kitchen window, gets noticed, watered, and harvested far more consistently than one tucked into a far corner of the yard you only visit on weekends.
If your yard genuinely does not offer a sunny enough spot, or if you do not have a yard at all, that is not a dead end. Containers can be moved throughout the day to chase available light, and a sunny balcony or patio often outperforms a shaded backyard by a wide margin. We will cover container and balcony options in detail later in this guide.
Once you have identified the sunniest, most accessible, best-draining spot available to you, mark its boundaries, even with a few stakes and string, so you can move on to evaluating what is actually in the soil there.
Test and Improve Your Soil
Soil is the part of gardening most beginners skip past, and it is usually the part that decides whether a first season feels effortless or frustrating. You do not need a laboratory to get useful answers. A few simple, almost old-fashioned tests will tell you most of what you need to know before you plant a single thing.
The squeeze test. Grab a handful of slightly damp soil and squeeze it into a ball. If it falls apart instantly, it is likely too sandy and will drain nutrients and water quickly. If it forms a dense, slick ball that holds its shape like clay, it likely drains poorly and can suffocate roots. What you want is soil that forms a loose clump and then crumbles apart with a light poke, a texture gardeners call “loam.”
The jar test. Fill a clear mason jar about a third full of soil from your planting area, add water until the jar is nearly full, screw on the lid, and shake hard for a minute. Set it on a windowsill and leave it alone for at least 24 hours. As the particles settle, you will see distinct bands form: sand on the bottom, settling within minutes, silt above that, settling over a few hours, and the finest clay particles on top, sometimes taking a full day to settle. Roughly even bands suggest balanced loam; a jar dominated by one layer tells you exactly what you are working with.
Fig. 2 — A mason jar test sorts soil into sand, silt, and clay layers within a day
The pH check. Inexpensive pH test strips or a basic probe meter will tell you whether your soil leans acidic or alkaline. Most vegetables prefer a slightly acidic to neutral range, and a reading far outside that range is often the hidden reason plants look stunted despite “good” soil. If your container mix is the focus rather than ground soil, our breakdown of the best potting soil mix for indoor plants covers how bagged mixes differ from native ground soil and when it is worth upgrading.
Once you know what you are working with, improving it almost always comes down to one ingredient: organic matter. Finished compost, aged manure, or shredded leaves worked into the top six to eight inches of soil will loosen dense clay, help sandy soil retain moisture, and feed the microbial life that makes nutrients available to roots in the first place. There is no perfect ratio to memorize; a generous two to three inch layer of compost mixed into existing soil before planting solves the majority of beginner soil problems on its own.
If a soil test reveals something more specific, persistently soggy ground, a strong sulfur smell, or visible construction debris, it may be worth sending a sample to your local agricultural extension office for a lab analysis. These services are often free or low-cost and will return exact nutrient levels rather than the general read you get from a jar on a windowsill. For most first gardens, though, the squeeze test, jar test, and a healthy dose of compost are all you need before moving on to deciding what kind of bed to build.

Worth The Few Dollars
At-Home Soil Test Kit
A simple pH and nutrient kit that turns guesswork into a real answer before you spend money on a single seedling.
Check Price on AmazonChoose In-Ground, Raised Bed, or Containers
With a site picked and your soil understood, the next decision is structural: will you plant directly into the ground, build a raised bed above it, or grow entirely in containers? None of the three is universally “better.” Each trades cost, effort, and control over soil quality differently, and plenty of experienced gardeners use all three at once depending on what they are growing.
Fig. 3 — Soil depth and structure differ across the three most common bed styles
In-Ground Beds
Planting directly into the earth is the lowest-cost way to start, since you are amending soil you already have rather than buying or building anything to contain it. It works best when your jar test showed reasonably balanced loam, drainage is decent, and you are willing to spend a season improving the soil with compost rather than expecting perfect results immediately. The tradeoff is less control: rocky, heavily compacted, or contaminated soil (common near older homes or driveways) can take real effort to fix.
Raised Beds
A raised bed is essentially a bottomless box, often built from untreated lumber, set on top of the existing ground and filled with a soil and compost blend you choose. Because you control the fill completely, raised beds tend to drain better, warm up faster in spring, and stay easier on the back and knees than ground-level planting. The cost is higher upfront, lumber, soil, and compost for a 4×8 bed typically lands between roughly one hundred fifty and three hundred dollars, but many gardeners find the consistency worth it.
Containers
Pots, fabric grow bags, and other containers are the most flexible option, ideal for patios, balconies, driveways, or simply testing the waters before committing to a permanent bed. Sizing matters more than most beginners expect; a container that is too small will dry out within hours on a hot day and stunt root development regardless of how well you water. Our guide on choosing the right pot size for plants breaks down exactly which container volume suits which crop, from a five-gallon bucket for a single tomato to a window box for herbs.
| Bed Style | Typical Startup Cost | Soil Control | Drainage | Mobility | Best For |
|---|---|---|---|---|---|
| In-Ground | Low ($0–$50) | Limited | Depends on site | None | Larger plots, flat budgets |
| Raised Bed | Moderate ($150–$300) | Full | Excellent | Low | Most backyard beginners |
| Containers | Low–Moderate ($20–$150) | Full | Excellent | High | Patios, balconies, renters |
Lean Toward a Raised Bed If…
- Your soil test revealed heavy clay, rocky ground, or poor drainage
- You want a tidy, defined growing space that’s easier on your back
- You’re willing to spend more upfront for less ongoing soil work
Lean Toward In-Ground If…
- Your jar test showed reasonably balanced, workable soil already
- You’re gardening on a tight budget or a larger footprint
- You don’t mind a season of improving soil with added compost
If you’re undecided, a hybrid approach works well for a first season: build one modest raised bed for the crops that need the most consistent soil, tomatoes and peppers, for example, while testing a small in-ground patch for tougher crops like squash or beans that tolerate average soil more easily.

Most Popular Beginner Choice
Cedar Raised Garden Bed Kit
A pre-cut, corner-bracketed kit that skips the lumber-cutting step entirely, usually ready to fill within an hour.
Check Price on AmazonGather Your Essential Tools
One of the fastest ways to overspend as a new gardener is buying every shiny implement at the garden center before you know what you actually need. The honest list is short. Most of what gets stocked on tool display walls is either a duplicate of something simpler or a specialized item you will not need until your second or third season. What follows is what matters in week one and what can wait.
Fig. 4 — The six tools most beginners reach for in week one; everything else can wait
What you genuinely need from the start:
- Hand trowel. The single most-used tool in any garden. Choose one with a comfortable grip and a stainless or carbon steel blade that will not bend when you hit a root.
- Hand fork / cultivator. For loosening soil in tight spaces, working compost into an existing bed, and breaking up small clumps around seedlings.
- Gloves. Fit matters more than thickness. A glove that is too bulky makes it impossible to feel what you are doing; thin nitrile-coated gloves offer protection and dexterity together.
- Watering can or hose with a gentle-shower head. Seeds and seedlings need a soft, even distribution of water. A hard stream from a hose with no nozzle can displace seeds, compact surface soil, and snap young stems.
- Pruning snips or scissors. For harvesting herbs and greens, removing dead growth, and cutting twine. A cheap pair from any hardware store works fine to start.
- Kneeling pad. Optional in the first week, genuinely appreciated by the second. Your knees will thank you within the first hour of weeding.
What can wait until season two: a long-handled hoe, a full-size garden fork, a drip irrigation system, a soil thermometer, raised bed corner brackets, and any number of specialty tools aimed at specific pests or tasks you have not yet encountered. Buying in response to an actual problem you are having is always more efficient than stocking a tool rack in advance of a problem that may never appear.
If you are buying a basic set rather than individual pieces, a bundled trowel-and-fork combination costs less than buying both separately at most garden centers, and a set that includes gloves often adds only a few dollars to the total. The key quality signal to look for in any gardening tool: a tang (the metal part of the blade) that runs the full length of the handle rather than inserting only partway in. Half-tang tools bend or snap under real load; full-tang tools last years.

Underrated Must-Have
Garden Kneeling Pad with Handles
A thick foam pad with side handles that double as support when standing up. Protects knees during planting and weeding sessions.
Check Price on AmazonDesign Your Garden Layout
Designing before you dig prevents a common beginner trap: planting things wherever they fit, then discovering in midsummer that your tall corn is blocking the sun from your low-growing peppers, or that your sprawling squash has engulfed the path you need to reach the back of the bed. A few minutes with graph paper, or even a rough sketch on a notepad, saves a full season of frustration.
Fig. 5 — Plant tall crops at the north end so they cast shade away from shorter neighbours
The most important layout principle for a new vegetable garden is the sun direction rule: place your tallest plants at the north end of the bed so they do not shade shorter neighbours as the sun moves across the sky. In the Northern Hemisphere, the sun tracks from east to west with a southern tilt, meaning a six-foot tomato cage on the south end of a bed can put everything behind it in full shade for half the day.
Beyond sun direction, a few other layout guidelines are worth building into your plan from the start:
- Access from both sides. A 4-foot-wide bed is the practical maximum for most adults to reach the centre from either side without stepping into the soil. Beds wider than this should have a stepping stone or narrow path through the middle. Compacted soil from footsteps undermines all the aeration work you did in Step 2.
- Leaving space for airflow. Plants packed too tightly create humid microclimates that encourage fungal diseases like powdery mildew. Seed packets and plant tags list spacing recommendations that often feel extravagant when you are starting out; they are based on a plant’s eventual mature size, not its seedling size. Trust the spacing guide the first season.
- Grouping thirsty plants together. If you end up with both drought-tolerant herbs and moisture-hungry tomatoes in the same bed, watering becomes a compromise for both. Planting similar moisture-need crops together allows you to water the bed evenly rather than spot-watering around a patchwork of different needs.
- Companion planting basics. Some plant pairings genuinely help each other: basil near tomatoes may deter aphids; marigolds at the bed edge repel many common pests; tall beans and squash shaded by corn is the classic Three Sisters combination. These are not magic, but they are easy to build into a plan at the design stage rather than rearrange after planting.
Sketch your layout at actual scale, even roughly, using graph paper where each square represents one foot. Mark each crop’s final footprint based on its spacing requirements, note which direction your bed faces, and make sure every plant has a logical path to reach it. This ten-minute step regularly saves a full season of replanting.
Build or Prepare the Bed
Now that you know where your garden will go, what bed style you are using, and what your soil looks like, the physical preparation step becomes straightforward. The goal here is a planting surface that is loose, well-draining, and free of grass or aggressive weed roots down to six to eight inches.
Fig. 6 — A layered fill approach builds drainage and fertility into a new raised bed from day one
Preparing an In-Ground Bed
Mark the edges of your plot with stakes and string, then smother any existing grass by covering the area with five to eight layers of overlapping newspaper or a single layer of plain cardboard. Water it thoroughly, then pile three to four inches of compost on top. Leave this for two to four weeks if you have time; the grass beneath will die and begin to decompose, adding organic matter rather than requiring removal. If you need to plant sooner, cut through the cardboard layer with a trowel when planting individual seedlings. This “no-dig” or “lasagna” method skips the back-breaking work of removing sod and tends to produce better soil structure within a single season than aggressive digging does.
Filling a Raised Bed
A simple and reliable fill ratio for a raised bed is roughly sixty percent topsoil, thirty percent finished compost, and ten percent an aerating ingredient like perlite, coarse sand, or aged bark chips. Avoid pure topsoil (too dense and often weed-seed-laden) and avoid pure potting mix (designed for containers, too light and expensive at raised-bed scale). Mix the layers as you add them or stir after filling. Water the bed well before planting, let it settle for a day, then top off any sunken areas and you are ready.
Container Fill
Containers should be filled with a bagged potting mix specifically formulated for containers, not garden soil, which compacts severely in pots and cuts off root oxygen. A mix that contains coco coir or perlite will drain well and resist the wet-then-bone-dry swings that kill container plants quickly. Fill to within an inch of the rim so water does not run off the surface before it can soak in.
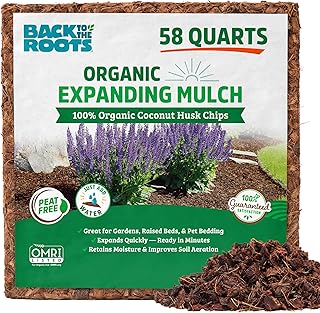
Get the Fill Right
Premium Raised Bed & Container Potting Mix
A pre-blended mix with compost, perlite, and slow-release nutrients built in, one of the most-recommended time-savers for first raised beds.
Check Price on AmazonChoose What to Plant
Choosing plants for a first garden comes down to two filters applied in order: what will actually grow well in your climate and season, and what you will realistically eat or use. The most perfectly grown crop in the world is a waste of effort if it sits on the counter until it rots because nobody in your household likes it.
| Crop | Difficulty | Time to Harvest | Space Needed | Best For |
|---|---|---|---|---|
| Bush Beans | Very Easy | 50–60 days | 6 in. apart | Beginners wanting a quick win |
| Radishes | Very Easy | 22–30 days | 2 in. apart | Fastest harvest of any vegetable |
| Leaf Lettuce | Very Easy | 30–45 days | 6–8 in. apart | Cut-and-come-again harvests |
| Cherry Tomatoes | Easy | 60–70 days | 24–36 in. apart | High yield, forgiving of mistakes |
| Zucchini / Courgette | Easy | 50–55 days | 36 in. apart | Prolific producers from one plant |
| Herbs (basil, parsley, chives) | Easy | 30–40 days to useable size | 6–12 in. apart | Daily kitchen use, small footprint |
| Kale / Spinach | Easy | 40–60 days | 8–12 in. apart | Cool-season growing, long harvest |
| Cucumbers | Moderate | 50–65 days | 12 in., needs trellis | High yield once established |
| Peppers (sweet or hot) | Moderate | 70–90 days | 18 in. apart | Long season; very productive |
Start with three to five crops rather than ten. A smaller list means you can give each plant the individual attention it needs to succeed rather than dividing your time and focus across a sprawling variety of different care requirements. Once you have had one successful season, add two or three new crops the following year and build your repertoire gradually.
Seeds versus seedlings. Starting from seed is cheaper and gives you access to a wider variety of cultivars than any garden center will stock as transplants. It does, however, ask you to start indoors four to eight weeks before your last frost date and manage the extra step of hardening seedlings off (gradually acclimating them to outdoor conditions over one to two weeks before planting outside). Buying seedling transplants from a nursery skips all of that and gets you in the ground faster, at the cost of a few dollars per plant and a narrower range of varieties. For a first garden, transplants for tomatoes, peppers, and herbs are often the practical choice while you direct-sow the faster, easier crops like beans, radishes, and lettuce from seed.
Plant Seeds or Seedlings
Planting day is satisfying but also one of the most common places beginners make small mistakes that cost them weeks of growth. The two most frequent errors are planting too deep and planting too early before the last frost date has safely passed. Both are easy to avoid once you know what to look for.
Fig. 8 — Seed depth is roughly 2–3× the seed’s diameter; transplants go in at their nursery soil line except tomatoes, which root along a buried stem
Direct-seeding. Read the seed packet for the specific sowing depth; the general rule is to plant seeds at a depth of two to three times their diameter. Tiny seeds like carrot and lettuce go barely below the surface; larger seeds like beans and squash go an inch deep or a little more. After sowing, press the soil gently over the seeds to ensure contact, water lightly with a gentle spray, and mark the row so you know what is coming up. Germination timelines vary from three days for radishes to two weeks for parsley, so do not assume nothing is happening just because the soil looks bare for a week.
Transplanting seedlings. Dig a hole slightly wider and about as deep as the seedling’s root ball. Set the plant so the base of the stem sits at the same level it was in the nursery pot, neither buried below the surrounding soil nor raised above it. The exception is tomatoes: burying two-thirds of the stem, including pinched-off lower leaves, causes roots to form along the buried section and produces a dramatically stronger, more drought-resistant root system than shallow planting.
Water each transplant in well immediately after planting. A gentle pour directly at the base of the stem settles soil around the roots and eliminates any air pockets that could dry them out. Over the next few days, the plant may wilt slightly while it adjusts; this is normal and usually resolves within two to three days once roots begin drawing water from the surrounding soil.
Water the Right Way
Inconsistent watering is one of the most common hidden causes of first-garden disappointment. Overwatering drowns roots by displacing oxygen from the soil. Underwatering stresses plants at critical growth and flowering windows. Erratic watering, wet then bone dry then wet again, causes problems specific to each crop: blossom end rot on tomatoes, tip burn on lettuce, bitter flavour in cucumbers. Getting the rhythm right matters more than any other single maintenance task.
Fig. 9 — Shallow, frequent watering trains roots to stay near the surface where they are most vulnerable; deep, infrequent watering grows drought-resilient root systems
The finger test. Before reaching for the watering can, push your index finger one to two inches into the soil. If it comes out damp, skip watering. If it comes out dry and the soil surface is dusty, water now. This two-second test beats any watering schedule because it accounts for temperature, rain, and evaporation automatically.
Deep and infrequent. Once seedlings are three to four weeks old, switch from the light daily misting needed to establish seeds to a deeper, less frequent rhythm. Water until you see moisture begin to drain from the bottom of a container, or until the soil has been wetted to a depth of six to eight inches in a raised bed (stick a finger in an hour after watering to confirm). Then wait until the soil reaches the “dry two inches down” point before watering again. This rhythm encourages roots to follow moisture deeper into the soil, building the kind of deep root system that can tolerate a hot weekend without constant attention.
Time of day. Morning watering is consistently the best option. Water applied in the morning reaches roots before the heat of the day drives evaporation, and any moisture on foliage has time to dry before evening, reducing the humidity that encourages fungal disease. Watering in late evening, when moisture sits on leaves overnight, is the single most common environmental cause of fungal problems in backyard vegetable gardens.
Where to aim. Direct water at the base of plants rather than over the foliage whenever possible. Wet leaves are more susceptible to disease, and most of the water that lands on foliage evaporates before it reaches the roots where it is actually needed. A simple drip line or soaker hose directed at the root zone makes this effortless if you eventually decide to automate.
Mulch, Fertilize, and Keep Up With Maintenance
Once plants are in the ground and watered, your job becomes rhythmic maintenance rather than active building. Three habits, mulching, feeding, and weekly observation, cover the majority of what a garden needs between planting day and first harvest.
Mulching
A two to three inch layer of organic mulch, straw, shredded leaves, wood chips, or grass clippings, applied around the base of plants does four things at once: it retains soil moisture by slowing evaporation, moderates soil temperature during heat spells, suppresses weeds by blocking light at the soil surface, and gradually breaks down to feed soil biology. Keep mulch a couple of inches away from the base of each stem to prevent rot from developing where the plant meets the soil. Mulching is one of the highest-return-on-effort habits in the whole garden, and most beginners discover it later than they wish they had.
Fertilizing
If you built your bed with a generous compost proportion, you have a head start. Most vegetables in a well-amended bed can get through four to six weeks on existing nutrients alone. After that, a balanced granular fertilizer worked into the soil surface or a liquid feed applied to the root zone every two to three weeks keeps production high without the risk of nutrient burn that comes from overfeeding. Watch your leaves for early signals: pale yellowing all over signals nitrogen shortage; purple-tinged lower leaves suggest phosphorus; brown leaf edges often point to potassium. Addressing what you actually see rather than applying fertilizer on a fixed schedule avoids the equally common problem of over-fertilizing, which produces lush foliage at the expense of fruit and flowers.
Weekly Observation
The most useful maintenance habit is simply walking through your garden a few times a week and looking closely. Turn over a few leaves, check the undersides where pests hide, notice whether anything looks wilted, discolored, or chewed. Catching a small aphid colony before it becomes a large one, noticing that a plant has outgrown its support stake, or seeing that a corner of the bed is drying out faster than the rest, all of these are far easier to address when they are small. Experienced gardeners often say the best thing you can bring to a garden is your shadow, meaning the simple act of frequent presence prevents most problems from becoming serious ones.

Set It and Mostly Forget It
Raised Bed Drip Irrigation Kit
A soaker line system with a timer that waters at the root zone each morning, the single upgrade that keeps more first gardens alive through a busy summer.
Check Price on AmazonBudget-Friendly Ways to Start a First Garden
A common misconception about starting a garden is that you need to spend several hundred dollars before a single plant goes in the ground. The truth is that some of the most productive and enjoyable first gardens have started with almost nothing spent at all. Here are the approaches that reliably reduce cost without sacrificing results.
- Start small, not large. A single 4×4 raised bed, two large containers, or a six-foot in-ground row accomplishes everything a first garden needs to teach you. A smaller space costs less to build, fill, and maintain, and failure in a small space is recoverable in a way that failure across a large plot is not.
- Buy seeds, not transplants, where it is easy to do so. Beans, radishes, lettuce, cucumbers, squash, and corn are all crops that grow reliably from direct-sown seed and cost a fraction of transplant prices. Save the transplant budget for crops that genuinely benefit from a head start, like tomatoes, peppers, and eggplant.
- Get compost free or cheap. Many municipalities run composting programs where finished compost is available to residents at low cost or free. Local stables often have aged manure available for the cost of collection. Some garden centers sell “topsoil and compost” blends significantly cheaper than bagged product. Ask around before buying retail bags.
- Borrow or barter tools. Most neighbourhoods have at least one gardener happy to loan a hand fork or trowel to someone just starting out, especially if you can offer surplus seedlings or produce in return later in the season.
- Repurpose containers. Five-gallon buckets, old colanders with built-in drainage, wooden crates lined with landscape fabric, and even clean trash bins with holes drilled in the base all work as planters. The plant does not care about aesthetics; it cares about root volume, drainage, and consistent moisture.
- Save seeds for next year. From the very first season, setting aside seeds from your best-performing tomatoes, beans, and peppers costs nothing and eliminates a significant portion of next year’s seed bill while producing plants already adapted to your specific growing conditions.
| Garden Type | Realistic Startup Budget | What It Gets You |
|---|---|---|
| Containers on a balcony | $25–$75 | 2–4 large pots, seed packets, basic potting mix |
| Small in-ground patch | $10–$50 | Seeds, a bag of compost, basic tools you may already own |
| 4×4 raised bed, DIY | $60–$130 | Lumber, screws, bulk soil, and seeds |
| 4×8 raised bed kit with fill | $150–$300 | Pre-cut kit, quality fill blend, a full season of vegetables |
No Yard? Containers, Balconies, and Windowsills
Not having access to outdoor garden space is not a barrier to growing food; it simply changes which crops make sense and how much soil you are working with. Some of the most productive small gardens are grown entirely on apartment balconies, sunny rooftop corners, or even indoors on a well-lit windowsill, and the principles of sunlight, soil quality, and consistent watering apply just as directly in those settings as they do in a backyard.
What works in containers without a yard:
- Cherry tomatoes in a five-gallon minimum pot (ten-gallon preferred) on a south-facing balcony with at least six hours of direct sun
- Herbs, basil, parsley, chives, mint, and cilantro, which thrive in small pots on a sunny windowsill or balcony railing
- Leaf lettuce, spinach, and arugula in a shallow window box, ideal for partial-shade balconies that cannot support fruiting crops
- Peppers and compact bush beans in eight-to-twelve-inch pots
- Microgreens and sprouts, grown indoors in trays under any bright window, no outdoor space required at all
The biggest pitfall of container and balcony growing is underestimating how quickly containers dry out on a warm, windy day. A single large pot in direct afternoon sun can lose enough moisture to wilt a plant within hours. Daily checking and a consistent watering schedule, or a basic self-watering pot or drip timer, make the difference between a thriving balcony garden and a constant battle to keep up. Check your lease terms if you are renting before installing anything permanent; most balcony container gardens are fully portable and compliant with standard rental agreements.
For those who want to go further indoors, a grow light setup on a windowsill or shelf extends what is possible considerably, especially during winter months when natural light is too weak and too brief to support most crops. A full-spectrum LED panel provides the wavelengths plants need for genuine growth rather than mere survival.
Common Beginner Gardening Mistakes to Avoid
Most first-garden failures trace back to a short list of predictable missteps. Knowing them in advance makes it easier to avoid them, or to recognise and correct them early when they happen anyway.
Habits That Help
- Testing soil before spending anything on plants or amendments
- Starting smaller than feels comfortable; expanding next season
- Watering in the morning, at the root, not the foliage
- Checking the garden two or three times a week rather than only on weekends
- Reading plant-tag spacing as a floor, not an estimate to tighten
- Mulching within the first few weeks to lock in moisture
- Hardening off seedlings for seven to ten days before full outdoor exposure
Patterns That Sink First Gardens
- Choosing a planting spot before observing how much sun it actually gets
- Planting too many different crops and underserving all of them
- Overwatering early, which kills seedlings just as readily as drought
- Fertilising on a fixed schedule instead of reading the plant’s signals
- Planting before the last frost date has reliably passed
- Skipping mulch and then wondering why the bed dries out so quickly
- Expecting harvests too soon and giving up just before production peaks
The last point on that list is worth expanding on. Many vegetables, especially tomatoes, peppers, and cucumbers, spend the first two-thirds of their season developing roots, establishing structure, and eventually flowering before a single fruit appears. A tomato plant that has been in the ground for six weeks with no visible fruit is not failing; it is building infrastructure. Patience through the slow middle stretch is the underappreciated skill that separates gardeners who stick with it from those who pull plants out a week before they would have started producing.
Quick Seasonal Reference Guide
What to do and when to do it depends heavily on your local frost dates, which are freely available from your county extension service or by searching your postal code at any weather-data site. Use the table below as a starting framework, then adjust the specific timings by checking your first and last frost dates.
| Season / Period | Key Tasks | What to Plant (Temperate Zone) |
|---|---|---|
| Late Winter (6–8 wks before last frost) | Start tomatoes, peppers, eggplant, and herbs indoors under grow lights | Seed trays indoors only |
| Early Spring (3–4 wks before last frost) | Direct sow cold-tolerant crops; prepare and fill beds | Peas, spinach, kale, radishes, lettuce |
| Late Spring (after last frost) | Transplant warm-season seedlings; direct sow warm-season seeds | Tomatoes, peppers, beans, cucumbers, squash, zucchini |
| Early Summer | Mulch beds; set up supports and trellises; water consistently | Succession-sow lettuce and beans every 2–3 weeks |
| Midsummer | Harvest regularly to keep plants producing; watch for pests and disease | Second sowing of fast crops for fall harvest |
| Late Summer / Early Autumn (6–8 wks before first frost) | Direct sow cool-season crops for autumn harvest | Kale, spinach, garlic, lettuce, arugula, brassicas |
| Autumn / First Frost | Harvest remaining crops, pull spent plants, add compost to beds | Final harvests; protect cold-tolerant crops with row cover |
| Winter | Plan next year’s garden; order seeds; improve beds with winter mulch | Indoor sprouts and microgreens only |
Recommended Tools & Supplies for a First Garden
Everything covered throughout this guide condenses to a short shopping list. Linking each category to Amazon makes it easy to compare options without visiting multiple stores; the selections below represent well-reviewed, entry-level choices that will serve a first garden without overspending.

Most Reached-For Tool
Stainless Steel Trowel & Hand Fork Set
A matched pair with comfortable grips and depth markings on the trowel blade, the most practical two-piece starter set for raised beds or containers.
Check Price on Amazon
For Starting Indoors
Seed Starting Tray Kit with Dome & Heat Mat
A clear dome traps humidity during germination and a heat mat keeps soil at the ideal temperature for fast, reliable sprouting. The most common first-season upgrade.
Check Price on Amazon
The High-Return Habit
Compressed Straw Mulch for Garden Beds
A compressed straw bale that expands dramatically on application. Retains moisture, suppresses weeds, and moderates soil temperature through the hottest weeks.
Check Price on Amazon
Simple and Effective
Balanced Granular Vegetable Fertilizer
A slow-release granular blend formulated for vegetables. Applied every four to six weeks, it covers the nutrition gap between what compost provides and what heavy-producing crops need.
Check Price on AmazonFrequently Asked Questions
How much does it cost to start a garden from scratch?
Costs vary widely by method. A few containers with potting soil and a handful of seed packets can get you growing for well under fifty dollars, while a single 4×8 raised bed with lumber, soil, and compost typically runs somewhere in the one hundred fifty to three hundred dollar range. In-ground gardens are often the cheapest to fill since you are amending soil that is already there, though you may spend more on tools upfront. Starting small and expanding each season is the most budget-friendly path for almost everyone.
What is the best season to start a new garden?
For most climates, the window right after your last expected frost in spring is the easiest time to begin, since soil has warmed and the growing season stretches ahead of you. Early autumn is also a quietly underrated time to prepare beds and plant cool-season crops like lettuce, spinach, and garlic, since the ground is workable and pest pressure is lower. The right season depends more on your local frost dates and what you intend to grow than on a fixed calendar rule.
Do I really need to test my soil before planting?
You do not strictly need to, but skipping it is one of the most common reasons new gardens struggle. A simple test tells you whether your soil drains too fast, holds too much water, or is missing nutrients your plants will need within the first few weeks. Cheap at-home kits or a mason jar test will catch the biggest problems, and a lab test through your local extension office gives precise numbers if you want to go further.
What is the easiest type of garden bed for a complete beginner?
Raised beds and containers are generally the most forgiving for first-timers because you control the soil completely from day one rather than fighting whatever is already in your yard. In-ground gardens can be just as productive and are usually cheaper to start, but they ask a little more patience while you improve native soil over a season or two.
How many hours of sunlight does a vegetable garden need?
Most fruiting vegetables, including tomatoes, peppers, and squash, want six to eight hours of direct, unobstructed sun, generally called full sun. Leafy greens, herbs, and root vegetables are more flexible and will still produce in four to six hours, often described as partial sun or partial shade. Mapping your yard’s light before you build anything saves you from putting a tomato bed in a spot that cannot support it.
Can I start a garden with zero prior experience?
Yes, and most experienced gardeners started exactly the way you are now. The steps in this guide are designed to be followed in order with no prior knowledge assumed, and choosing a smaller first garden lets you learn the rhythm of watering, feeding, and harvesting without feeling overwhelmed.
What are the easiest vegetables for a first-time gardener?
Bush beans, radishes, leaf lettuce, zucchini, and cherry tomatoes are consistently forgiving choices because they germinate reliably, tolerate minor watering mistakes, and reward you with a harvest relatively quickly. Starting with three or four of these rather than a dozen different crops keeps your first season manageable.
How often should a brand-new garden be watered?
Freshly sown seeds and new transplants need light, frequent watering — often once a day in warm weather — to keep the top few inches of soil consistently damp while roots establish. Once plants are several weeks old, switching to deeper, less frequent watering encourages roots to grow downward instead of staying near the surface.
Do I need to fertilize a brand-new garden bed right away?
If you built your bed with a generous mix of finished compost, you likely have enough nutrition to carry young plants for several weeks without additional fertilizer. Native in-ground soil that has not been amended, or a container filled with bagged potting mix, usually benefits from a balanced starter fertilizer at planting time and then again every few weeks as plants grow.
Can I start a garden without a yard at all?
Absolutely. A sunny balcony, patio, windowsill, or even a single bright doorway is enough space for containers, a small herb garden, or microgreens grown entirely indoors. Many of the same principles in this guide — sunlight, soil quality, and consistent watering — apply just as directly to a five-gallon bucket on a balcony as they do to a backyard plot.
Final Thoughts: Your First Garden Starts This Week
Every experienced gardener you have ever admired made every single mistake covered in this guide at least once, probably more than once. The difference between a gardener who gives up after a difficult first season and one who comes back with a bigger, better garden the following spring is almost never skill. It is almost always the decision to start small enough that early mistakes are recoverable, and to stay curious rather than discouraged when something does not go as planned.
You now have everything you need to choose a site, understand your soil, pick a bed style, select a short list of forgiving crops, and keep them alive from planting to harvest. The sequence matters, and you have it. The rest, the plant-specific knowledge, the seasonal rhythms, the pest identification, the seed-saving, accumulates naturally season by season in a way no guide can fully front-load.
Start this weekend. Pick the sunniest spot you have. Buy a single bag of compost, a packet each of lettuce and beans, and one cherry tomato transplant. That is genuinely enough to begin. Everything else can be added as you learn what your particular space and your particular gardening rhythm actually call for.
For ongoing guidance season by season, the full library of articles at Gardening at Home covers everything from extending the season with row covers to saving tomato seeds from your best performers. We will be here for every step that comes after this one.
Ready to put it all into practice?
Save this guide, grab a trowel, and go choose your spot. Your first garden is closer than it looks from here.
More Guides at Gardening at Home →