Pick up almost any struggling houseplant and there’s a reasonable chance the pot is the problem — not the watering, not the fertilizer, not the light. Container size is the silent variable that controls how fast roots grow, how long soil stays moist, and whether a plant can ever reach its potential. Too small and the roots strangle themselves. Too large and they sit in soggy soil for days after every watering, slowly rotting.
This guide walks you through exactly how to choose the right pot size for every plant you own — from tiny succulents to fruiting tomatoes — using a clear step-by-step process, plant-specific size charts, and the kind of detailed reasoning that transforms a guess into a genuinely informed decision.
🪴 Pot Size at a Glance — Diameter to Plant Type
Why Pot Size Matters More Than You Think
Most gardening advice focuses heavily on the right soil, the right water, and the right light. Pot size gets far less attention — yet it quietly dictates the effectiveness of all three of those variables. A pot is not just a vessel; it’s a controlled ecosystem that determines how much oxygen reaches roots, how long water lingers before draining, and how much physical space a root system has to expand and gather nutrients.
Here is the core principle every container gardener needs to understand: the volume of growing medium in a pot and the volume of root mass inside it must be in appropriate proportion to each other. When too much soil surrounds too few roots, the excess soil acts as a reservoir of moisture that the roots can’t absorb fast enough. That waterlogged soil becomes anaerobic — oxygen-depleted — and creates the conditions where Pythium and Phytophthora (the fungal organisms responsible for root rot) thrive.
Conversely, when too many roots occupy too little soil, the plant essentially runs out of growing medium. It has nowhere to push new roots, the potting mix dries out within a day of watering, and the plant can no longer access the nutrients locked in those tiny volumes of rapidly-depleted soil. This state — being root-bound — is the single most common reason container plants stop growing or begin to decline in experienced gardeners’ homes.
Getting pot size right isn’t about following a rigid formula. It’s about understanding what plants actually need from their container and matching the container to those needs. That begins with knowing your plant and reading its signals — skills that this guide is designed to build. For a full foundation on container growing, the complete home gardening guide covers the broader principles that make every specific decision like this one more intuitive.
The Master Pot Size Chart
Before diving into the step-by-step process, here’s a reference chart that covers the most common plants and their ideal container dimensions. Use this as a starting point — the following sections explain the reasoning behind each category in detail.
| Plant Type | Min. Pot Diameter | Min. Pot Depth | Gallon Volume | Notes |
|---|---|---|---|---|
| Succulents / cacti | 4–6 inch | 4–5 inch | 0.5–1 gal | Snug fit preferred; terracotta ideal |
| Herbs (basil, parsley, thyme) | 6–8 inch | 6 inch | 1–2 gal | Cilantro needs deeper; mint spreads |
| Lettuce / spinach | 8–12 inch | 6–8 inch | 2–3 gal | Shallow but wide works well |
| Pepper (small) | 10–12 inch | 10 inch | 3–5 gal | Compact varieties in 3 gal minimum |
| Pepper (large / bell) | 12–14 inch | 12 inch | 5–7 gal | Bigger pot = more fruit per plant |
| Tomato (determinate) | 12 inch | 12 inch | 5 gal | Minimum for any fruiting tomato |
| Tomato (indeterminate) | 16–18 inch | 16 inch | 10–15 gal | 20 gal preferred for best yield |
| Pothos / philodendron | 6–10 inch | 6–8 inch | 1–3 gal | Up-pot only when root-bound |
| Snake plant | 6–10 inch | 8 inch | 1–3 gal | Tight pots encourage flowering |
| Peace lily | 8–12 inch | 8 inch | 2–4 gal | Prefers to be slightly root-bound |
| Monstera deliciosa | 10–16 inch | 10–14 inch | 3–8 gal | Grows into large pot over time |
| Fiddle leaf fig | 10–14 inch | 12 inch | 5–10 gal | Sensitive to oversizing — go slow |
| Dwarf citrus | 16–20 inch | 16 inch | 10–15 gal | Heavy container; use wheeled base |
| Microgreens | Any width | 2–3 inch | Any | Very shallow trays work perfectly |
These dimensions are guidelines built from the root architecture of each plant type. The steps below explain exactly how to arrive at these numbers — and how to adapt them when you’re dealing with a plant that doesn’t fit a neat category.
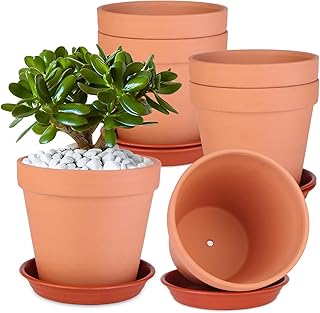
The ideal starter set for building a range of pot sizes. Unglazed terracotta breathes freely, regulates moisture, and works beautifully for herbs, succulents, and smaller houseplants.
Check Price on Amazon →Know Your Plant’s Root Type
Every pot sizing decision begins with one question: what kind of root system does this plant have? Root architecture determines both the minimum depth and the minimum width a container must provide. Getting this wrong at the start means every other sizing decision is built on a faulty foundation.
There are three broad root type categories for container gardening purposes:
Shallow fibrous roots spread wide rather than deep. Succulents, most lettuces, herbs like basil and thyme, and most grasses fall into this category. They do best in wide, shallow containers — a 12-inch wide, 6-inch deep planter will outperform a narrow, 12-inch deep one for these species.
Medium taproot systems combine a central tap with lateral branching. Most houseplants, peppers, and many tropical foliage plants have this root architecture. They need containers with balanced proportions — both width and depth matter equally.
Deep taproot systems drive downward first and need genuine depth to perform. Tomatoes, carrots, parsnips, and most large fruiting crops need pots that are at least as deep as they are wide — and for tomatoes, deeper is almost always better.
Misidentifying root type leads to classic container mistakes: growing carrots in a shallow pot (they fork and distort), growing lettuce in a deep narrow planter (wasted depth, insufficient width, waterlogging), or putting succulents in a generous deep pot that keeps their roots perpetually damp.
Measure the Current Root Ball
For plants that are already growing — being moved from a nursery container or repotted from an existing home setup — the most accurate way to determine the right new pot size is to measure the current root ball directly. This takes thirty seconds and eliminates all guesswork.
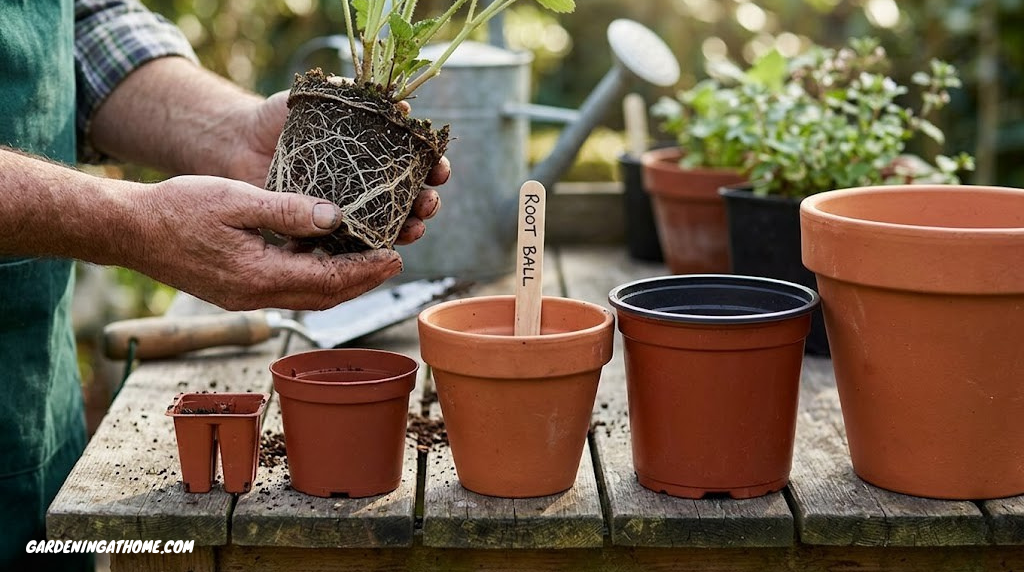
To measure a root ball: gently tip the plant out of its current container (squeeze the sides of a plastic pot to loosen, or use a blunt knife to run around the inside of a clay pot). Once the root ball is exposed, measure its diameter at the widest point. That measurement — combined with your plant’s root type from Step 1 — tells you the exact specifications for your new pot.
For seedlings or bare-root transplants where there’s no existing pot to reference, measure the spread of the root system when laid flat. The new pot should be comfortably wider than that spread on all sides.
Most plants: new pot should be 1–2 inches wider in diameter than the root ball. Fast-growing or large tropical plants: 2–4 inches wider. Succulents and cacti: 1 inch wider only — they genuinely prefer the snug fit.
If you can’t remove a plant from its pot without risk of damage (large established specimen, delicate root system), look at the base. Roots visibly emerging from drainage holes is a reliable proxy for a root ball that has fully colonized its container and is ready for a size up.
Choose the Right Width (and Avoid Going Too Big)
Armed with your root ball measurement and root type identification, you can now select a pot width with confidence. The “1–2 inches wider” rule covers most situations, but there are meaningful refinements based on plant behavior and growth rate.
The “too large” scenario deserves special attention because it’s a trap many well-intentioned gardeners fall into. The reasoning sounds logical: give the plant more room and it will grow bigger. But more soil volume means more water-holding capacity — and those outer zones of soil, untouched by any roots, will stay wet for days or even weeks after watering. That persistently waterlogged soil creates exactly the conditions that rot pathogens love.
For most plants, sizing up by more than 2 inches in diameter at a time is counterproductive. If you want to go from a 6-inch to a 10-inch pot, do it in stages: 6 → 8, then 8 → 10 at the next repotting interval. The exception is when you’re dealing with genuinely fast-growing tropicals or outdoor vegetable crops that will fill a container’s root zone rapidly within a single season.
Check Drainage First — Always
No pot size decision is complete without confirming adequate drainage. A correctly-sized pot with poor drainage will kill a plant just as reliably as the wrong size. Drainage holes are not optional for the vast majority of plants — they are structural requirements that allow excess water to escape rather than saturate the root zone.
Placing gravel, pebbles, or pot shards at the bottom of a container to “improve drainage” is one of the most persistent myths in gardening. It actually creates a perched water table — water accumulates just above the gravel layer because it’s moving from one particle size to another. This saturates the bottom of the soil layer, exactly where roots sit. Skip the gravel. Use a pot with adequate drainage holes and place a piece of window mesh or a single pot shard over each hole to prevent soil loss.
For pots without drainage holes — decorative cachepots, glass terrariums, or repurposed containers — the solution is either to drill drainage holes (a 1/4-inch masonry bit works on ceramic and clay), use a nursery pot inside the decorative outer pot, or choose only extremely drought-tolerant plants like cacti and succulents that can handle temporary waterlogging. Even then, careful watering technique becomes critical. For watering guidance that keeps any container’s moisture balance right, our article on signs of overwatering vs underwatering covers exactly what to look for.

Fabric pots air-prune roots naturally, eliminating circling root syndrome and promoting healthier, denser root systems. Perfect for tomatoes, peppers, and herbs on patios or balconies.
Check Price on Amazon →Match Pot Material to Plant Needs
The material a pot is made from significantly affects the moisture and temperature environment inside it — two variables that interact directly with your plant’s root system. Same size, different material: the plant may need watering twice as often or half as often. Understanding material properties lets you make an informed choice rather than picking purely on aesthetics.
Terracotta / Unglazed Clay
Best for: succulents, cacti, Mediterranean herbs, moisture-sensitive plants. Dries quickly, breathes freely, and regulates soil temperature. Heavier and can crack in hard frost.
Plastic
Best for: tropical houseplants, ferns, moisture-loving species. Lightweight, inexpensive, retains water well. Less breathable, so risks waterlogging if drainage holes are inadequate.
Glazed Ceramic
Best for: medium-moisture plants, decorative indoor use. The glaze significantly reduces breathability compared to terracotta. Heavy but frost-resistant glazed versions exist.
Fabric / Grow Bags
Best for: vegetables, fruiting plants, outdoor containers. Air-prunes roots naturally, preventing circling and promoting dense, healthy root networks. Dries very fast — may need daily watering in summer.
Wood
Best for: large outdoor planters, raised bed boxes. Breathable but eventually decomposes — untreated pine lasts 2–3 years. Cedar and teak last much longer without chemical treatment.
Fiberglass / Resin
Best for: large statement containers, architectural planters. Lightweight despite appearance, frost-safe, very little breathability but good durability. Ideal for large tropical specimens.
If you’re growing plants on an apartment balcony where weight is a real constraint, plastic, fabric, and fiberglass containers are your most practical options. Our detailed guide to balcony gardening ideas for apartments addresses the structural, weight, and wind considerations that affect container selection in high-rise situations.
Repot with Confidence — Technique Matters
Even with the perfect pot selected, a bad repotting technique can set a plant back weeks or cause transplant shock that looks indistinguishable from poor pot sizing. Here is the process that minimizes stress and gives your plant the best possible start in its new container.
The repotting sequence that works for most plants:
- Water 24 hours before repotting. Moist soil clings to roots better than dry soil, reducing root disturbance during the move. A dry root ball crumbles, exposing fine roots to air damage.
- Cover the drainage holes with a small piece of window screen or landscape mesh — not gravel, as explained in Step 4.
- Add a base layer of potting mix to the new container. The depth of this layer determines where the root ball will sit — aim for the crown (where stem meets roots) to land 1 inch below the rim of the new pot, leaving room for watering.
- Remove the plant from its old container by squeezing the sides, inverting it, and supporting the root ball. For large plants, lay the container on its side.
- Gently loosen the outer roots if they’ve become tightly circling. Straighten any roots growing in circles — left uncorrected, these can eventually girdle the plant and restrict water and nutrient flow.
- Center the root ball in the new pot and backfill with fresh potting mix, firming gently but not compacting. Leave the 1-inch gap between the soil surface and the rim.
- Water thoroughly until water drains from the bottom. This settles the mix around the roots and eliminates air pockets.
The quality of potting mix you use at repotting time directly affects how quickly roots establish in the new container. A well-draining, nutrient-rich mix designed for the plant type you’re growing gives roots the optimal environment to colonize their new space quickly. For detailed guidance on selecting mixes, see our comprehensive guide to the best potting soil mix for indoor plants.
Place the newly repotted plant in a location with consistent light but protect it from direct intense sun for the first week — the root system needs time to establish in the new medium before supporting maximum water uptake. Hold off on fertilizing for 4–6 weeks after repotting; fresh potting mix contains enough nutrients to sustain the plant while roots establish.

One of the most recommended all-purpose mixes for repotting houseplants and outdoor containers. Balanced drainage, organic nutrition, and consistent texture that works across most container plant types.
Check Price on Amazon →Pot Sizes for Vegetables: Growing Food in Containers
Vegetable gardening in containers has specific pot-size dynamics that differ from ornamental growing. Fruiting crops need depth and volume for root mass, nutrient reserves, and water retention through the long growing season. Getting undersized with vegetable containers is one of the most common reasons for disappointing yields.
The following size recommendations are for single-plant containers. You can grow multiple plants per container — scale up accordingly, and be aware that competing root systems will perform better with more soil volume per plant than these minimum single-plant figures suggest.
Tomatoes deserve special mention: they are consistently the most undersized vegetable in container gardens. A 5-gallon pot will produce tomatoes — but a 10-gallon pot of the same variety will produce dramatically more fruit, resist drought stress better, and maintain productivity later into the season. If you’re serious about container tomato yields, our dedicated guide to growing tomatoes on a balcony covers everything from variety selection to feeding schedules that maximize what your containers produce.
For beginning vegetable gardeners who want to start with the easiest, most forgiving crops, our roundup of the easiest vegetables to grow in pots focuses on crops that are forgiving of minor pot-size mistakes and still deliver satisfying harvests from modest containers. If microgreens interest you — one of the few food crops that actually thrives in tiny, shallow containers — the guide to growing microgreens at home without soil walks through the minimal setup that produces surprisingly productive results.
Large vegetable containers dry out faster than you might expect in warm weather — especially fabric grow bags and terracotta. Tomatoes in 10-gallon fabric pots may need watering daily, or even twice daily, during peak summer. Installing a simple drip irrigation system solves this completely and often improves yields by maintaining consistent moisture rather than the wet-dry cycles that stress fruiting plants.

These heavy-duty fabric bags with handles are ideal for large vegetable crops. The BPA-free geotextile fabric air-prunes roots and dramatically improves drainage compared to hard-sided containers the same size.
Check Price on Amazon →Pot Sizes for Houseplants: Indoor Container Essentials
Houseplants have different container priorities than outdoor crops. Most tropical houseplants are grown for long-term display — they may live in the same pot for 1–3 years between repottings, and they tend to be somewhat more tolerant of being root-bound than fruiting vegetables. Some, like peace lilies, snake plants, and spider plants, actually perform better (flower more reliably) when slightly root-bound.
| Houseplant | Starting Pot Size | Mature Pot Size | Repot Frequency | Tip |
|---|---|---|---|---|
| Pothos | 4–6 inch | 8–10 inch | Every 1–2 years | Extremely forgiving of pot size; tolerates rootbound conditions well |
| Snake plant (Sansevieria) | 4–6 inch | 8–10 inch | Every 2–3 years | Blooms more when snug; use heavy pot to prevent tipping |
| Peace lily | 6 inch | 10–12 inch | Every 1–2 years | Wilts dramatically when root-bound; flowers when slightly pot-bound |
| Monstera deliciosa | 8–10 inch | 14–18 inch | Every 1–2 years | Fast grower; watch for roots at drainage holes |
| ZZ plant | 6 inch | 10–12 inch | Every 2–3 years | Stores water in rhizomes; slow-growing, prefers snug pot |
| Fiddle leaf fig | 10 inch | 14–16 inch | Every 1–2 years | Highly sensitive to oversizing — go 1 size at a time only |
| Spider plant | 4–6 inch | 8–10 inch | Every 1–2 years | Produces more babies when slightly root-bound |
| Rubber plant (Ficus elastica) | 8 inch | 12–16 inch | Every 1–2 years | Can become very large; use a weighted base once established |
For low-light areas of your home — north-facing rooms, interior corners, dimly lit offices — the right container choice pairs with the right species selection. Our guide to best indoor plants for low light lists specific species that genuinely thrive in those conditions, along with their ideal container sizing. Similarly, if you’re selecting houseplants for their air-filtering properties, indoor plants that purify the air covers which species are most effective — and the right pot sizes for maintaining their health and maximum efficacy.
For herbs grown indoors — where container size directly affects harvest volume — a dedicated indoor herb garden setup benefits from sizing each herb to its specific growth habit. Our complete guide to starting an indoor herb garden covers pot sizing, window placement, and the varieties that produce most reliably when grown in containers on a kitchen windowsill.
Common Pot Sizing Mistakes (and How to Avoid Them)
Even experienced gardeners make container sizing errors — often because the consequences unfold slowly and get misattributed to other causes like pests, watering, or light. Here are the most common mistakes and their telltale symptoms.
| Mistake | Symptom | Fix |
|---|---|---|
| Pot too large (oversizing) | Yellowing leaves, wilting despite moist soil, mushy roots when inspected, slow or no growth | Downsize to a more appropriate container; improve drainage; reduce watering frequency |
| Pot too small (underpotting) | Rapid wilting after watering, roots circling at surface or emerging from drainage holes, stunted growth | Repot to 1–2 inches larger diameter; gently straighten circling roots before repotting |
| Wrong depth for root type | Carrots that fork, succulents that rot, shallow herbs drying out constantly | Match depth to root architecture: shallow for fibrous roots, deep for taproots |
| Gravel layer at bottom | Consistently wet lower soil, yellowing lower leaves, root rot despite “good drainage” | Remove gravel, replace with correct potting mix, ensure drainage holes are clear |
| Skipping one pot size | Soggy soil for weeks, slow root establishment, plant looks unhappy despite correct watering | Repot incrementally — never jump more than 2 inches in diameter at once for most plants |
| Wrong material for plant type | Succulents in glazed ceramic rotting; moisture-lovers in terracotta wilting daily | Match material to plant’s moisture needs as detailed in Step 5 |
Problems caused by poor pot sizing are often diagnosed as overwatering or underwatering — and then “fixed” with more or less water, which compounds the problem. If your watering technique is consistent and your light is appropriate but a plant still struggles, the container is frequently the variable to investigate. Our guide to signs of overwatering vs underwatering can help distinguish moisture stress from root-stress caused by wrong container sizing, as they share symptoms but require different interventions. Fungus gnats — a common nuisance in containers — are also directly related to chronically oversized pots keeping soil wet. See our article on how to get rid of fungus gnats naturally for solutions that address both the insects and the underlying moisture conditions that encourage them.
When to Repot: Recognizing the Signs Before It’s Too Late
Repotting at the right time — not too early, not too late — is as important as choosing the right size when you do repot. Doing it too early disrupts a plant that hasn’t yet colonized its current container. Doing it too late means weeks or months of a plant struggling in cramped conditions, possibly developing root girdling that takes years to correct even after repotting.
Reliable Signals That a Plant Needs Repotting
🔍 Clear Signs — Repot Soon
- Roots growing out of drainage holes
- Roots circling visibly at the soil surface
- Plant wilts within 24 hours of thorough watering
- Water runs straight through without being absorbed
- The plant has lifted itself up in the pot (roots pushing the root ball upward)
- Growth has noticeably slowed or stopped in an otherwise healthy growing season
⏳ Wait — Repot Not Yet Needed
- Plant is actively flowering or setting fruit (repotting stress may cause flower drop)
- It’s the middle of winter for most houseplants
- Plant is newly purchased and still acclimating
- You repotted less than 6 months ago
- Plant species prefers to be slightly root-bound (peace lily, snake plant, spider plant)
- Growth is continuing normally and watering frequency is stable
The best time to repot most plants is in early spring, just as new growth begins to emerge. This aligns repotting with the plant’s active growth phase, so it can quickly establish roots in its new container rather than sitting in fresh soil through the slow winter period.
After repotting, nutrition becomes important quickly — the fresh potting mix will sustain a plant for a month or two, but after that, regular feeding supports the new root growth that’s colonizing the larger container. Our guide on how and when to fertilize houseplants explains what to feed, at what stage, and how to avoid the over-fertilizing that often follows repotting when gardeners are enthusiastic about supporting a newly potted plant.
If you’re newer to container gardening and want to start simple before building to this level of detail, exploring cheap gardening ideas for beginners will show you that excellent container results don’t require expensive setups — the principles above work just as well in repurposed containers as in premium ceramic pots. More broadly, the entire journey from choosing a first plant to understanding its container requirements is covered in our beginner’s guide on how to start a garden from scratch.

Eliminates the biggest risk of oversized pots — inconsistent watering. The reservoir delivers water from below as the soil dries, keeping moisture levels consistent without waterlogging the root zone.
Check Price on Amazon →Frequently Asked Questions
What happens if a pot is too big for a plant?
A pot that is too large holds excess soil that stays wet long after watering, creating conditions for root rot. The plant also redirects energy into root expansion rather than flowering, fruiting, or foliage growth, resulting in disappointing above-ground performance.
What happens if a pot is too small?
A pot that is too small restricts root growth, causes the plant to become root-bound, dries out extremely quickly, and starves the plant of nutrients. Symptoms include roots growing out of drainage holes, wilting shortly after watering, and stunted or declining growth.
How much bigger should a new pot be than the old one?
For most plants, the new pot should be 1–2 inches wider in diameter than the current container. For fast-growing plants or those you want to size up significantly, 2–4 inches wider is appropriate. Never jump more than one pot size at a time for slow-growing or sensitive plants.
Does pot depth matter as much as width?
Yes, but it depends on the plant. Deep-rooted plants like tomatoes and carrots need depth as much as width. Shallow-rooted plants like lettuce and succulents perform best in wide, shallow containers. Matching depth to root type prevents waterlogging in the lower portions of an oversized deep pot.
Is terracotta or plastic better for container gardening?
Neither is universally better — it depends on the plant and climate. Terracotta is breathable and dries quickly, which is ideal for succulents, cacti, and Mediterranean herbs. Plastic retains moisture longer, which suits tropical plants and ferns. In hot, dry climates, plastic may actually require less frequent watering for moisture-loving plants.
How do I know when a plant needs repotting?
Signs a plant needs repotting include: roots growing out of drainage holes, roots circling visibly at the soil surface, the plant wilting rapidly after watering, significant decline in growth rate, or the plant becoming visibly top-heavy and unstable in its current pot.
Can I use any container as a plant pot?
Almost any container can be used if it has or can be given adequate drainage holes. The key constraints are drainage (non-negotiable for most plants), material safety (avoid containers previously holding chemicals), and sufficient volume for the root system. Repurposing colanders, crates, and wooden boxes is entirely viable with the right liner and drainage.
Do succulents and cacti need special pot sizes?
Succulents and cacti actually prefer snug pots — a container just 1 inch wider than the root ball is ideal. Large pots hold too much moisture for their drought-adapted root systems, dramatically increasing the risk of root rot. Wide, shallow pots work well for most succulent varieties.
What size pot do tomatoes need?
Tomatoes need at minimum a 5-gallon pot for determinate (bush) varieties and a 10–15 gallon container for indeterminate (vining) varieties. Bigger is always better for tomatoes — a 20-gallon container produces significantly more fruit than a 5-gallon equivalent of the same variety.
Should I put gravel at the bottom of a pot for drainage?
No — this is a widely repeated myth that actually worsens drainage. A layer of gravel at the bottom creates a perched water table, meaning water accumulates just above the gravel layer and saturates the roots before draining. Use a pot with adequate drainage holes instead, covered with landscape mesh to prevent soil loss.
How often should I repot my plants?
Most houseplants benefit from repotting every 1–2 years. Fast-growing plants like pothos, tomatoes, and tropical aroids may need annual repotting. Slow-growing succulents and cacti can stay in the same pot for 3–5 years. Always repot based on root behaviour rather than a fixed calendar schedule.
What is the best time of year to repot plants?
Early spring is the best time to repot most plants, just before the active growing season begins. This allows the plant to quickly establish roots in its new container before the period of strongest growth. Avoid repotting in winter (when most plants are dormant) or during the peak of summer heat stress.
Conclusion: The Right Pot Changes Everything
Container size is one of those foundational gardening decisions that shapes every subsequent outcome — how often you water, how much the plant grows, whether it flowers, and whether it survives the season. Once you understand the six steps covered in this guide, choosing the right pot for any plant becomes a quick, confident decision rather than a gamble.
Start with the root type. Measure the root ball. Select the right diameter. Confirm drainage. Match material to moisture needs. Repot with proper technique. Follow those steps in sequence and the container will work with your plant’s biology rather than against it.
The plants you’ve been struggling with in wrong-sized containers will often recover dramatically once correctly potted — and the plants you pot correctly from the start will outperform your expectations from the very first growing season. Browse more growing guides, or start with the complete foundation if you’re newer to the hobby.
Start Your Garden from Scratch →