Start Gardening for Almost Nothing — 34 Budget Ideas That Actually Work
You don’t need an expensive toolkit or a big backyard. These practical, proven ideas help beginners grow food, flowers, and green spaces on the tightest possible budget.
Gardening Is One of the Last Hobbies Where Starting for Free Is Actually Possible
Most hobbies have a floor — a minimum spend before you can get started at all. Photography needs a camera. Woodworking needs tools. Cooking needs a kitchen. Gardening is different. A seed, a container, some soil, some sunlight, and some water: that’s the entirety of what you need to grow something that feeds you or brings you genuine satisfaction. Everything else is a nice-to-have.
The gardening industry is well aware of how easy it is to sell to beginners who don’t yet know what they actually need. Raised bed kits, specialist seed starting trays, soil conditioners, custom grow lights — the list of things retailers want you to buy before you’ve even grown your first radish is long and expensive. None of it is essential.
This guide is written for the person who either can’t or doesn’t want to spend much to get started. You’ll find ideas that cost nothing at all, ideas that cost a few dollars, and guidance on where your very limited budget is worth spending versus where you’re being sold something you don’t need. Whether you have a garden, a balcony, a windowsill, or just a sunny wall, there’s a way to start growing for close to nothing.
The most important gardening truth for beginners: the cheapest possible action is to start. A seed costs pennies. Soil can be free. A container can be a yogurt pot. The only irreplaceable resource is time — and that, too, costs nothing.
The Budget Gardener Mindset — What Changes Everything
Before we get into specific ideas, it helps to understand the thinking that separates experienced budget gardeners from beginners who spend too much and give up. The shift isn’t about being frugal for its own sake — it’s about recognising that gardening’s fundamental inputs are mostly free, and that most of the paid alternatives are solutions to problems you haven’t encountered yet.
Buy Once, Grow Forever
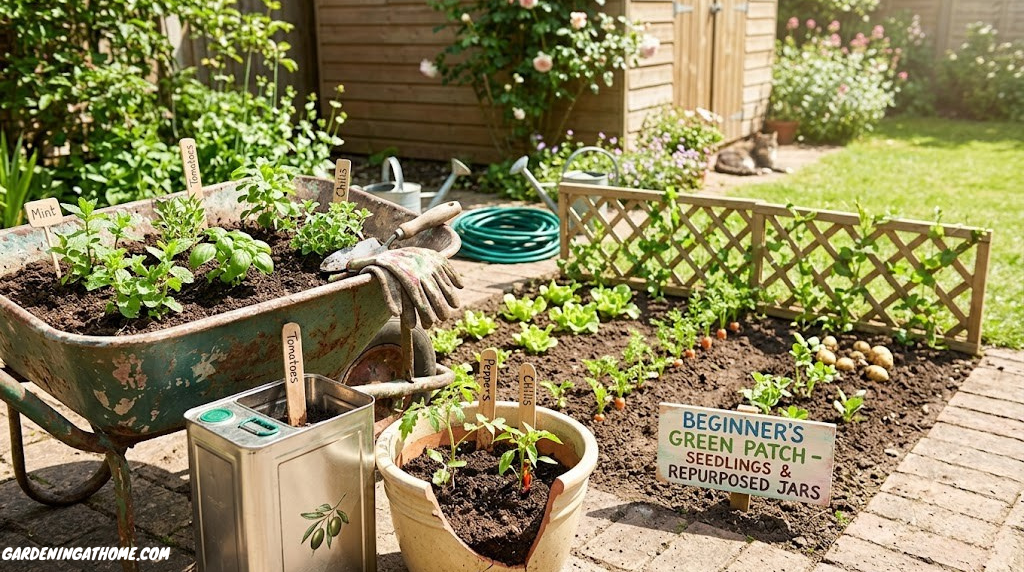
The most important budget principle in gardening is the difference between spending on things that compound over time and spending on consumables you’ll keep buying. Seeds from good-quality open-pollinated or heirloom varieties can be saved every season and replanted indefinitely, for free, forever. Hybrid seeds (usually labelled F1) won’t reliably reproduce true to type, so you’d need to buy again. This single distinction — open-pollinated vs. hybrid — makes a meaningful long-term cost difference.
Similarly, a good compost bin, even a basic homemade one, pays for itself in the first season and continues producing free, high-quality soil amendment every year. Learning to save seed, make compost, and take cuttings transforms your garden from a cost centre into something that largely sustains itself.
The Free Economy of Gardeners
Gardeners have always had a sharing culture. Seed swaps, cutting exchanges, community composting, plant sales at church fetes and school fundraisers — this informal economy of free and very cheap plant material is remarkably robust. Online communities (Nextdoor, local Facebook groups, Reddit’s r/planting) have made it even easier to connect with local gardeners who regularly give away seedlings, excess harvests, and plants they’re dividing. This is worth exploring before spending a single penny on plants or seeds.
To get your bearings on what’s genuinely needed vs. what’s nice to have, our guide to essential gardening tools for beginners cuts through the clutter with an honest starter kit that fits most budgets.
Free Gardening Ideas — Things That Cost Absolutely Nothing
Let’s start with the ideas that genuinely cost zero. Not “nearly free” or “very affordable” — actually free. These are the building blocks of budget gardening and the starting point for anyone who wants to grow without spending.
Free Seeds and Propagation
1. Save Seeds from Kitchen Vegetables
Before you throw away tomatoes, squash, peppers, or pumpkins, scoop out the seeds. Rinse them, lay them flat on a piece of kitchen towel, let them dry for a week, and store in a labelled paper envelope. Tomato seeds, chilli seeds, courgette seeds, and pumpkin seeds all germinate reliably from kitchen scraps if the fruit was ripe. This is genuinely one of the most productive free gardening actions a beginner can take. The only caveat: seeds from hybrid supermarket vegetables may not grow true-to-type, but they’ll still produce edible plants worth experimenting with.
2. Regrow Kitchen Scraps in Water
Spring onions, celery, lettuce, leeks, and fennel will all regrow from their cut bases in a glass of water on a sunny windowsill. This isn’t a long-term production system, but it’s an entirely free way to get weeks of additional harvest from vegetables you’d otherwise discard. Spring onions are the most reliable — cut them about 2cm above the roots, place in shallow water, and they’ll regrow full-length in a week or two. This is also a wonderful way to build gardening confidence before graduating to soil-based growing.
3. Take Stem Cuttings from Friends’ Gardens
Many garden plants — mint, rosemary, pelargoniums, fuchsias, lavender, hydrangeas, and dozens of perennials — root readily from stem cuttings. A 10cm cutting taken from just below a leaf node, stripped of lower leaves, and placed in a glass of water or a pot of damp perlite will often develop roots within two to four weeks. This is how gardeners have always propagated their favourites. Ask friends, neighbours, or local gardening groups if they have anything that needs cutting back — you’ll rarely get a no.
4. Attend or Organise a Local Seed Swap
Seed swaps happen regularly in community centres, libraries, and churches — especially at the end of winter and beginning of spring. You bring seeds you’ve saved (even just a handful in paper envelopes) and swap for others. Many seed swaps also accept small divisions of perennials and herb cuttings. If there isn’t one near you, starting one is easier than it sounds — a Facebook post in a local group is often all it takes.
Free Compost and Soil Improvement
5. Start a Compost Pile from Kitchen Scraps
A compost pile requires nothing more than a corner of garden or a homemade wooden pallet bin. Vegetable peelings, fruit scraps, eggshells, tea bags (paper ones), coffee grounds, cardboard, and garden clippings all decompose into rich, crumbly compost in three to six months. This is the single best free soil amendment available — richer than most commercial composts, free of plastic packaging, and genuinely circular. If you’re gardening in a small space or apartment, a countertop worm bin (vermiculture) can do the same job on a smaller scale, and worm castings are extraordinarily potent fertiliser. Learning what makes a good potting soil mix helps you understand why compost is the foundation.
6. Use Coffee Grounds as a Free Fertiliser
Spent coffee grounds are mildly acidic (pH around 6.5–6.8) and contain nitrogen, potassium, and phosphorus — three of the main plant nutrients. Many coffee shops give them away free in large bags if you ask (Starbucks used to run a formal scheme; independent cafés often do it informally). Work them into the soil surface around acid-loving plants like blueberries, strawberries, tomatoes, and roses. Don’t overdo it — too much at once can create a compacted crust — but as one element in a broader feeding approach, they’re genuinely valuable.
7. Collect Rainwater
Mains water costs money and is treated with chlorine that some plants, especially seedlings, can be sensitive to. Rainwater is free, pH-balanced, and what plants evolved to receive. Even a basic water butt attached to a downpipe will collect hundreds of litres over a season. If a water butt is out of budget initially, large buckets or plastic storage boxes placed under drainpipes during rain catch substantial volumes. In areas with regular rainfall, this can eliminate watering costs entirely.
8. Mulch with Cardboard and Newspaper
Mulching — covering the soil surface — suppresses weeds, retains moisture, and adds organic matter as it breaks down. Cardboard and newspaper are both excellent mulching materials and almost always available for free. Flatten boxes, remove any tape, and lay them two to three sheets thick around plants or in new beds. Cover with a thin layer of soil, leaves, or wood chips to keep them in place. This technique (often called “lasagne gardening” or “sheet mulching”) is one of the most productive free soil-building methods available to gardeners.

Free Containers and Planters
9. Repurpose Yogurt Pots and Takeaway Containers for Seedlings
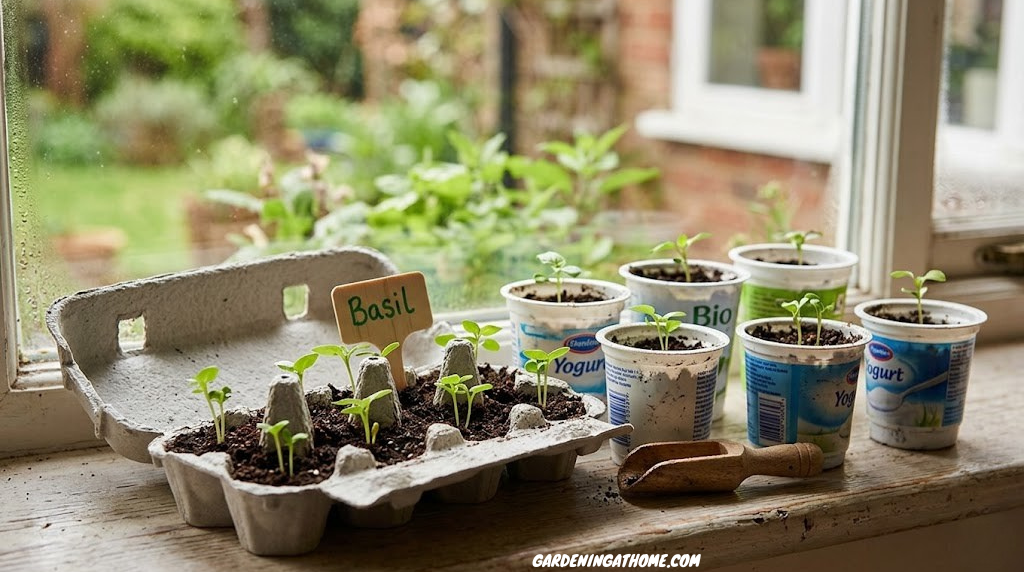
Any food container with drainage holes drilled or punched in the bottom is a perfectly functional seed starting pot. Yogurt tubs, takeaway containers, tin cans, margarine tubs — all of these work. Drill or skewer several holes in the bottom for drainage, fill with seed compost (or homemade compost sieved to remove large lumps), and you have a free seed starting setup. The main practical advantage of purpose-made trays is their uniformity and stackability — but for getting seeds germinated, any container works.
10. Use Old Colanders, Buckets, and Crates as Planters
Colanders are nearly perfect planters — the built-in drainage is already there. Old metal buckets (punch holes in the base), wooden crates lined with hessian sacking, plastic storage boxes with drainage holes, even old boots and rubber wellies — all have been used productively as plant containers. The informal look of repurposed containers has become something of an aesthetic in its own right; a colander of strawberries or a crate of herbs is genuinely appealing in a way that ranks of identical plastic pots isn’t.
11. Egg Cartons as Biodegradable Seed Trays
Paper egg cartons are perfect for starting seeds. Fill each cup with seed compost, sow one or two seeds per cup, and when the seedlings are ready to plant out, cut the individual cups apart and plant them whole — the cardboard decomposes in the soil without disturbing roots. This eliminates transplant shock entirely, which is particularly valuable for tap-rooted plants like carrots and parsnips that hate being moved. Egg boxes are also stackable, easy to label, and completely free.
12. Toilet Roll Tubes as Biodegradable Pots
Like egg cartons, toilet roll tubes are biodegradable and go straight in the ground with the plant when transplanting time comes. Stand them upright in a tray, fill with compost, and sow a seed in each. They’re particularly good for tall seedlings like sweet peas, peas, and broad beans that need depth but don’t like having their roots disturbed. Collect them over a few weeks and you’ll have enough for a decent seed-starting setup at no cost.

Under-$10 Ideas That Punch Well Above Their Cost
Once you’ve exhausted the free options — or where a small investment pays outsized dividends — these ideas deliver real gardening capability for a very small outlay. Everything in this section can be done for under $10, and most of it pays for itself within the first harvest.
Build a Herb Garden for Under $5
An indoor or outdoor herb garden is the most practical and cost-efficient thing a beginning gardener can grow. Fresh herbs cost $2–4 a bunch at the supermarket and are used in small quantities, which means the packet spoils before you finish it. Growing your own means pinching fresh leaves whenever you need them — and a packet of seeds produces far more herb plants than a single bought bunch ever could.
Basil from Seed
A $1–2 seed packet gives you dozens of plants. Sow thickly in any container in a warm, sunny spot. Pick from the top to encourage bushiness.
~$1.50Mint Division
One pot of supermarket mint can be divided into six or more smaller plants. Pot each division separately. Mint spreads aggressively — keep it in a container.
~$2.00Chives from Seed
Chives are almost indestructible, perennial, and self-seed freely. One packet gives you a clump that divides every few years to fill multiple pots.
~$1.50Parsley from Seed
Slow to germinate (3–4 weeks) but extremely productive once established. Sow in a long window box for a compact indoor herb feature.
~$1.50For a complete beginner’s guide to setting up herbs indoors, including which varieties need the most light and how to prevent common problems, see our guide to how to start an indoor herb garden.

A Budget Vegetable Patch: What to Grow and How to Keep Costs Down
Growing vegetables for the first time is one of the most rewarding things you can do in a garden, but seed catalogues and garden centres have a way of making beginners spend more than they need to. The key is to focus on easy, productive varieties that don’t need coddling, expensive nutrients, or specialist equipment.
The “Maximum Return on Minimum Investment” Vegetable List
13. Radishes — The 28-Day Win
Radishes go from seed to harvest in three to four weeks. That’s fast enough to fit two or three successions into the gap between sowing other vegetables. They need almost no care, virtually no space, and cost pennies per packet. Eating a radish you grew three weeks ago from seed is one of the most motivating things a beginner can do — proof, in the palm of your hand, that this actually works. Sow a short row every two weeks from early spring to early autumn for a continuous supply.
14. Salad Leaves — Cut and Come Again
Loose-leaf lettuce and mixed salad leaf varieties (often sold as “cut and come again” or “salad bowl”) are harvested by cutting leaves from the outer edge while the central growing point keeps producing. One sowing can give weeks of continuous harvest from a single small container. A window box of mixed leaves on a kitchen windowsill can replace buying bags of salad for a large part of the growing season. Sow thinly in any compost, even mediocre quality, in a bright spot. They ask almost nothing of you in return for what they give.
15. Spring Onions — The Perpetual Harvest
Spring onions are compact, fast (around 8 weeks to harvest), and ideal for containers. You can sow them in a circle around the edge of a pot used for another plant, making efficient use of marginal space. Like salad leaves, you can harvest individual plants and leave the rest to continue growing. A couple of small pots of spring onions cover most cooking needs without ever needing to buy the supermarket version that wilts in the bottom of the fridge.
16. Courgettes (Zucchini) — Unbelievably Productive
A single courgette plant, once it gets going in midsummer, will produce fruit faster than most households can eat it. One plant, in a large container or a small patch of ground, can yield 30–40 fruits in a season. From a budget standpoint, the maths are extraordinary: a seed packet costs $1–2 and contains 10–12 seeds, each capable of producing a courgette plant that will outlast your ability to eat courgette for three months. Sow indoors in a warm spot in late spring, transplant outside after the last frost. Easy to grow, and the flowers are edible too.
17. Runner Beans and Climbing French Beans
Climbing beans are one of the best productivity-per-square-foot crops for small gardens. They grow vertically — up a wigwam of bamboo canes or garden twine — which means they use height rather than ground space. The beans are harvested young and tender over a long picking season. Runner beans in particular are prolific once established. Saved seeds from this year’s beans can be planted next season, making them essentially free after the first buy.
18. Tomatoes in Containers
Cherry tomatoes are among the most cost-effective crops a home gardener can grow — a punnet of cherry tomatoes at the supermarket costs $3–5 and disappears in an afternoon. A single tomato plant, grown in a large container on a sunny balcony or patio, can produce hundreds of cherry tomatoes over a season. Start from seed for maximum economy, or buy young plug plants if seed starting is intimidating in the first season. For balcony-specific guidance, our post on how to grow tomatoes on a balcony covers varieties, containers, and feeding without breaking the budget. Our guide to the easiest vegetables to grow in pots covers more container-friendly options.
Budget-Friendly Tools — What You Actually Need vs. What You Don’t
The gardening tool market is enormous, and much of it is unnecessary for beginners. Here’s the honest breakdown: what actually earns its place in a budget starter kit, and what you can skip entirely without affecting your garden’s success one bit.
Essential — Worth Buying
- A hand trowel (for planting)
- A watering can or repurposed jug
- A hand fork (for weeding)
- Labels and waterproof marker
- Gloves (optional but useful)
- Bamboo canes or sticks (for climbing plants)
Skip in the First Season
- Raised bed kits ($60–200+)
- Electric tillers or cultivators
- Specialist seed trays (use yogurt pots)
- Grow lights for most vegetables
- Heated propagators (warm windowsill works)
- Soil test kits (visual observation first)
Where to Find Cheap or Free Tools
- Charity shops / thrift stores: Hand tools in excellent condition often sell for $1–3. Garden tools are almost always available.
- Freecycle / Facebook Marketplace / Nextdoor: People moving house frequently give away entire garden tool sets for free.
- End-of-season sales: Garden centres drastically discount tools and containers in autumn. Stock up for next season.
- Dollar stores and discount retailers: Basic hand tools, seed trays, and small pots are often stocked at a fraction of garden centre prices.
- Borrow from neighbours: Rarely-used tools (a dibber, a soil sieve, a bulb planter) are ideal candidates for community borrowing rather than individual buying.
A complete guide to the bare minimum toolkit for getting started is at our essential tools for beginner gardeners resource — it’s specifically written to avoid the classic mistake of buying more than you’ll ever use.

Container Gardening on a Budget — Making the Most of What You Have
Container gardening is how most beginners without large gardens get started — and it’s an excellent format precisely because it’s so controllable. You choose the soil, the location can be moved to follow light, and the setup costs can be kept extremely low if you’re resourceful about containers.
19. The Grow Bag Method
A standard 40-litre bag of compost can be used as-is as a grow bag — cut slits in the top surface for planting rather than emptying the compost into a pot. Lay the bag flat, cut three or four planting holes in the top surface, and plant directly into the bag. Tomatoes, courgettes, peppers, and herbs all grow well this way. It’s not elegant, but it works, and the compost bag does double duty as both container and growing medium. A single $6–10 bag of general compost becomes both the pot and the soil.
20. Stacking and Tiered Planters from Pallets
Wooden pallets are widely available for free from builders’ merchants, hardware stores, and industrial estates. Standing a pallet vertically and filling the gaps with compost creates an instant tiered planting wall — ideal for strawberries, herbs, or lettuce. You can also lay two pallets flat and stack them to create a raised bed structure for minimal cost. Note: look for pallets marked “HT” (heat treated) — these are safe for food production. Avoid “MB” marked pallets (methyl bromide treatment) — never use these for food growing.
21. Window Box Salad Bar
A standard plastic window box (often available very cheaply from discount stores) mounted on a windowsill or balcony railing and filled with mixed salad leaves is one of the most space-efficient and cost-efficient setups for beginners. The salad can be harvested leaf by leaf from outside the kitchen window — about as convenient as food production gets. For those without outdoor space at all, the same setup works on a well-lit indoor windowsill, particularly for south-facing windows. For those in apartments, our guide to balcony gardening ideas for apartments has a section specifically on container setups on tight budgets.
22. Drainage: The Rule That Saves Your Plants
Every container, whatever it is — yogurt pot, bucket, colander, terracotta pot — must have drainage holes. Without drainage, roots sit in waterlogged soil, oxygen-starved, and eventually rot. This is the most common cause of container plant death in beginners’ gardens, and it’s entirely preventable. Drill, punch, or skewer holes in the base of any container before using it. Add a thin layer of gravel, broken pot pieces, or even scrunched newspaper at the bottom to help water flow through freely. For more on getting watering right from the start, our post on signs of overwatering vs underwatering teaches you to read your plants’ own feedback.
Choosing Container Size: The Cheat Sheet
- Small pots (under 15cm): Herbs, chives, single lettuces, small succulents
- Medium pots (15–25cm): Dwarf tomatoes, peppers, spring onions, parsley, spinach
- Large pots (25–35cm): Standard tomatoes, aubergines, courgettes, carrots
- Extra large (35cm+): Runner beans, climbing cucumbers, large perennial herbs
For full guidance on matching plants to container sizes, see: how to choose the right pot size for plants

Indoor Budget Gardening — Growing Without a Garden
An outdoor garden is not a prerequisite for gardening. A sunny windowsill, a south-facing room, or even a north-facing space (with careful plant selection) is enough to grow food, herbs, and indoor plants without spending much at all.
23. Grow Microgreens — The Fastest Possible Harvest
Microgreens are seedlings harvested at the cotyledon stage — one to two weeks after germination. They’re extraordinarily nutritious (often 4–40× more concentrated in vitamins than their mature equivalents, according to USDA research), extremely fast, and can be grown in any shallow tray on a windowsill. A single tray of sunflower or pea shoot microgreens takes around seven to ten days from sowing to harvest. The seeds are cheap, the container can be a baking tray or a takeaway container, and the growing medium can be a thin layer of damp compost. If you’ve ever paid $5 for a small punnet of microgreens at a farmers’ market, the economics of growing your own are immediately obvious. Full guidance: growing microgreens at home without soil.
24. Choose Low-Light Plants for Darker Spaces
Not every indoor space gets bright sunlight, but that doesn’t mean you can’t garden in it. Pothos, snake plants, spider plants, ZZ plants, peace lilies, and certain ferns all thrive in lower light conditions and are available very cheaply from garden centres, hardware stores, and often completely free from people dividing their existing plants. Air-purifying indoor plants are an added bonus — see our guide to air-purifying indoor plants and best indoor plants for low-light rooms for specific recommendations by room type.
25. Propagate Pothos and Spider Plants — Infinite Free Plants
Pothos and spider plants produce runners and offsets that root in water within two to three weeks. One pothos plant can supply dozens of cuttings a year. One mature spider plant produces enough offsets in a season to fill a windowsill or give away to every person you know. These aren’t exotic propagation techniques — they’re basic plant biology taking care of itself. Water-propagating stem cuttings (simply placing them in a glass of water until roots appear) works for pothos, tradescantia, coleus, begonias, impatiens, and many more common indoor plants.
26. DIY Liquid Fertiliser from Kitchen Scraps
Banana peel soaked in water for 48 hours produces a mild potassium-rich liquid fertiliser. Compost tea (handful of compost steeped in a bucket of water for 24 hours, strained) works similarly. Diluted cooking water from vegetables (unsalted) contains trace minerals leached from the vegetables during cooking. None of these replace a balanced commercial fertiliser perfectly, but all contribute nutrients to soil-grown plants. For a proper guide to feeding indoor plants effectively — including when they don’t need any feeding at all — see how and when to fertilize houseplants.

Small Space Ideas — Maximum Productivity in Minimum Space
Small spaces reward creative thinking more than money. Vertical space, underused walls, south-facing fences, awkward corners — all of these can be put to productive gardening use without significant investment.
27. String and Bamboo Cane Vertical Growing
A bamboo cane wigwam (three or four canes pushed into a pot or ground and tied at the top) costs almost nothing and supports climbing beans, sweet peas, or cucumbers right up to shoulder height. String tied from any horizontal surface down to pots allows climbing plants to travel upward along any wall or fence. Using vertical space multiplies the productivity of a small plot without spending on elaborate structures. Bamboo canes are one of the better gardening investments at around $3–5 for a pack of ten.
28. Three Sisters Companion Planting
The Three Sisters — corn, beans, and squash — is a traditional companion planting combination from Indigenous North American agricultural practice. The corn provides a climbing frame for the beans; the beans fix nitrogen from the air into the soil, feeding the other plants; the squash covers the ground with its large leaves, suppressing weeds and retaining moisture. It’s a no-fertiliser, no-herbicide system that maximises the productivity of a small patch by using the plants’ natural relationships. Not every climate is ideal for all three, but the companion planting principle — using plants to support each other rather than treating them as isolated specimens — is a powerful one for any small-space garden.
29. Succession Sowing for Continuous Harvest
Rather than sowing a whole packet of salad leaves or radishes at once and getting a glut followed by a gap, sow small amounts every two to three weeks throughout the season. This succession sowing approach means you have something ready to harvest continuously rather than all at once. It also means less waste, better use of your container space, and a natural rotation that prevents pests and diseases from building up in one spot. One of the most valuable — and completely free — techniques in kitchen gardening.
30. No-Dig Gardening — Less Work, Better Results
No-dig gardening is exactly what it sounds like: you don’t dig the soil. Instead, you layer organic matter — compost, leaf mould, or well-rotted manure — directly on the surface of the soil or even on top of grass. Worms and soil organisms incorporate it, creating better soil structure than digging disrupts. The method suppresses weeds (especially when thick layers are applied), improves drainage, and significantly reduces the work involved in setting up a new bed. It also means you don’t need a spade or fork to establish new growing areas, which keeps tool requirements minimal. Our guide to starting a garden from scratch covers the no-dig setup in practical steps.
Matching your plants to the right light conditions is one of the most budget-relevant gardening decisions you’ll make — plants in the wrong light fail regardless of how much money you spend on them. Our guide to understanding full sun vs partial shade explains what plant label light requirements actually mean in practice.
Budget-Busting Mistakes Beginners Make — And How to Avoid Them
The fastest way to spend more than you need to in a garden is to make avoidable mistakes that kill plants, waste soil, or require expensive fixes later. These are the most common and most costly beginner errors, with practical advice on how to sidestep them.
31. Overwatering — The Number One Killer
More plants die from overwatering than from any other cause. The symptom — yellowing, wilting leaves — is identical to underwatering, which leads beginners to water more, worsening the problem. The root system of an overwatered plant sits in anaerobic (oxygen-free) waterlogged soil and rots. The rule of thumb: stick your finger into the soil to the second knuckle. If it feels damp, don’t water. If it feels dry, water thoroughly. Containers with drainage holes and checking the soil rather than the calendar before watering prevents the problem almost entirely. Read our full post on signs of overwatering vs underwatering to recognise what your plants are telling you.
32. Using Poor Soil
Cheap or inappropriate soil is the second largest source of plant failure for beginners. Garden soil taken directly from a border and put into containers compacts, drains poorly, and may harbour pests and diseases. The minimum investment worth making is a bag of general-purpose compost for containers — or a blend as covered in our guide to the best potting soil mix for indoor plants. The cost of one bag of good compost is usually less than replacing the plants that died in poor soil.
33. Ignoring Fungus Gnats and Pests Until It’s Too Late
Fungus gnats — tiny flies that hover around indoor plants — are one of the most common and frustrating beginner gardening problems. They lay eggs in the top layer of moist compost, and larvae damage roots. The problem can be prevented by letting the top inch of compost dry out between watering (fungus gnats need moist surface soil to breed), using sticky yellow traps as an early warning system, and top-dressing containers with a thin layer of horticultural grit or sand, which the gnats can’t lay eggs in. For a full guide to natural management, see how to get rid of fungus gnats naturally.
34. Sowing Too Deeply — Or Not Deeply Enough
Seed packet instructions on sowing depth exist for a reason. Small seeds (like lettuce) need light to germinate and should barely be covered. Large seeds (like beans) need to be buried to avoid drying out. Ignoring sowing depth guidance is a common cause of poor germination that beginners blame on seed quality or bad luck. The rule of thumb: sow at a depth approximately two to three times the diameter of the seed. When in doubt, err shallower rather than deeper — seeds can germinate from shallow depths more readily than they can push through excessive covering.
Full Budget Comparison: What Everything Costs
Here’s a practical reference of common beginner gardening setups, from the completely free to a modest first-season investment, so you can plan your spend before you start.
Cost-at-a-Glance by Setup Type
| Setup | Estimated Cost | Plants/Crops | Difficulty | Payback Time |
|---|---|---|---|---|
| Kitchen scrap regrowing | Free | Spring onions, lettuce, celery | Very Easy | 1–2 weeks |
| Seed-saving garden | Free | Tomatoes, squash, beans | Easy | First harvest |
| Microgreens tray | ~$3–5 | Pea shoots, sunflower, radish | Very Easy | 7–14 days |
| Windowsill herb garden | ~$5–10 | Basil, chives, parsley, mint | Easy | 4–8 weeks |
| Salad box (window box) | ~$6–12 | Mixed leaves, spring onions | Easy | 3–5 weeks |
| Courgette in large container | ~$10–15 | Courgette, squash | Moderate | 8–10 weeks |
| Cherry tomato in pot | ~$12–18 | Cherry tomatoes | Moderate | 10–14 weeks |
| Climbing beans (wigwam) | ~$6–10 | Runner beans, French beans | Easy | 8–10 weeks |
| No-dig patch (cardboard mulch) | ~$5–8 | Mixed vegetables | Easy | Ongoing |
| Compost bin (DIY wooden pallets) | Free–$5 | Free compost forever | Easy | 3–6 months |
Seasonal Planting Guide for Budget Gardeners
Timing your sowing and planting to the natural seasons — rather than buying expensive heated propagators or grow lights to fight the seasons — is one of the most budget-friendly approaches to gardening. Plants grown in their natural window are generally more vigorous, less pest-prone, and need less intervention than those forced in artificial conditions.
🌱 Spring
- Sow salad leaves, radishes
- Start tomatoes & peppers indoors
- Plant peas & broad beans outside
- Take herb cuttings
- Start compost pile
☀️ Summer
- Transplant tomatoes, courgettes outdoors
- Succession sow salad every 3 weeks
- Harvest beans continuously
- Save seeds from bolted herbs
- Collect rainwater for dry spells
🍂 Autumn
- Save seeds from end-of-season crops
- Plant garlic cloves
- Mulch beds with cardboard + compost
- Buy tools/pots at end-of-season sales
- Collect fallen leaves for leaf mould
❄️ Winter
- Plan next season’s garden (free!)
- Order seeds (buy non-F1 open-pollinated)
- Grow microgreens indoors
- Regrow kitchen scraps
- Attend seed swaps

The Complete Budget Gardening Starter Checklist
Before your first growing season, use this checklist to set yourself up for success without unnecessary spending:
- Identify a sunny spot (windowsill, balcony, garden corner)
- Collect free containers (yogurt pots, takeaway tubs, colanders)
- Source free compost material (kitchen scraps, cardboard, leaves)
- Join a local seed swap or gardening Facebook group
- Buy one small bag of multi-purpose compost ($5–8)
- Choose 2–3 easy crops for first season (salad, radishes, herbs)
- Make or find one composting solution (bin, pile, or worm farm)
- Set up a rainwater collection point (bucket under drainpipe)
- Read up on light requirements for your space (sun vs shade guide)
- Learn the overwatering signs before you start (overwatering guide)
Frequently Asked Questions
The cheapest possible start is to save seeds from kitchen vegetables (tomatoes, peppers, squash), regrow kitchen scraps in water (spring onions, lettuce), and use repurposed containers (yogurt pots, takeaway tubs) with drainage holes punched in the base. Fill with free compost made from kitchen scraps, or buy one small bag of potting compost (around $5–8). This approach costs almost nothing and can produce a meaningful amount of food within weeks. For a step-by-step guide to setting up your first garden, see our resource on how to start a garden from scratch.
The easiest and most cost-effective vegetables for beginners are radishes (harvest in 3–4 weeks, almost indestructible), salad leaves (cut-and-come-again harvest over weeks from a single sowing), spring onions (fast, compact, excellent in containers), courgettes (one plant produces dozens of fruits from a single cheap seed), runner beans (vertical growing, prolific harvest, seeds can be saved), and cherry tomatoes (outstanding value once productive). All of these are forgiving, productive, and available as cheap seed packets. See our full guide to the easiest vegetables to grow in pots.
Yes — particularly in the first season and with the right approach. Saving seeds from kitchen vegetables, regrowing scraps in water, collecting rainwater, making compost from household waste, and using repurposed containers covers most of the essential gardening inputs. Seeds can be obtained free from swaps, neighbours, and online community groups. Soil can be improved with free coffee grounds, cardboard mulch, and homemade compost. Many garden plants are propagated from cuttings given freely by other gardeners. The one place a small investment pays off most quickly is a bag of quality potting compost for containers — poor soil is the most common reason beginner gardens fail.
On a balcony with zero budget: regrow spring onion bases, celery, and lettuce in glasses of water. Sow seeds saved from kitchen tomatoes or peppers in yogurt pots filled with homemade compost. Use a large takeaway container as a window box for salad leaves sown from saved seeds. The main constraint on a balcony is container size and sunlight — larger containers allow more options, and south or west-facing balconies get enough sun for tomatoes and herbs. Our complete guide to balcony gardening for apartments covers budget-specific setups in more detail.
For a beginner’s first season, cheap tools are entirely adequate — and sourcing them second-hand from charity shops, Freecycle, or Facebook Marketplace makes even more sense, since good-quality used tools often cost less than cheap new ones and last far longer. The items worth investing in quality over time (once you’re sure gardening is a long-term interest) are a decent hand trowel, a good pair of secateurs, and a solid fork or spade. These are the tools you’ll use the most and the ones where a flimsy version genuinely makes the job harder. Everything else — seed trays, watering cans, labels — can stay cheap indefinitely.
The most common money-wasting mistakes for beginner gardeners are: buying too many different plants or seeds and failing to tend them all; purchasing specialist soil mixes for every different plant when a general multi-purpose compost works for most; buying hybrid (F1) seeds that can’t be saved rather than open-pollinated varieties; buying plants in prime condition from garden centres rather than growing from seed; purchasing grow lights and heated propagators before confirming a warm windowsill isn’t sufficient; and buying expensive pest treatments before trying simple free solutions (diluted washing-up liquid spray for aphids, letting the top inch dry out to deter fungus gnats, copper tape for slugs).
The best sources of free seeds for beginner gardeners are: saving seeds from ripe kitchen vegetables (tomatoes, peppers, squash, cucumbers are easiest); attending or organising local seed swaps; joining local gardening groups on Facebook, Nextdoor, or Reddit where seeds are regularly shared; checking local libraries that sometimes run seed lending libraries; asking neighbours whose gardens you admire if they save seed; and taking cuttings from plants rather than buying from seed at all (mint, rosemary, lavender, many perennials). Once you’ve grown a crop through to seed-bearing maturity, the supply becomes self-sustaining.
A functional budget potting mix for containers can be made by combining: homemade compost (approximately 60%), garden soil that has been sieved and sterilised in the oven (20%), and perlite or coarse sand for drainage (20%). If homemade compost isn’t ready yet, the cheapest commercial option is a large bag of general-purpose compost from a discount retailer or supermarket garden centre — often significantly cheaper per litre than from a garden centre. Avoid using pure garden soil in containers as it compacts and drains poorly; some drainage material and organic matter are essential additions. For more detail, see our guide to the best potting soil mix.
Yes, with some caveats around light. Most vegetables need six or more hours of direct sunlight to produce a meaningful harvest — a south-facing or west-facing window in the northern hemisphere provides the best conditions. Salad leaves, herbs, spring onions, and radishes are the most practical indoor vegetable options as they need less light than fruiting crops like tomatoes. Microgreens — harvested at the seedling stage before significant light is needed — are the most productive indoor option in any light condition and produce harvestable food within one to two weeks. For apartment-specific options, our guide to balcony gardening for apartments and best plants for low-light rooms are both helpful starting points.
Confusingly, overwatering and underwatering can produce similar visible symptoms — wilting, yellowing leaves, drooping. The way to tell them apart: check the soil. If it’s wet or damp when you insert your finger to the second knuckle, the plant does not need water and is likely showing signs of overwatering (root rot is beginning). If the soil is completely dry throughout, the plant is underwatered. Overwatered plants often have mushy stem bases, yellowing lower leaves, and soil that smells slightly sour. Underwatered plants have dry, crumbly soil, leaves that are papery and crisp rather than soft and limp. Our post on signs of overwatering vs underwatering gives you a clear, plant-by-plant guide.
Your First Garden Doesn’t Have to Cost Much — It Just Has to Start
The most expensive mistake in beginner gardening is waiting until everything is perfect. Waiting for the right container, the right compost, the right space, the right season. The second most expensive mistake is buying everything at once before you know what you actually need.
The ideas in this guide give you everything you need to get started — many of them for nothing at all. A saved tomato seed in a yogurt pot on a sunny windowsill is a garden. It doesn’t need a label, a specialist seed tray, or a heated propagator. It needs warmth, light, water, and time. All of those are free.
Start small. Pick two or three of the free ideas and try them this week. Add more as your confidence grows. The gardening knowledge you build in your first season — learning what your space does with sunlight, understanding what overwatered soil feels like, seeing which plants thrive where — is worth far more than any product you could buy. It compounds. The garden you have in three seasons will be largely self-sustaining if you’ve invested in saving seeds, building compost, and learning your space.
And if you want to go deeper on any specific area — choosing the right containers, building your first herb garden, understanding what your soil needs — the GardeningAtHome resource library has practical, beginner-focused guides for every part of the journey.
Ready to Grow Your First Garden?
Start with seeds, scraps, and repurposed pots — then let the garden teach you the rest. Our complete beginner’s guide is the next step.
Start Your First Garden →