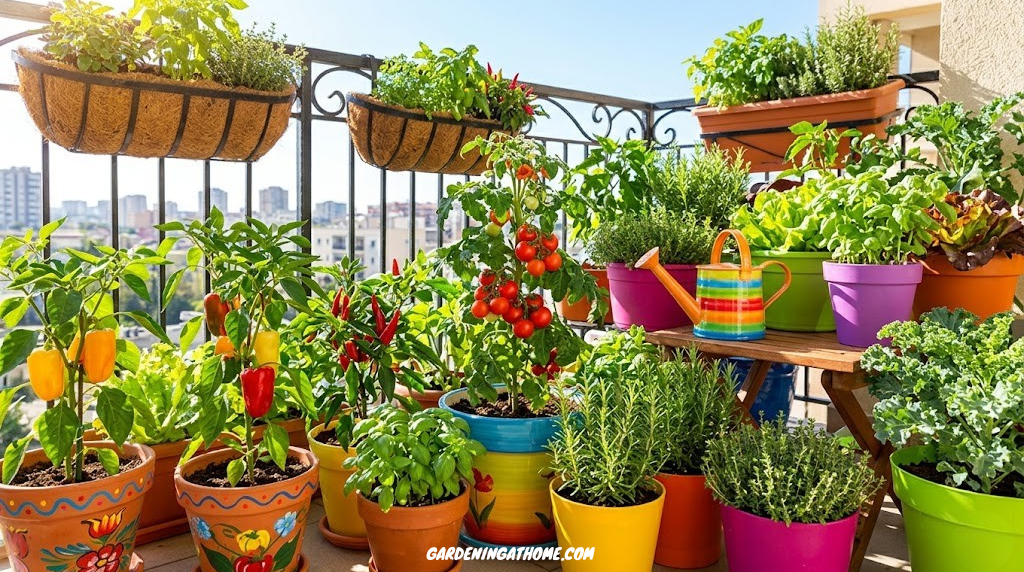
The Easiest Vegetables to Grow in Pots (and How to Keep Them Thriving)
No yard? No problem. These beginner-friendly picks grow beautifully in containers on balconies, patios, and windowsills.
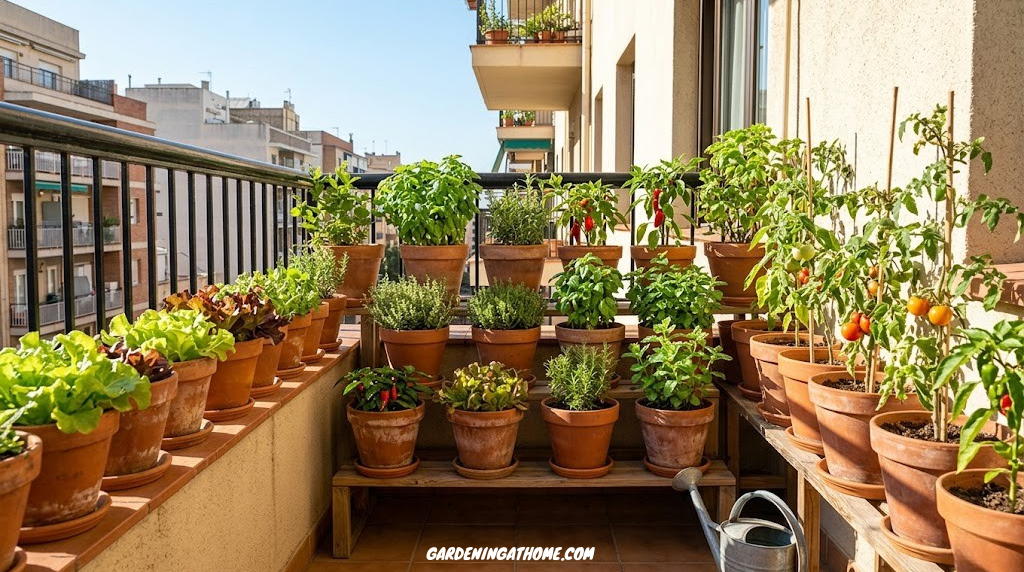
If you have always wanted a vegetable garden but lacked the yard space — or the time and energy for a traditional plot — container gardening is the answer you have been looking for. Growing vegetables in pots has gone from a niche workaround to one of the most practical and rewarding ways to grow your own food, and it all starts with choosing the right plants.
Not every vegetable is built for life in a container. Some need metres of root run; others are perfectly happy in a modest pot on a balcony rail. This guide focuses entirely on the vegetables that genuinely thrive in containers: plants that forgive beginner mistakes, produce a satisfying harvest without demanding enormous space, and reward you far faster than you might expect.
Whether you are setting up a balcony garden in an apartment or claiming a corner of a patio, the picks in this guide will give you a productive, manageable, and genuinely beautiful container vegetable garden. Let us get into it.
Quick answer: The absolute easiest vegetables to grow in pots are radishes, lettuce, spinach, green onions, cherry tomatoes, chillies, dwarf French beans, peas, kale, courgette, garlic, and Swiss chard. All thrive in containers, forgive beginner errors, and produce a real harvest within a single growing season.
Why Growing Vegetables in Pots Works So Well
There is a common misconception that container vegetables are a consolation prize — something you do when you cannot have a “real” garden. The truth is quite different. Container growing gives you a level of control over your plants’ environment that in-ground gardens simply cannot match.
You control the soil entirely. In-ground gardeners spend years — sometimes decades — improving their native soil’s drainage, fertility, and pH. With containers, you fill your pot with exactly the right potting mix from day one. Your plants start with ideal growing conditions, not the compromised reality of clay-heavy or sandy garden beds.
You also control placement. Move pots to follow the sun, bring tender plants inside when frost threatens, cluster them for a beautiful display, or spread them across a balcony railing. This mobility is something fixed beds can never offer.
Pest and disease management is significantly easier too. Container plants are more isolated, which slows the spread of soil-borne diseases. Many common pests — slugs, vine weevils, fungus gnats — are easier to spot and address in a contained environment.
✅ Advantages of Container Veg Growing
- Complete soil control from the start
- Moveable — follow the sun or avoid frost
- Reduced pest and disease pressure
- Works on balconies, patios, rooftops
- Easy to scale up or down
- Great for beginners — immediate feedback
- Visually appealing and compact
⚠️ Limitations to Know
- Pots dry out faster than open ground
- Nutrient reserves are limited — must fertilise regularly
- Some vegetables need very large (and heavy) pots
- Root-bound plants can stall production
- Initial setup costs (pots + quality soil)
The key to success is matching your plant choices to what containers do best. That means starting with a well-thought-out starting plan and picking varieties that were either bred for containers or naturally compact. Every vegetable on this list ticks both of those boxes.

Best Self-Watering Planters for Vegetables
These self-watering containers maintain consistent moisture — the single biggest factor in container vegetable success. Available in multiple sizes.
Shop on AmazonThe 12 Easiest Vegetables to Grow in Pots
Each vegetable below has been chosen for its proven track record in containers, its tolerance for the inevitable learning-curve moments of beginner gardening, and its genuine productivity in small spaces. For each one, you will find the minimum pot size, sunlight needs, and what makes it especially container-friendly.
Lettuce
Grows in just 6″ of soil depth. Cut-and-come-again varieties give you weeks of harvests from one sowing.
Chillies & Peppers
Compact, decorative, and surprisingly productive. One plant per 10″ pot easily.
Cherry Tomatoes
Dwarf and tumbling varieties were specifically bred for container life. Fast, fun, prolific.
Spinach
Thrives in cool weather. Perfect for spring and autumn container growing in partial shade.
Radishes
Ready in as little as 25 days. Perfect for filling gaps between slower-growing plants.
Green Onions
Almost impossible to kill. Grow in any deep container, even repurposed mugs or tins.
Dwarf French Beans
Compact bushy varieties need no staking. A single 12″ pot can feed two people.
Peas
Container dwarf varieties stay compact. Add a small trellis and they are effortless.
Kale
Incredibly cold-hardy. One large pot gives you fresh leaves right through winter.
Courgette (Zucchini)
Needs a big pot (at least 15″) but produces spectacularly. One plant is usually enough.
Garlic
Plant cloves in autumn, harvest bulbs in summer. Completely hands-off once planted.
Swiss Chard
Stunning rainbow stems, productive, heat-tolerant, and harvest-ready fast.
Quick Comparison: Container Vegetable At-a-Glance
| Vegetable | Min. Pot Size | Sunlight | Days to Harvest | Difficulty | Good for Beginners? |
|---|---|---|---|---|---|
| Lettuce | 6″ deep | 4–6 hrs | 30–45 | ⭐ Very Easy | ✅ Yes |
| Radishes | 6″ deep | 4–6 hrs | 25–35 | ⭐ Very Easy | ✅ Yes |
| Spinach | 6″ deep | 3–5 hrs | 40–50 | ⭐ Very Easy | ✅ Yes |
| Green Onions | 4″ deep | 3–6 hrs | 60–70 | ⭐ Very Easy | ✅ Yes |
| Garlic | 8″ deep | 6+ hrs | 240+ (autumn plant) | ⭐ Very Easy | ✅ Yes |
| Swiss Chard | 8″ deep | 4–6 hrs | 50–60 | ⭐ Easy | ✅ Yes |
| Chillies | 10″ wide | 6–8 hrs | 60–90 | ⭐ Easy | ✅ Yes |
| Cherry Tomatoes | 12″ wide | 6–8 hrs | 60–80 | ⭐ Easy | ✅ Yes |
| Kale | 10″ deep | 4–6 hrs | 55–75 | ⭐ Easy | ✅ Yes |
| Dwarf French Beans | 12″ wide | 6–8 hrs | 55–65 | ⭐ Easy | ✅ Yes |
| Peas | 12″ deep | 5–7 hrs | 60–70 | ⚡ Moderate | ✅ Yes (with support) |
| Courgette | 15″ wide | 6–8 hrs | 50–65 | ⚡ Moderate | ⚠️ With care |
Deep Dive: Each Vegetable Explained
1. Lettuce — The Perfect Container Starter
Lettuce is genuinely one of the most satisfying container vegetables because you can see results so fast. Seeds germinate in just three to five days, and most loose-leaf varieties are ready to start harvesting within four to six weeks. The trick is the “cut-and-come-again” approach: instead of pulling the whole plant, snip the outer leaves and leave the centre growing. A single pot sown once in spring can keep providing fresh leaves for two to three months.
Choose loose-leaf varieties like ‘Oak Leaf’, ‘Salad Bowl’, or ‘Butterhead’ rather than tight-headed types such as iceberg, which need more root space and tend to bolt quickly in containers. A window box at least 15cm (6″) deep is all you need. Lettuce actually benefits from partial shade during hot spells — the leaves stay tender and slow to bolt rather than turning bitter.
Pro tip: Sow a new pot of lettuce every two to three weeks (a technique called succession sowing) to always have fresh leaves ready, rather than getting a glut all at once. This is one of the most effective techniques covered in our indoor herb and leaf garden guide.
2. Cherry Tomatoes — Small Plant, Massive Harvest
Standard tomato varieties can be a handful in containers — they produce enormous root systems and get unruly without firm training. Cherry tomatoes, especially “tumbling” or patio varieties, are an entirely different proposition. Varieties like ‘Tumbling Tom’, ‘Maskotka’, and ‘Balcony Red’ were specifically developed for hanging baskets and containers, staying compact while still producing hundreds of small, flavour-packed fruits over a long season.
Give a cherry tomato plant a pot at least 30cm (12″) in diameter, fill it with a rich, well-draining potting mix, and position it somewhere that gets at least six hours of direct sun per day. On a bright balcony, a single plant can produce kilograms of fruit from early summer through to the first frosts. You can also read our dedicated guide to growing tomatoes on a balcony for a full step-by-step walkthrough.
3. Radishes — The Instant Gratification Vegetable
No other container vegetable gives results as fast as a radish. From seed to harvest in as little as 25 days, radishes are the perfect plant for anyone who struggles to stay patient during a vegetable garden’s slow build-up. They make brilliant gap-fillers, too — pop a few seeds around the edges of pots where slower plants are getting established, and you will have harvested the radishes before those slower plants even need the space.
Use any pot at least 15cm (6″) deep. Radishes bolt (go to seed and become woody) quickly in heat, so spring and autumn are prime growing times. For a continuous supply of crisp radishes through those seasons, sow a small batch every couple of weeks. Varieties like ‘French Breakfast’, ‘Cherry Belle’, and ‘Sparkler’ are all reliable and widely available.
4. Chillies and Sweet Peppers — The Best-Looking Container Crop
There is something genuinely impressive about a chilli plant loaded with colourful fruits in a terracotta pot. Chillies are naturally compact, they produce over a very long season, and they are among the most forgiving of beginner mistakes as long as they get enough sun. Both hot chilli varieties and sweet pepper varieties thrive in containers, so you can choose based on your cooking preferences.
One plant per 25cm (10″) pot is ideal. Chillies are slow to start — they need warmth to germinate and grow — but once established they are extremely productive. If you have a sunny windowsill, you can start seeds indoors in early spring and have plants ready to move outside once temperatures are reliably above 15°C. Understanding whether your balcony or windowsill provides full sun or partial shade is critical for chillies, which need the most sun of any vegetable on this list.
5. Spinach — The Cool-Season Champion
Spinach is the perfect cool-season container vegetable. It grows quickly in spring and autumn, tolerates light frosts, and does not need as much sun as most vegetables — making it ideal for north-facing balconies or spots that get only three to five hours of light per day. It is also one of the most nutritionally dense crops you can grow, which makes it an extremely satisfying harvest.
Like lettuce, spinach benefits from a cut-and-come-again approach. Harvest outer leaves regularly, and the plant keeps producing for weeks. It does bolt (go to seed) quickly once temperatures climb above about 27°C, so plan for spring and autumn crops rather than midsummer ones. ‘Bloomsdale Long Standing’ and ‘Medania’ are excellent, bolt-resistant varieties for container growing.
6. Green Onions (Spring Onions / Scallions)
Green onions may be the single lowest-maintenance container crop available. They grow in almost any container, need surprisingly little depth (even 10cm/4″ is workable), and can handle both full sun and partial shade. Direct sow seeds thickly into a pot, thin slightly as they grow, and begin harvesting from the outside in when they reach pencil-thickness. There is almost nothing to go wrong.
You can even regrow green onions from kitchen scraps: place the root ends of bought spring onions into a glass of water or poke them into a pot of compost, and they regrow within days. For a continuous supply, sow a fresh pot every three to four weeks through spring and summer.
7. Kale — The Toughest Vegetable You Can Grow
Kale is remarkably cold-hardy — many varieties keep producing fresh leaves right through winter, even under frost. In a container, it makes an attractive, substantial plant that keeps giving for months. It is also highly nutritious and versatile in the kitchen: use young leaves in salads, mature leaves in stir-fries, soups, and smoothies.
Choose compact varieties like ‘Dwarf Blue Curled’, ‘Red Russian’, or ‘Redbor’ for containers. A 25–30cm (10–12″) pot with good depth allows the root system to establish properly. Kale does best in full sun but tolerates partial shade reasonably well. Keep the soil consistently moist — kale that dries out repeatedly becomes bitter and tough.
8. Dwarf French Beans — Compact and Incredibly Productive
Most beans are climbers that need staking, trellises, and considerable vertical space. Dwarf French bean varieties change that entirely. These compact, bushy plants stay below about 45cm (18″) tall, need no support, and produce abundant crops of slim, tender pods from a single 30cm (12″) pot. They are among the most rewarding container crops for the space they occupy.
Direct-sow seeds 5cm (2″) deep once the risk of frost has passed. They germinate quickly (five to seven days) and grow fast in warm weather. Keep soil consistently moist and begin harvesting pods before they become tough — regular picking actually stimulates the plant to produce more. ‘Sprite’, ‘Safari’, and ‘Masterpiece’ are all excellent compact varieties.
9. Peas — Add a Trellis and Forget About Them
Peas thrive in cool weather and are genuinely easy to grow in containers — the main additional requirement compared to the other picks on this list is some kind of support structure. Even a few bamboo canes pushed into the pot and linked with string is sufficient for most dwarf pea varieties. ‘Meteor’, ‘Little Marvel’, and ‘Tom Thumb’ are all excellent compact choices that stay under 45cm tall.
Direct-sow seeds 3cm deep, spaced about 5cm apart, in a 30cm deep pot. Water consistently — peas hate both waterlogging and drying out. Begin harvesting pods as soon as they fill out; like beans, regular harvesting encourages further production. The fresh peas straight from the pod are genuinely one of the best things a container garden produces.
10. Courgette (Zucchini) — Spectacularly Productive in a Big Pot
Courgette does need a large container — at least 40cm (15″) in diameter and similar depth — but the payoff in productivity is remarkable. A single well-cared-for courgette plant in a big pot can easily produce 20 to 30 fruits across a season. For most households, one plant is genuinely enough.
The plant itself is large and dramatic-looking, with huge architectural leaves and bright yellow flowers that are also edible. Grow it somewhere with maximum sun and water generously — courgettes are thirsty plants. Choose compact or “patio” varieties like ‘Patio Star’ or ‘Eight Ball’ for the most container-friendly performance.
11. Garlic — Plant It and Walk Away
Garlic is perhaps the most hands-off vegetable you can grow in a pot. Plant individual cloves in autumn (pointed end up, about 5cm deep), water them in, and then largely leave them alone through winter. They quietly develop roots, send up fresh green shoots, and by early summer, you have full bulbs ready to harvest. The entire process requires almost no attention beyond an occasional water during dry spells.
Use a pot at least 20cm (8″) deep and space cloves about 10cm apart. ‘Solent Wight’ and ‘Elephant Garlic’ are popular choices for containers. Harvest when the lower leaves begin to turn yellow and die back — typically late spring to early summer. Cure the bulbs in a warm, airy spot for a few weeks before storing.
12. Swiss Chard — Colour, Productivity, and Toughness in One Plant
Swiss chard is perhaps the most visually striking vegetable on this list. The ‘Rainbow Chard’ variety produces stems in vivid reds, oranges, yellows, and whites that look almost ornamental — yet the plant is also one of the most productive and resilient in any container garden. It tolerates both heat and light frost, grows quickly, and the cut-and-come-again harvest method means one pot keeps producing for an entire season.
Grow in a pot at least 20cm (8″) deep. Swiss chard is less fussy about sunlight than most vegetables — it genuinely handles partial shade well. Harvest outer leaves regularly and use them like spinach or kale. The coloured stems are particularly good sautéed with butter and garlic.

Vegetable Container Growing Starter Kit
Everything you need to get started: quality grow bags, saucers, plant labels, and a soil scoop. Perfect gift for beginner gardeners.
Shop on AmazonChoosing the Right Pot: Size, Material, and Drainage
The pot you choose has an enormous impact on your vegetable’s success. Too small, and the roots become crowded and stressed, leading to reduced yields, stress, and susceptibility to pests. Too large relative to the plant, and the excess soil stays wet for long periods, which encourages root rot. Matching pot size to the vegetable’s root system is one of the most important choices you will make.
Our comprehensive guide to choosing the right pot size for plants covers this in great detail — but here are the most critical container vegetable guidelines:
| Vegetable Category | Min. Pot Diameter | Min. Depth | Drainage Holes? | Plants per Pot |
|---|---|---|---|---|
| Salad leaves, spinach, herbs | 20cm (8″) | 15cm (6″) | Essential | 4–8 plants |
| Radishes, spring onions, garlic | 20cm (8″) | 15–20cm (6–8″) | Essential | 8–12 plants |
| Chillies, kale, Swiss chard | 25–30cm (10–12″) | 25cm (10″) | Essential | 1–2 plants |
| Cherry tomatoes, dwarf beans, peas | 30cm (12″) | 30cm (12″) | Essential | 1 plant |
| Courgette, standard peppers | 40cm+ (15″+) | 35cm (14″) | Essential | 1 plant |
Material Matters: Which Pot Type is Best?
Terracotta pots are breathable, which helps prevent waterlogging — but they also dry out quickly in hot weather and can crack in frost. They look beautiful and suit a traditional aesthetic.
Plastic pots retain moisture longer than terracotta (helpful in summer, potentially problematic in winter if not well-drained) and are lightweight and inexpensive. Modern options look far better than the cheap plastic of previous generations.
Fabric grow bags have become extremely popular with container vegetable gardeners because they air-prune roots naturally (preventing the roots from circling and becoming bound), promoting a more fibrous, efficient root system and better overall plant health. They are also highly affordable and can be stored flat when not in use.
Self-watering containers include a reservoir at the base that the plant draws from as needed. These are excellent for busy gardeners or anyone who tends to forget to water — particularly valuable for thirsty crops like tomatoes and courgettes.
The golden rule of containers: Every pot must have adequate drainage holes. Vegetables sitting in waterlogged soil develop root rot quickly, and no amount of correct watering thereafter will save a plant whose roots have begun to rot. If you love a pot that has no holes, drill some — most materials can be drilled with the right bit.
The Best Soil Mix for Container Vegetables
Never use ordinary garden soil in containers. This is one of the most common and damaging mistakes beginner container gardeners make. Garden soil compacts badly in pots, dramatically reducing drainage and aeration. It also carries soil-borne diseases, weed seeds, and pest eggs. What feels perfectly fine in a large garden bed becomes dense, airless, and hostile in a container.
Purpose-made potting compost is formulated to remain open and well-draining in the confined space of a pot, with a nutrient base suited to container plant needs. For vegetables specifically, you want a mix that balances good drainage with sufficient water retention, because vegetables need consistent moisture rather than either waterlogging or drought.
The Ideal Container Vegetable Soil Formula
This blend gives you excellent drainage (from the perlite or grit), strong initial nutrient content (from the compost or worm castings), and good water retention without waterlogging. Our detailed guide on the best potting soil mix explains the components in more depth, including how to adapt the ratios for specific vegetable types.
For tomatoes and peppers, look for specialist “tomato and pepper” or “fruiting plant” composts, which tend to have a higher potassium content to support flowering and fruiting. For leafy vegetables like lettuce, spinach, kale, and chard, a higher nitrogen content suits them better — a standard multipurpose compost with added worm castings works very well.
When to Replace Potting Compost
Potting compost degrades over time. The structure breaks down, nutrients are depleted (especially once you start fertilising, you are compensating for what the compost has lost), and the mix can become compacted. As a general guide, replace or significantly refresh the potting mix in vegetable containers at the start of each new growing season — especially for perennial or long-season crops.
For annual vegetables started from seed each year, simply empty the old compost into your garden beds or compost heap, wash the pot, and refill with fresh mix at the start of the season. The spent compost from vegetable containers is still excellent as a soil improver for garden beds.
Watering Container Vegetables: The Right Approach
Watering is the most common cause of container vegetable failure — both too much and too little cause problems, and the symptoms can look remarkably similar at first glance. Learning to read your plants rather than following a rigid schedule is the single most valuable skill you can develop as a container gardener.
The standard advice — “water when the top 2–3cm of soil feels dry” — is a reasonable starting point, but several factors modify this rule significantly:
- Hot, dry weather: Small pots in full sun during a heatwave may need watering twice daily. Large containers are more buffered but still dry out fast.
- Pot material: Terracotta and fabric pots dry out much faster than plastic; adjust your schedule accordingly.
- Plant stage: Young seedlings need consistently moist soil. Established plants with large root systems can tolerate slightly more variation.
- Vegetable type: Tomatoes, courgettes, and peas are thirsty crops. Garlic and radishes are more drought-tolerant.
Learning to distinguish the signs of overwatering versus underwatering will help you course-correct quickly when something looks wrong. Yellowing lower leaves often indicate overwatering; wilting with dry soil is underwatering. Both are easy to fix when caught early.
Practical Watering Tips for Container Vegetables
- Water at the base of the plant, not over the leaves, to reduce fungal disease risk.
- Water slowly and deeply — until water runs from the drainage holes — rather than a quick splash.
- Water in the morning where possible; evening watering leaves foliage damp overnight, which encourages disease.
- Group containers together to create a more humid microclimate and reduce individual moisture loss.
- Mulch the surface of large containers with a thin layer of compost to dramatically slow surface evaporation.
- Consider self-watering containers for tomatoes and courgettes in particular — they dramatically reduce the watering workload.
The lift test: Lift a container before and after watering — learn what “wet” and “dry” feel like for that specific pot. Over time this becomes instinctive, and you will know at a glance (and by the weight) whether a container needs water. This simple technique replaces a lot of trial-and-error.

Long-Reach Watering Can — Perfect for Container Veg
A long-spout watering can lets you water at the base of plants with precision. Preferred over hose watering for container vegetable gardens.
Shop on AmazonUnderstanding Sunlight for Container Vegetables
Sunlight is the engine that drives vegetable growth. The amount of light your growing space receives determines which vegetables will thrive there — and no amount of perfect soil, careful watering, or expensive fertiliser can compensate for inadequate light.
Our detailed guide on full sun vs partial shade explains the definitions in depth, but here is how it maps to container vegetable choices:
| Sunlight Level | Hours of Direct Sun | Suitable Container Vegetables |
|---|---|---|
| Full Sun | 6+ hrs/day | Tomatoes, chillies, courgette, beans, peas, garlic |
| Partial Sun | 4–6 hrs/day | Kale, Swiss chard, spinach, lettuce, radishes |
| Partial Shade | 2–4 hrs/day | Spinach, lettuce, spring onions, mint (not most veg) |
| Full Shade | <2 hrs/day | Very limited vegetable options — try low-light indoor plants instead |
One of the genuine advantages of container growing is that you can move pots to optimise their light exposure. On a partially shaded balcony, try rotating pots periodically so all sides of the plant get some sun exposure. If your balcony or outdoor space is genuinely quite shaded, focus on leafy crops (lettuce, spinach, chard) rather than fruiting ones (tomatoes, peppers) — leafy vegetables are far more tolerant of lower light levels.
Heat reflection from walls and surfaces can also supplement direct sunlight on balconies. South-facing walls in particular absorb heat during the day and radiate it back in the evening, creating a warmer microclimate that benefits heat-loving vegetables like chillies and tomatoes even when they are not technically in direct sun for the full six-plus hours.
How and When to Feed Container Vegetables
Unlike in-ground plants that can extend their root systems to explore a larger volume of soil for nutrients, container vegetables are entirely dependent on what you give them. Fresh potting compost contains a nutrient charge, but this is typically exhausted within six to eight weeks of active plant growth — after which, regular feeding becomes essential for continued productivity.
Understanding how and when to fertilise plants properly is the difference between a plant that produces abundantly all season and one that tails off after an initial flush of growth.
Fertiliser Types for Container Vegetables
Slow-release granular fertilisers (such as Osmocote or similar products) are mixed into the potting compost at planting time or scattered on the surface. They release nutrients gradually over several months, providing a steady background feed. These are excellent for lower-maintenance containers.
Liquid fertilisers are diluted in water and applied every seven to fourteen days from the point when the initial compost charge is likely exhausted. They work more quickly than granular types and allow you to adapt the nutrient profile to what the plant needs at that stage:
- High nitrogen (N) feeds support leafy growth — ideal for spinach, lettuce, kale, and chard during their vegetative stage.
- High potassium (K) feeds (“tomato feed”) support flowering and fruiting — switch to these for tomatoes, chillies, peas, and beans once they begin to flower.
- Balanced NPK feeds are suitable for general container vegetable maintenance, particularly for crops where you harvest both leaves and fruit (like Swiss chard).
Watch for deficiency signs: Yellowing leaves starting from the bottom of the plant often signal nitrogen deficiency — the most common nutrient shortage in container vegetables. Purple tinting on leaves can indicate phosphorus deficiency. Both are quickly corrected with the right liquid feed.
Seaweed extract is a valuable addition to any container vegetable feeding regime. It does not provide significant levels of the major nutrients, but it is rich in trace elements, plant growth hormones (cytokinins and auxins), and beneficial compounds that improve root health, stress tolerance, and overall plant vigour. Apply monthly as a drench or foliar spray in addition to your main fertiliser.
Fast-Growing Container Vegetables for Quick Wins
One of the best ways to sustain enthusiasm for container gardening — especially in the early stages — is to include at least some vegetables that produce harvests quickly. Fast results are motivating, and the experience of eating something you have grown yourself within a few weeks of starting is genuinely powerful.
If quick wins are a priority, these are the container vegetables to prioritise:
| Vegetable | Days to First Harvest | Notes |
|---|---|---|
| 🌱 Radishes | 25–35 days | Fastest of all. Sow a fresh batch every 2 weeks for continuous supply. |
| 🥬 Lettuce (leaves) | 30–45 days | Cut outer leaves from 4–5 weeks; plant keeps producing for months. |
| 🌿 Spinach | 35–45 days | Baby leaves ready in 3–4 weeks; full-size leaves at 6–8 weeks. |
| 🧅 Spring Onions | 60–70 days | Thin seedlings and eat the thinnings as micro spring onions from week 3. |
| 🌈 Swiss Chard | 50–60 days | Baby leaves from 5–6 weeks; harvest outer leaves continuously after that. |
| 🥦 Kale | 55–75 days | Baby kale leaves from 5 weeks; mature plant harvests from 8–10 weeks. |
| 🫛 Dwarf French Beans | 55–65 days | Harvest young for best flavour; picking regularly boosts production. |
Microgreens are also worth a mention here, though they are technically germinated seeds rather than fully grown vegetables. They are ready in just 7–14 days and can be grown in any shallow tray on a windowsill. Our guide to growing microgreens at home without soil covers the full process — and they make an excellent complement to your container vegetable garden, providing fresh greens even through winter when outdoor containers are less productive.
Combining fast-harvest crops (radishes, lettuce, spinach) with medium-term producers (beans, chard, kale) and longer-season crops (tomatoes, chillies, garlic) gives you a container garden that is always producing something, from the first warm days of spring right through to the first frosts of autumn.
Companion Planting in Containers: Growing More in Less Space
Companion planting in containers is one of the most effective ways to maximise the productivity of limited pot space, and it offers genuine benefits beyond just fitting more plants in. Certain plant combinations actively help each other: some deter pests, some attract beneficial insects, some fix atmospheric nitrogen into the soil, and some shade the soil surface to reduce moisture loss.
The core principle for successful container companion planting is choosing companions that have different growth habits, different root depths, and ideally complementary benefits. Avoid pairing two heavy-feeding, large-rooted plants in the same pot — they will compete for space and nutrients to the detriment of both.
| Primary Vegetable | Good Companions | Why It Works | Avoid |
|---|---|---|---|
| Tomatoes | Basil, nasturtium, French marigolds | Basil may repel whitefly; marigolds deter aphids and add colour | Fennel, brassicas |
| Chillies | Basil, parsley, chives | Herbs deter many common chilli pests; chives discourage aphids | Fennel |
| Lettuce | Radishes, spring onions, nasturtiums | Radishes repel some leaf-feeding beetles; compact combinations make efficient use of space | Celery |
| Beans | Nasturtiums, summer savory | Savory deters bean weevil; nasturtiums attract aphids away from beans | Onions, garlic |
| Kale / Chard | Nasturtiums, dill, marigolds | Nasturtiums act as trap crops for aphids; dill attracts predatory insects | Other brassicas (disease risk) |
French marigolds (Tagetes patula) deserve special mention as the single most versatile companion plant for container vegetables. Their bright blooms attract beneficial predatory insects like hoverflies and ladybirds (which eat aphids), and they produce root secretions that deter certain soil-dwelling pests. They are also very easy to grow and look wonderful combined with vegetables in a large pot or planter.
Herbs are another natural companion for container vegetables. Basil alongside tomatoes is the classic pairing, but chives deter aphids from many vegetables, dill attracts beneficial insects, and mint — best grown in its own pot to prevent it from spreading — deters aphids and ants. An indoor herb garden and a container vegetable setup are natural complements to each other.

French Marigold Seeds — The Essential Companion Plant
These bright annuals deter aphids, attract beneficial insects, and look stunning alongside container vegetables. Easy to grow from seed.
Shop on AmazonCommon Container Vegetable Mistakes (and How to Avoid Them)
Most container vegetable failures trace back to a handful of recurring mistakes. Knowing what they are — and why they cause problems — means you can sidestep them completely and arrive at a productive container garden much faster.
Using garden soil in pots
Garden soil compacts in containers, eliminating the air pockets root systems depend on for oxygen uptake. It also introduces weed seeds, soil-borne diseases, and pest eggs. Always use purpose-made potting compost blended with perlite for container vegetables. This is a non-negotiable starting point.
Choosing pots that are too small
Undersized containers restrict root development, which directly limits the above-ground size and productivity of the plant. A tomato plant in a 15cm pot will never match the output of the same variety in a 30cm pot. Go bigger than you think you need — within reason — and your vegetables will reward you.
Inconsistent watering
The boom-and-bust watering cycle — allowing the compost to dry out completely, then flooding it, then letting it dry again — is very stressful for vegetable plants. It can cause blossom end rot in tomatoes, split fruits in tomatoes and peppers, and poor germination in direct-sown crops. Consistent moisture is far more important than perfect watering at precise intervals. Learn the signs of overwatering and underwatering so you can catch problems early.
Forgetting to fertilise after the first 6–8 weeks
Container vegetables exhaust the nutrient charge in fresh potting compost surprisingly quickly — typically within six to eight weeks of active growth. After this point, regular liquid feeding is essential. Many gardeners notice their plants looking vigorous and then gradually losing colour and vigour; the most common cause is nutrient depletion, not disease or pest problems.
Growing the wrong varieties for containers
Not all varieties of a given vegetable are equally suited to containers. A full-sized beefsteak tomato in a pot is an ambitious project requiring considerable skill; a tumbling cherry tomato variety is almost effortless. Choose compact, container-bred, or naturally small varieties of any vegetable you want to grow, and the difference in results is dramatic.
Ignoring drainage
Pots without adequate drainage holes — or pots with holes that are blocked by a layer of gravel or crocks (a widely perpetuated myth) — lead to waterlogged compost and root rot. Drainage holes must be clear and unobstructed. The old advice about placing a layer of crocks at the bottom of pots actually impedes drainage rather than improving it; fill the pot entirely with potting compost instead.
Neglecting pest monitoring
Aphids, whitefly, spider mites, and fungus gnats are common container vegetable pests. Catching infestations early — when they are small and easier to deal with — makes a huge difference. Check the undersides of leaves weekly. If you notice fungus gnats around your containers, address the issue promptly before populations build up.
Not having the right tools
Container gardening does not require many tools, but having the right few makes the whole process easier and more enjoyable. A long-reach watering can, hand trowel, small pruners, plant labels, and a quality dibber are the core kit. Our guide to essential gardening tools for beginners covers everything you need without overcomplicating the list.
Seasonal Planting Guide for Container Vegetables
Container vegetables are not exclusively a summer activity. With the right plant choices and a small degree of preparation, you can be harvesting fresh vegetables from your containers right through the year. The key is understanding which vegetables suit which seasons and planning accordingly.
| Season | Sow / Plant | Harvest | Notes |
|---|---|---|---|
| Early Spring | Peas, spinach, lettuce, radishes, spring onions | Lettuce, spinach, radishes from previous sowing | Start chillies and tomatoes indoors on a warm windowsill |
| Late Spring | Tomatoes (after last frost), beans, courgette, chard | Peas, spinach, lettuce, spring onions, radishes | Most productive outdoor planting window; succession-sow lettuce |
| Summer | Successive sowings of lettuce, radishes, chard | Tomatoes, chillies, beans, courgette, kale | Water daily in hot weather; feed weekly; watch for pests |
| Early Autumn | Spinach, kale, spring onions, garlic (cloves) | Tomatoes (winding down), chillies, beans, chard | Plant garlic cloves for next summer’s harvest |
| Winter | Garlic (outdoors), overwintered spinach and kale | Kale, overwintered spinach, forced chicory | Move tender plants indoors; protect pots from hard frost |
For beginners, start with late spring planting and keep things simple: one pot of cherry tomatoes, one of lettuce, one of chillies, and perhaps a window box of radishes and spring onions. This four-container setup covers multiple flavours and harvest timings without being overwhelming. Once you have a season of experience behind you, expanding into a full year-round setup becomes straightforward.
The balcony and patio gardener has some advantages for extending the season. Pots against south-facing walls benefit from reflected warmth that extends the growing season by several weeks at both ends. Portable cold frames or fleece covers can be moved over sensitive containers when frost threatens in autumn, buying extra weeks of harvest.
Year-round abundance tip: Plant kale and Swiss chard in late summer specifically for an autumn and winter harvest. Both are frost-hardy enough to keep producing through surprisingly cold weather, and both look striking in containers on a winter balcony when everything else has died back. Pair with winter-planted pansies for a container display that is both edible and beautiful.

Plant Fleece — Season Extender for Container Gardens
Drape over containers during cold snaps to extend the season by weeks. Lightweight, reusable, and available in multiple sizes to suit different pot arrangements.
Shop on AmazonTroubleshooting Container Vegetable Problems
Even well-managed container vegetable gardens encounter problems. The difference between experienced and beginner gardeners is largely a matter of recognising problems early and understanding what causes them — which allows for quick, targeted fixes rather than guesswork. Here are the most common issues and their solutions.
Yellow Leaves
Yellowing leaves on container vegetables is one of the most common symptoms, and it has multiple potential causes. Yellow leaves starting at the bottom of the plant and working upward often indicate nitrogen deficiency — common in containers where the nutrient charge has been depleted. Apply a high-nitrogen liquid feed. Overall yellowing on all leaves simultaneously can indicate overwatering and waterlogged roots; check drainage and allow the compost to partially dry out before watering again.
Wilting Despite Wet Soil
If your vegetable is wilting but the compost is clearly moist, root problems are likely. Overwatering, root rot, or a severely root-bound plant are the most common causes. Tip the plant from its pot and examine the roots: healthy roots are white or cream and firm; rotted roots are brown, slimy, and smell unpleasant. Root-bound plants need repotting into a larger container; root rot requires cutting away affected roots and repotting into fresh, well-draining compost.
No Flowers or Fruit on Tomatoes/Chillies
If your tomato or chilli plant is growing vigorously but not setting fruit, the most common causes are insufficient sunlight (move to a sunnier position), temperatures that are too high or low for pollination (high heat above 35°C and cold below 10°C both inhibit fruit set), or excess nitrogen fertiliser (which encourages foliage growth at the expense of fruiting). Switch to a high-potassium tomato fertiliser and ensure the plant is getting adequate direct sun.
Leggy, Pale Seedlings
Seedlings that are tall, thin, and pale rather than compact and green are stretching for light — they are not getting enough. Move the container or seedling tray to a brighter position. If growing indoors, a south-facing windowsill in direct sun is the minimum requirement for most vegetable seedlings. Grow lights are an excellent solution for indoor starting in genuinely low-light conditions.
Aphid Infestations
Aphids are the most common pest in container vegetable gardens. Small numbers are not usually a major problem — natural predators like ladybirds will often find and deal with small colonies. Larger infestations can cause distorted leaves and reduced vigour. Knock large colonies off with a strong stream of water, or apply insecticidal soap spray. Growing companion plants like marigolds and chives helps deter aphids in the first place. Also check for fungus gnats, which are a separate but common container pest that can be confused with aphids in their early stages.
Blossom End Rot on Tomatoes
A dark, sunken patch at the base of ripening tomatoes indicates blossom end rot — a calcium deficiency symptom caused not by lack of calcium in the soil but by inconsistent watering that prevents calcium uptake. The fix is consistent watering rather than a calcium supplement. Using a self-watering container eliminates this problem almost completely for tomatoes in pots.
Leggy or Bolting Lettuce and Spinach
Lettuce and spinach bolt (send up a flowering stem and stop producing edible leaves) in response to heat, long days, or drought stress. Once bolting begins, the leaves become bitter and the plant’s productive life is effectively over. Prevention is far more effective than cure: choose bolt-resistant varieties, keep the soil consistently moist, provide some afternoon shade during the hottest months, and sow cool-season crops in spring and autumn rather than midsummer.
If you are dealing with multiple issues simultaneously, stepping back and reassessing your setup from a holistic gardening perspective can help identify the root cause rather than treating symptoms individually.
Frequently Asked Questions
Conclusion: Your Container Vegetable Garden Starts Now
Growing vegetables in pots is one of the most accessible, rewarding, and genuinely useful things you can do as a home gardener. The barrier to entry is remarkably low — a couple of pots, a bag of good potting compost, a handful of seeds, and a spot with some sunlight is genuinely all you need to get started.
The vegetables on this list — from lightning-fast radishes and cut-and-come-again lettuce to productive cherry tomatoes and dramatic courgettes — are the ones that give beginners real results with manageable demands. Start with just two or three pots in your first season: one of lettuce or spinach, one of cherry tomatoes or chillies, and perhaps a window box of radishes and spring onions. See how they grow, learn what your particular space does best, and build from there.
The experience of eating something you have grown yourself — even something as simple as a handful of radishes or a bowl of fresh lettuce leaves — is disproportionately satisfying. It connects you to the growing cycle in a way that is genuinely difficult to describe, and once experienced, it becomes deeply motivating. The goal is not perfection in your first season; it is engagement and learning.
Visit Gardening at Home for more guides across every aspect of home gardening, from balcony garden setups to indoor herb gardens and beyond. Every container vegetable journey begins with putting compost in a pot and pressing a seed into it. Everything else follows from there.
Ready to Grow Your First Container Vegetable Garden?
Explore our full range of beginner gardening guides — from soil selection to seasonal planning — and grow with confidence from day one.
Start Your Garden Journey →
Container Vegetable Seed Collection
A curated selection of compact, container-friendly vegetable seeds — including dwarf tomatoes, chillies, beans, lettuce, and more. Perfect beginner starter set.
Shop on Amazon