How to Use a Broadcast Spreader the Right Way: Achieve a Lush, Even Lawn Every Time
A masterclass on setup, calibration, walking technique, and material mastery — stop wasting seed and fertilizer on uneven coverage, fix lawn stripes, and get professional results from your rotary or drop spreader.
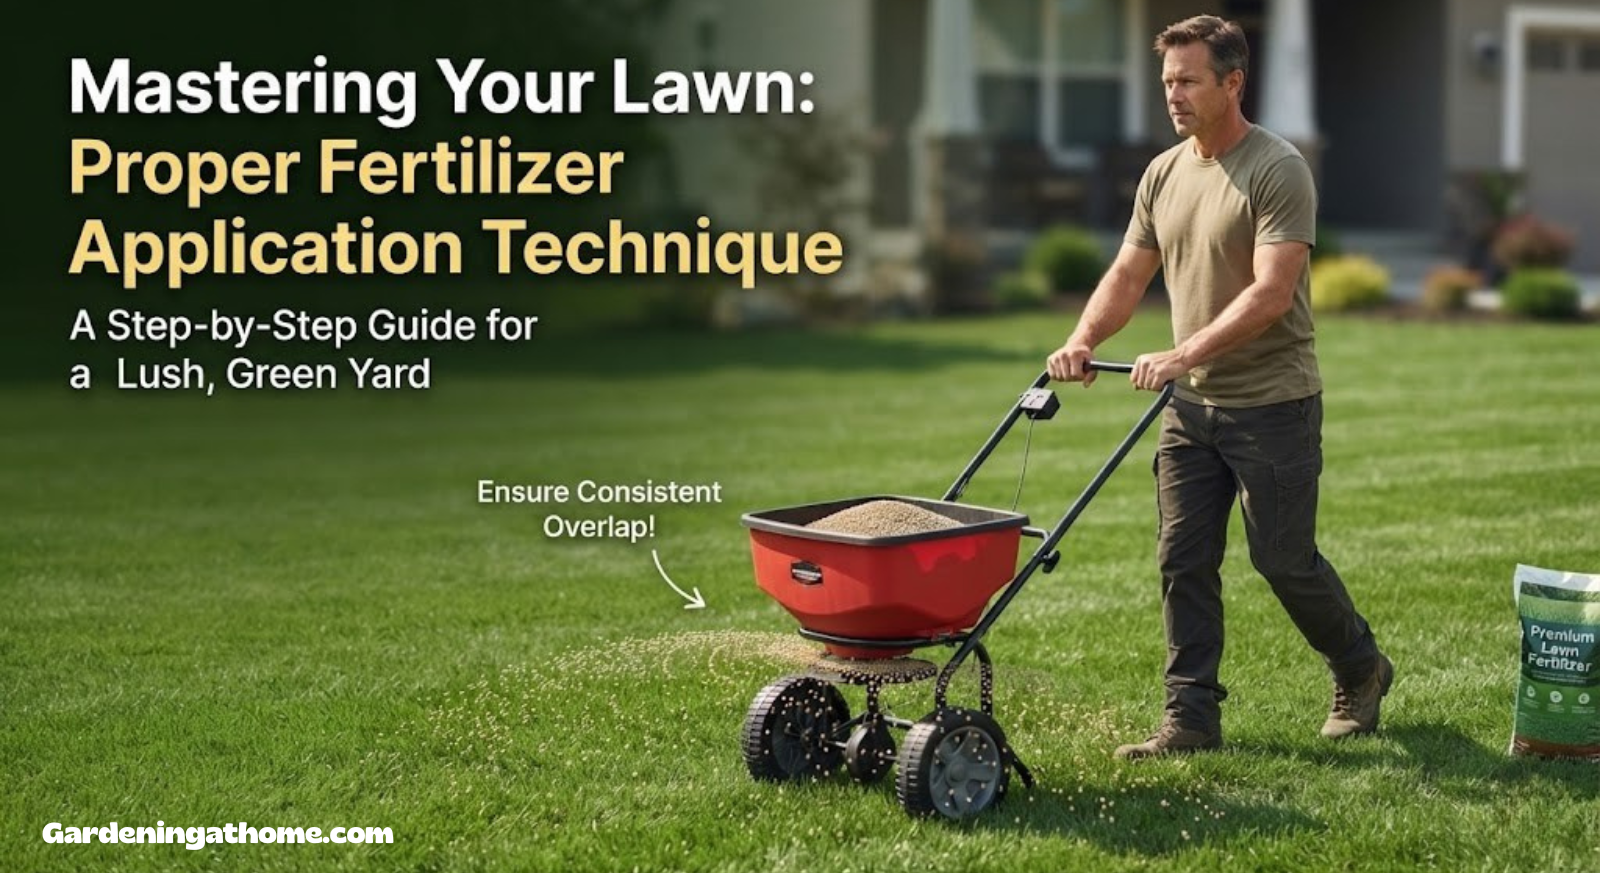
1. Why Technique Matters for a Healthy Lawn
A broadcast spreader is one of the simplest yet most misunderstood lawn tools you’ll ever own. Simple doesn’t mean foolproof. Hand someone a spreader with no instruction and you’ll almost always get the same result: dark green stripes running through an otherwise pale lawn, bald patches where seed never landed, or a scorched strip along the driveway where fertilizer piled up too thick. None of that happens because the tool is bad — it happens because technique got skipped. The right application method is the single biggest factor separating a professional, carpet-like turf from a patchy, weed-prone yard.
This guide walks through the entire process from picking the right unit to putting it away clean, with a dedicated inline diagram for every major step so you can see exactly what correct technique looks like rather than just reading about it. Whether you’re seeding a new lawn, feeding an established one, applying lime to correct soil pH, or knocking down ice on a walkway, the fundamentals covered here apply across nearly every situation. We’ll also dive deep into troubleshooting lawn stripes, fixing uneven fertilizer application, and choosing the best broadcast spreader for your specific yard size and grass type.
2. Types of Broadcast Spreaders: Finding the Best Spreader for Your Needs
Before diving into technique, it helps to know which category of spreader you’re actually holding, since the walking pattern differs slightly between types. Broadcast (rotary) spreaders fling material outward in a fan shape using a spinning disc, while drop spreaders release material straight down in a narrow, precise band directly beneath the hopper. Understanding the difference between a broadcast spreader vs drop spreader is critical for choosing the right tool for your lawn care program.
| Spreader Type | Coverage Width | Best For | Precision | Typical Price Range |
|---|---|---|---|---|
| Walk-behind broadcast | 4-8 ft | Small to mid lawns (up to 1/2 acre) | Moderate | $30 – $80 |
| Tow-behind broadcast | 8-12 ft | Large lawns, acreage | Moderate | $150 – $350 |
| Drop spreader | 18-24 in | Small yards, precise edges, near flower beds | High | $40 – $120 |
| Handheld broadcast | 3-5 ft | Spot treatment, tiny urban yards, tight corners | Low | $15 – $40 |
This guide focuses primarily on broadcast (rotary) spreaders since they’re the most common choice for homeowners, including both walk-behind and tow-behind models. If you’re still shopping and haven’t settled on a specific unit, our roundup of the best lawn seed spreader options breaks down which type fits which lawn size. For most homeowners with a lawn size between 5,000 and 15,000 square feet, a mid-range walk-behind broadcast spreader with a capacity of around 50-80 lbs offers the perfect balance of efficiency and accuracy. Larger properties with over an acre will find that a tow-behind broadcast spreader drastically reduces application time for seasonal fertilizer treatments and overseeding projects.
3. Before You Start: Essential Prep for Even Lawn Application
A few minutes of preparation prevents almost every common spreading mistake. Start by checking the weather — calm, dry conditions are ideal. Wind scatters lightweight seed unpredictably, and spreading fertilizer or seed right before heavy rain can wash material into gutters and storm drains before it has a chance to settle into the soil, leading to nutrient runoff and a patchy lawn. Soil moisture also plays a role; you don’t want to spread on bone-dry, compacted earth any more than you want a mud pit.
Pre-Spreading Checklist for Lawn Care Success
- Confirm wind speed is under 10 mph to prevent product drift
- Check that no heavy rain is expected for at least 24 hours (unless the product calls for immediate watering)
- Mow the lawn a day or two before, if seeding or fertilizing, to ensure granules reach the soil surface
- Have the product bag’s settings chart handy — don’t trust memory
- Wear closed-toe shoes and gloves, especially with granular fertilizers or ice melt, to avoid skin irritation
- Clear the lawn of debris, toys, and hoses that can deflect the spread pattern
- Mark sprinkler heads and shallow utility lines if you’re working in an unfamiliar area

Don’t have a spreader yet? Compare top-rated models and current pricing for the best lawn spreaders.
Shop Broadcast Spreaders on Amazon4. Step 1: Choose the Right Spreader for the Job
1Before you even touch the material you’re spreading, match the spreader to the size and shape of your lawn. A drop spreader makes sense for a small, tightly landscaped yard where precision near flower beds matters more than speed. A broadcast spreader is the better call for anything mid-size or larger, since it covers ground faster with a wider fan pattern. The “best broadcast spreader” isn’t a single model; it’s the one that fits your specific lawn dimensions and the type of product you apply most often.
For most half-acre-plus properties, a broadcast unit — whether push or tow-behind — is going to save you significant time without sacrificing much accuracy, as long as you follow proper overlap technique covered later in this guide. A common question is, “What size spreader do I need?” For lawns under 5,000 square feet, a small walk-behind with a 25-50 lb hopper is ideal. Medium lawns of 5,000 to 15,000 square feet benefit from a full-size walk-behind. Anything larger than 15,000 square feet will make you wish you had a tow-behind model, which can cut a 40-minute job down to 10 minutes.
5. Step 2: Read the Product Label Settings Chart
2Every bag of seed, fertilizer, or ice melt includes a settings chart on the packaging that lists recommended dial numbers for common spreader brands. This step gets skipped constantly, and it’s the single biggest reason people end up with uneven or overly heavy application, often asking “Why is my lawn striped after fertilizing?” The answer almost always traces back to guessing the setting instead of reading the bag.
If your spreader brand isn’t listed, look for a general application rate (usually stated in pounds per 1,000 square feet) and cross-reference that with your spreader’s manual, which typically includes a conversion chart. It’s an extra step, but it beats guessing. For new lawns, setting your spreader to a lower rate and making two perpendicular passes is far safer than one aggressive pass that leads to fertilizer burn. This technique is especially important when using a broadcast spreader for seeding, as seed distribution is less forgiving than granular fertilizer.
6. Step 3: Calibrate the Rate Setting for Perfect Coverage
3Spreader calibration confirms that your spreader’s dial setting actually matches the product’s recommended output. The easiest at-home method is the catch-and-weigh test: attach a tray or tarp under the hopper, run the spreader for a measured distance, then weigh what came out and compare it to the target rate. Calibrating your broadcast spreader annually, or whenever you switch product types, is the best defense against a striped lawn.
A full walkthrough of this exact process, including the math for converting your test results into a per-1,000-square-foot rate, is available in our dedicated how to calibrate a spreader guide. It’s worth doing this once per product, since density varies between seed blends and fertilizer formulations. Many homeowners are surprised to find their spreader was off by 20% or more, which explains those mysterious dark green stripes in the lawn. The 10-foot test run is simple: measure 10 feet, fill the hopper partially, walk that distance at your normal pace, and catch the output. Multiply the weight by a factor to get your pounds-per-1,000-square-feet rate, then adjust the dial up or down.
7. Step 4: Fill the Hopper Correctly on a Hard Surface
4Fill the hopper on a hard surface like a driveway or sidewalk rather than on the lawn itself — if you spill while filling, you’ll avoid burning a fertilizer-shaped patch into the grass. Close the gate lever before pouring material in, and never fill past the manufacturer’s max-fill line, since overfilling strains the agitator and can cause uneven flow. Spilling granular fertilizer on the lawn is one of the fastest ways to create a dead brown spot that takes months to recover.
Once filled, double-check the rate dial is still set to your calibrated number — it’s easy to accidentally bump it while carrying the spreader out to the lawn. For large jobs, consider filling the hopper only halfway to reduce fatigue and maintain a consistent walking speed. A heavy hopper changes your gait slightly, which can affect the spread pattern. Many pros fill a 5-gallon bucket with product and use that to refill the spreader, rather than dragging the entire 50-lb bag around the yard.
8. Step 5: Establish Border Passes First
5Before covering the open interior of the lawn, walk the perimeter first with the spreader closed, then open the gate only as you pass along the outer edges. This creates a defined border and prevents material from flying onto driveways, sidewalks, flower beds, or neighboring property, which is both wasteful and, in the case of fertilizer, a common source of runoff into storm drains. A clean border pass is the hallmark of a professional lawn application.
Think of the border as a container — once it’s established, you have clear boundaries to work within, which makes the interior pattern in the next step much easier to keep straight. For irregularly shaped lawns, the border pass is even more critical because it defines the edge of your workspace. Keep the spreader about 12-18 inches from the actual edge so the fan pattern feathers out to the boundary without throwing product past it. When working near flower beds or vegetable gardens, consider switching to a drop spreader for the final edge pass if absolute precision is required.
9. Step 6: Fill in the Interior Pattern with Straight Passes
6With borders complete, fill the interior using straight, parallel passes — back and forth like mowing rows, rather than random or circular paths. Straight lines make it far easier to judge overlap and spot any areas you may have missed. For new lawns and overseeding, the crosshatch pattern (north-south, then east-west) is the gold standard for eliminating gaps and achieving a thick, uniform turf.
If your lawn is irregularly shaped, break it into smaller rectangular or triangular sections mentally, then apply this row pattern within each section separately. For step-by-step technique specific to seed density, our guide on how to spread grass seed evenly goes deeper into this exact stage. The key is to never stop moving while the gate is open; plan your turns at the end of each row to happen on an area you’ve already covered. Many lawn care professionals use a technique called “half-rate, double-pass” where they apply at 50% of the recommended rate in two perpendicular directions. This virtually eliminates the risk of streaks and is particularly effective when using a broadcast spreader for fertilizer.
10. Step 7: Maintain Overlap and Steady Walking Speed
7Broadcast spreaders throw material in a fan pattern that’s heaviest in the middle and lighter at the edges. If you space your passes at exactly the rated width, those lighter edges create faint striping. Overlapping each pass by roughly 10-15% compensates for this taper and produces a much more even result. The question “How much should I overlap my spreader passes?” is one of the most common, and the answer is always more than you think.
Speed matters just as much as spacing. Walk at a slow, steady pace — roughly 3 mph, or the speed of a relaxed stroll. Moving too fast means less material drops per square foot before you’ve moved past that spot, thinning out coverage exactly where consistency matters most. To calibrate your walking speed, time yourself over a known distance: 100 feet should take about 22-23 seconds at 3 mph. A common mistake is starting too fast and then slowing down as you get tired, which creates a visible gradient of coverage from one end of the lawn to the other. For tow-behind spreaders, your mower or tractor speed needs to match the recommended walking pace; riding mowers often move too fast for accurate fertilizer application.
11. Step 8: Close the Gate and Clean Up for Long-Term Spreader Health
8Always close the gate lever before stopping, turning, or crossing hard surfaces like sidewalks and driveways. Pausing with the gate open dumps a concentrated pile of material in one spot, which can burn the lawn or create a slippery mess on pavement. Proper clean up after spreading is just as important as the application itself for maintaining your equipment.
Once finished, empty any remaining material back into its original bag rather than leaving it in the hopper, then rinse the unit if you used fertilizer, seed with a coating, or ice melt. Our full how to clean a lawn spreader guide covers the complete post-use routine, including how to prevent the agitator and gate mechanism from sticking between uses. Neglecting to clean a fertilizer spreader is the number one cause of premature failure; the chemicals are hygroscopic, meaning they attract moisture from the air and form a corrosive paste that seizes moving parts.

Upgrade to a spreader that makes calibration and even coverage effortless. Durable, rust-proof models available now.
Browse Spreaders on Amazon12. Material-Specific Tips for Lawn Seed, Fertilizer, Lime, and Ice Melt
While the core walking technique stays the same, a few adjustments make a real difference depending on what you’re spreading. Each material has unique characteristics — particle size, density, and spreadability — that affect how your broadcast spreader performs.
Grass Seed: Using a Broadcast Spreader for Seeding and Overseeding
Use a lower rate setting and consider doing two passes in perpendicular directions (once north-south, once east-west) for new lawns, which improves seed-to-soil contact and reduces gaps. This technique is covered in more detail in our how to overseed a lawn with a spreader guide. Grass seed is lighter than fertilizer and bounces more, so a slightly narrower effective spread width should be used for calculations. When overseeding an existing lawn, mixing the seed with a carrier like Milorganite or sand (4 parts sand to 1 part seed) helps improve flow through the hopper and makes it easier to see where you’ve been.
Granular Fertilizer: How to Avoid Fertilizer Burn with a Spreader
Fertilizer burns are almost always caused by overlapping too much or moving too slowly at a high rate setting. Stick to the label’s recommended rate exactly, and always water in shortly after application unless the product specifies otherwise. For slow-release fertilizers, the margin of error is slightly wider, but for fast-acting synthetics, precision is everything. If you see a dark green stripe pattern in your lawn a week after application, you’re overlapping too much or your rate is set too high.
Lime: Using a Broadcast Spreader for Soil Amendment
Pelletized lime is denser than seed or standard fertilizer, so it typically requires a higher rate setting to achieve the same coverage. Because lime adjusts soil pH gradually, slightly uneven application is more forgiving here than with fast-acting fertilizers. However, calcitic lime is dusty; wear a mask and consider using a drop spreader on windy days to keep the dust cloud contained.
Ice Melt: Winter Spreader Use on Walkways and Driveways
For winter use, a slightly heavier, more deliberate pass along high-traffic walkways is fine, but avoid overlapping too much on grass-adjacent areas, since excess salt exposure can damage turf and garden beds through spring runoff. Dedicated ice melt spreaders exist, but a standard broadcast spreader works just as well if cleaned thoroughly afterward — road salt and ice melt are far more corrosive than lawn products.
Timing also matters as much as technique — see our guide on the best time to spread grass seed for seasonal application windows by grass type and climate zone. Cool-season grasses like Kentucky bluegrass and fescue are best seeded in early fall, while warm-season grasses like Bermuda and zoysia should be seeded in late spring when soil temperatures reach 65-70°F.
13. Troubleshooting Common Lawn Problems: Stripes, Streaks, and Thin Spots
Why Is My Lawn Striped After Spreading?
Lawn striping after fertilizer application is the most common complaint from homeowners. It almost always results from insufficient overlap between passes. The fan pattern from a broadcast spreader is naturally heavier in the center and tapers off at the edges. If you space your wheels exactly at the stated spread width, you’re leaving a gap where the tapered edges meet, and that gap becomes a light stripe. Increasing overlap to 15-20% immediately fixes this.
Why Are There Brown Spots or Dead Patches?
Concentrated brown spots are usually caused by one of three things: spilling fertilizer while filling on the lawn, pausing with the gate open, or double-applying in the same area by zigzagging instead of using straight parallel passes. Unfortunately, once a fertilizer burn appears, the only fix is to flush the area with water immediately to dilute the nitrogen salts, then reseed the dead spot once the soil returns to normal.
My Lawn Is Patchy After Overseeding
Patchy germination after overseeding with a broadcast spreader typically means the seed rate was too low, the walking speed was inconsistent, or the seed didn’t make good soil contact. A light raking or rolling after seeding dramatically improves germination rates by pressing seed into the soil. Also, check if your spreader is throwing seed inconsistently; a bent or worn agitator can cause pulsating output that creates wavy patterns of thick and thin germination.
Fixing an Uneven Lawn After Spreader Use
If you catch the mistake early (within 24 hours for fertilizer), a thorough watering can help dilute over-applied areas and push nutrients deeper into the root zone where they’re less likely to burn. For seed, you can do a light second pass in the opposite direction to fill gaps. For established striping patterns, the best fix is often patience: a few mowing cycles and normal watering will eventually even out most mild fertilizer striping as roots expand laterally.
14. Spreader Maintenance, Storage, and Repair: Extending the Life of Your Equipment
How to Clean a Lawn Spreader Properly
After every use, empty the hopper completely. Use a soft brush or compressed air to dislodge any granules stuck in the agitator, gate mechanism, or hopper corners. Rinse the entire unit with a garden hose — not a pressure washer, which can force water into sealed bearings — and let it dry completely in the sun before storing. Pay special attention to the bottom of the hopper where the gate slides; this is where corrosion starts first.
Lubricating Moving Parts
Once a season, apply a light coating of silicone spray or white lithium grease to the gate linkage, axle bushings, and the agitator shaft where it enters the hopper. Avoid petroleum-based lubricants like WD-40 on plastic parts, as they can degrade certain types of nylon and polypropylene over time. The spinner plate shaft on a broadcast spreader benefits from a single drop of lightweight machine oil each season.
Off-Season Storage Tips
Store your spreader indoors, away from direct sunlight and moisture. If you must store it in a shed or garage with a concrete floor, place it on a wooden pallet or shelf to prevent moisture wicking up from the concrete and rusting the steel frame. Hang wall-mounted spreaders by the handle, not the hopper, to avoid stressing the plastic. Before storing for winter, do a deep clean, lubricate all moving parts, and consider spraying the metal frame with a rust inhibitor like Fluid Film if you live in a humid climate.
Common Spreader Repairs and Parts Replacement
The most common failure points are a stuck gate lever (caused by corrosion), a worn agitator that no longer spins freely, and cracked hopper plastic. Replacement parts for major brands like Scotts, EarthWay, and Chapin are widely available on Amazon and at hardware stores. A stuck gate can often be freed with penetrating oil and gentle tapping; never force the lever or you’ll snap the linkage. If the spinner plate wobbles, check for a bent shaft — this is common when the spreader has been stored with weight resting on the spinner.
15. Broadcast Spreader vs. Drop Spreader: A Detailed Comparison for Homeowners
Choosing between a broadcast spreader and a drop spreader is one of the most important decisions for your lawn care toolkit. While both have their place, they excel in very different scenarios.
| Feature | Broadcast (Rotary) Spreader | Drop Spreader |
|---|---|---|
| Coverage Width | 4 to 12 feet depending on model | Typically 18 to 24 inches |
| Application Speed | Fast — covers large areas quickly | Slow — requires more passes per area |
| Precision Near Edges | Low — material can drift onto beds and walks | High — drops material exactly below the hopper |
| Wind Sensitivity | High — lightweight products drift easily | Low — unaffected by moderate wind |
| Best For | Large, open lawns; overseeding; fertilizer on established turf | Small lawns; near flower beds; precise lime or fertilizer application |
| Striping Risk | Higher — requires careful overlap | Lower — precise drop pattern but missed passes show as skip stripes |
| Hopper Capacity | Typically 50-130 lbs | Typically 25-50 lbs |
| Price Range | $30 – $350+ | $40 – $120 |
For the vast majority of homeowners with lawns over 2,000 square feet, a broadcast spreader is the better primary tool. The time savings alone justify the choice. However, a drop spreader is invaluable as a secondary tool for precision work — applying a clean edge along flower beds, spreading lime near a vegetable garden, or working on a very small urban lawn where every inch of coverage needs to be exact. Many lawn care enthusiasts eventually own both: a broadcast spreader for the main lawn and an inexpensive handheld or small drop spreader for tight spaces.
When to Use a Tow-Behind Broadcast Spreader
For lawns exceeding 20,000 square feet (just under half an acre), a walk-behind spreader becomes a serious time commitment. A tow-behind model attached to a riding mower or ATV can cover an acre in under 10 minutes. The key consideration with tow-behind spreaders is that your vehicle’s speed must match the recommended walking pace; most riding mowers in low gear operate at 3-4 mph, which is perfect. The Agri-Fab pull-behind broadcast spreader is a popular choice for large properties.
16. Common Mistakes That Ruin Lawn Applications
Mistakes That Cause Uneven Coverage and Lawn Damage
- Skipping calibration and guessing the rate setting — the #1 cause of fertilizer burn
- Walking too fast for the material being spread, leading to thin, patchy coverage
- Not overlapping passes enough, creating visible light stripes
- Filling the hopper directly on the lawn, resulting in a dead brown pile-spot
- Leaving the gate open while stopped or turning, dumping a concentrated mound
- Spreading in windy conditions above 10 mph, causing product drift and waste
- Using damp seed or clumped fertilizer without breaking it up first, clogging the gate
- Neglecting to clean the spreader after use, leading to corrosion and stuck parts
- Applying product in a zigzag or circular pattern instead of straight parallel passes
- Ignoring the product label’s specific settings for your spreader brand
Habits That Improve Results Every Time
- Doing a border pass before filling in the interior to define the work area
- Keeping a slow, consistent walking pace throughout — about 3 mph
- Rechecking the rate dial after filling the hopper, since bumps change the setting
- Rinsing the spreader thoroughly after every use and drying before storage
- Applying in calm, dry weather windows with no rain forecast for 24 hours
- Using the half-rate, double-pass method for critical applications like seeding
- Marking your start and end points mentally or with landscape flags on large lawns
- Investing in a quality spreader with pneumatic tires for smoother, more consistent walking
17. Frequently Asked Questions About Broadcast Spreaders
What setting should I use on my broadcast spreader for Scotts fertilizer?
Check the product bag’s settings chart for your specific spreader brand. For Scotts broadcast spreaders using Scotts Turf Builder, the setting is typically between 3.5 and 5.0, but always verify on the bag. If your brand isn’t listed, use the general pounds-per-1,000-square-feet rate and calibrate manually.
How fast should I walk while spreading fertilizer or seed?
A slow, steady pace of approximately 3 mph — similar to a relaxed stroll — works best. Walking too quickly reduces how much material lands per square foot, thinning out coverage. A 100-foot distance should take about 22-23 seconds at the correct pace.
Should I overlap my passes with a broadcast spreader?
Yes, overlapping by roughly 15-20% compensates for the natural taper in coverage at the edges of the spread pattern and prevents visible striping. If your spreader throws 8 feet wide, your wheel tracks should be about 6.5 to 7 feet apart.
Can I use a broadcast spreader on a windy day?
It’s best to avoid spreading in winds above 10 mph, especially with lightweight grass seed or powdered lime, since wind can scatter material unevenly or off-target entirely into flower beds and neighbor’s yards.
Do I need to water after using a broadcast spreader?
For seed and most fertilizers, yes — watering shortly after application helps material settle into the soil and activates fertilizer nutrients. Always check the product label for specific watering instructions; some weed-and-feed products recommend leaving the product on the foliage for 24 hours.
Why is my lawn striped after using a spreader?
Striping is almost always caused by insufficient overlap between passes or an incorrect rate setting. Increasing overlap and rechecking calibration usually resolves it. If stripes persist, check that your spreader’s spinner plate isn’t damaged or wobbling.
Can I use the same spreader for seed, fertilizer, and ice melt?
Yes, most broadcast spreaders handle all three, provided you rinse and dry the unit thoroughly between different materials. Ice melt is especially corrosive; a dedicated winter spreader is a good investment if you use salt products frequently.
What’s the difference between a broadcast and drop spreader technique?
Broadcast spreaders throw material outward in a wide fan and rely on overlap to stay even, while drop spreaders release material in a narrow band directly below the hopper and require tighter, more precise passes with minimal overlap (just enough to avoid skip stripes).
How do I avoid fertilizer burn when spreading?
Stick closely to the label’s recommended rate setting, avoid excessive overlap, walk at a consistent speed, and water the lawn shortly after application unless directed otherwise. If you spill, scoop up as much as possible and flush the area with water immediately.
Do I need to do a border pass first?
It’s strongly recommended. Walking the perimeter first creates a clear boundary, which makes the interior back-and-forth pattern easier to keep straight and prevents overspray onto driveways or beds.
How often should I clean my spreader?
Rinse it after every use, especially with fertilizer or ice melt, and do a deeper clean with lubricant at the end of each season. Full instructions are in our how to clean a lawn spreader guide.
What size spreader do I need for my lawn?
For lawns under 5,000 square feet, a small walk-behind broadcast or drop spreader is sufficient. For 5,000 to 15,000 square feet, use a full-size walk-behind. For anything larger, a tow-behind broadcast spreader will save considerable time. Our best lawn seed spreader guide breaks this down by lawn size.
Can I spread topsoil or compost with a broadcast spreader?
No. Broadcast spreaders are designed for dry, free-flowing granular materials only. Topsoil, compost, and wet organic matter will clog the gate mechanism and damage the agitator. Use a compost spreader or a shovel and rake for these materials.
Why does my spreader leave a line of material directly under the hopper?
A heavy line directly below the spreader usually means the gate isn’t closing fully or the rate setting is too high for your walking speed, causing material to drop straight down before the spinner can fling it outward. Check the gate adjustment and clean any debris preventing a full seal.
18. Final Thoughts: Mastering Your Lawn Care Routine
Using a broadcast spreader well isn’t complicated, but it does reward a bit of patience upfront. Calibrating the rate setting, walking the border before filling in the interior, keeping a steady pace, and overlapping passes deliberately are the four habits that separate a professional-looking lawn from a striped, patchy one. None of these steps take more than a few extra minutes, and the payoff — a lawn with even color, consistent seed germination, and no wasted product — is well worth it.
Once you’ve got the technique down, the process becomes almost automatic. Pair good technique with the right spreader for your lawn size, and you’ll get consistent, professional-quality results every single time you head out to seed, feed, or de-ice your yard. Remember that lawn care is a seasonal rhythm: early spring pre-emergent, late spring fertilizer, fall overseeding and winterizer. Your broadcast spreader is the tool that ties that entire program together, and using it correctly means the difference between a lawn that just survives and one that thrives. Invest the time to calibrate, clean, and store it properly, and it will reward you with decades of reliable service and a lawn that’s the envy of the neighborhood.

Ready to put this technique to work? Find a reliable spreader today and start building your best lawn.
Shop Spreaders on Amazon