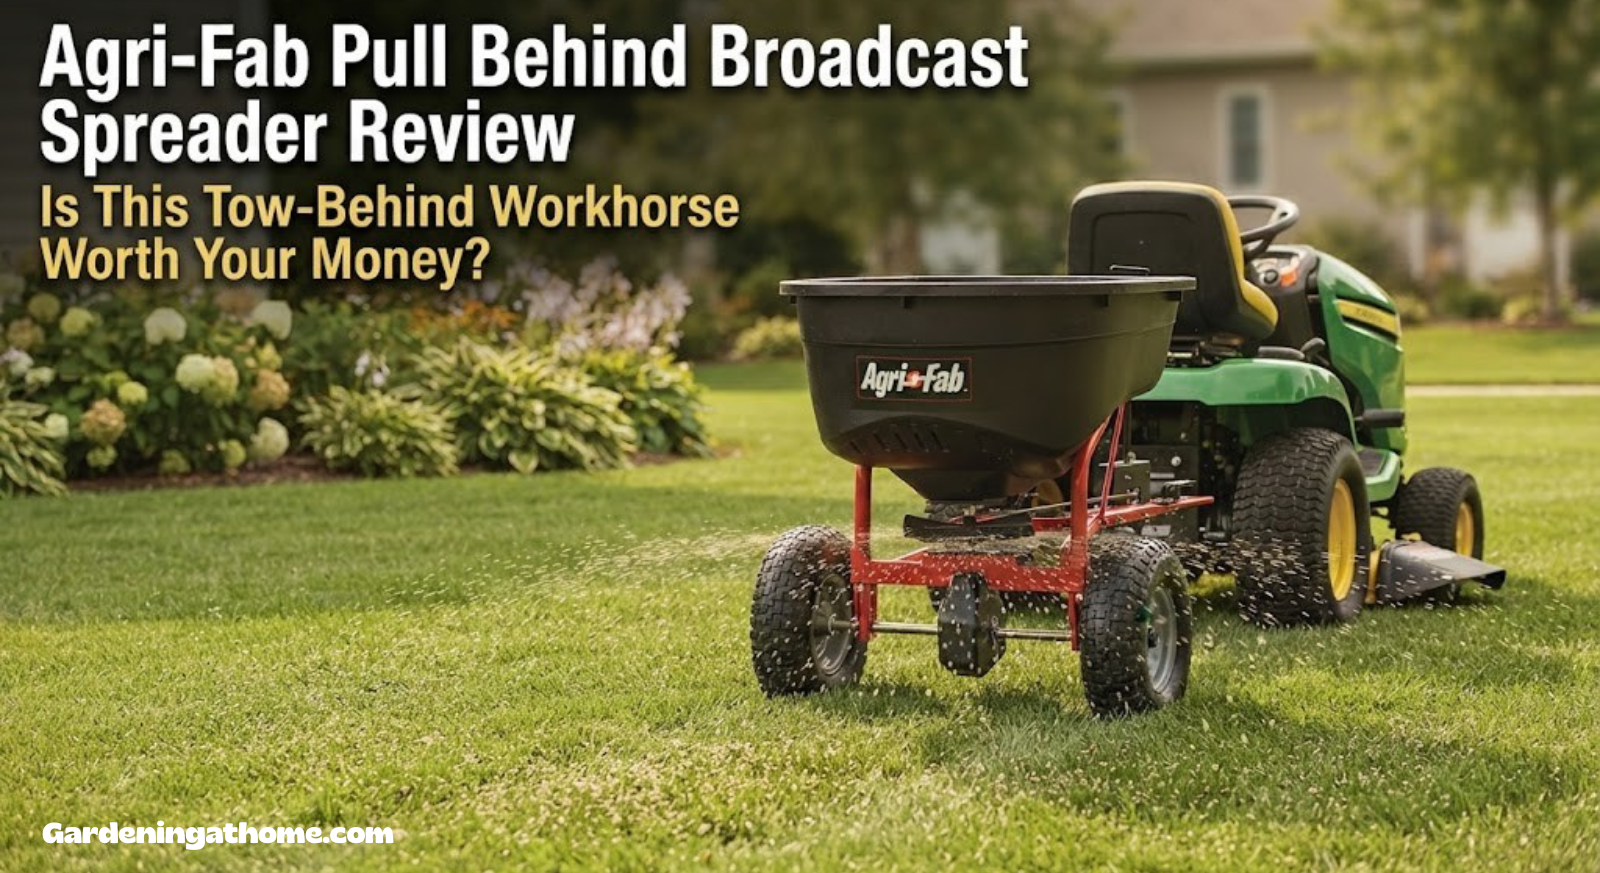
Agri-Fab Pull Behind Broadcast Spreader Review: Is This Tow-Behind Workhorse Worth Your Money?
An honest, hands-on style breakdown of hopper capacity, spread pattern, build quality, and real-world lawn performance.
1. Quick Overview & Verdict
If you’ve been dragging a handheld or walk-behind spreader across a half-acre yard and wondering why your arms feel like noodles afterward, the Agri-Fab pull behind broadcast spreader is probably already on your radar. It shows up again and again in homeowner forums, lawn care subreddits, and product comparison lists, and for good reason — it takes the physical labor out of feeding, seeding, and de-icing large lawns by letting your riding mower or garden tractor do the pulling instead of your shoulders.
This review walks through everything a buyer actually needs to know before clicking “add to cart”: how it’s built, how evenly it spreads material, how much it holds, how it hooks up to different mowers, and where it falls short. We’ll also stack it against comparable spreaders like the Earthway 2050P so you can see exactly where the value lies.
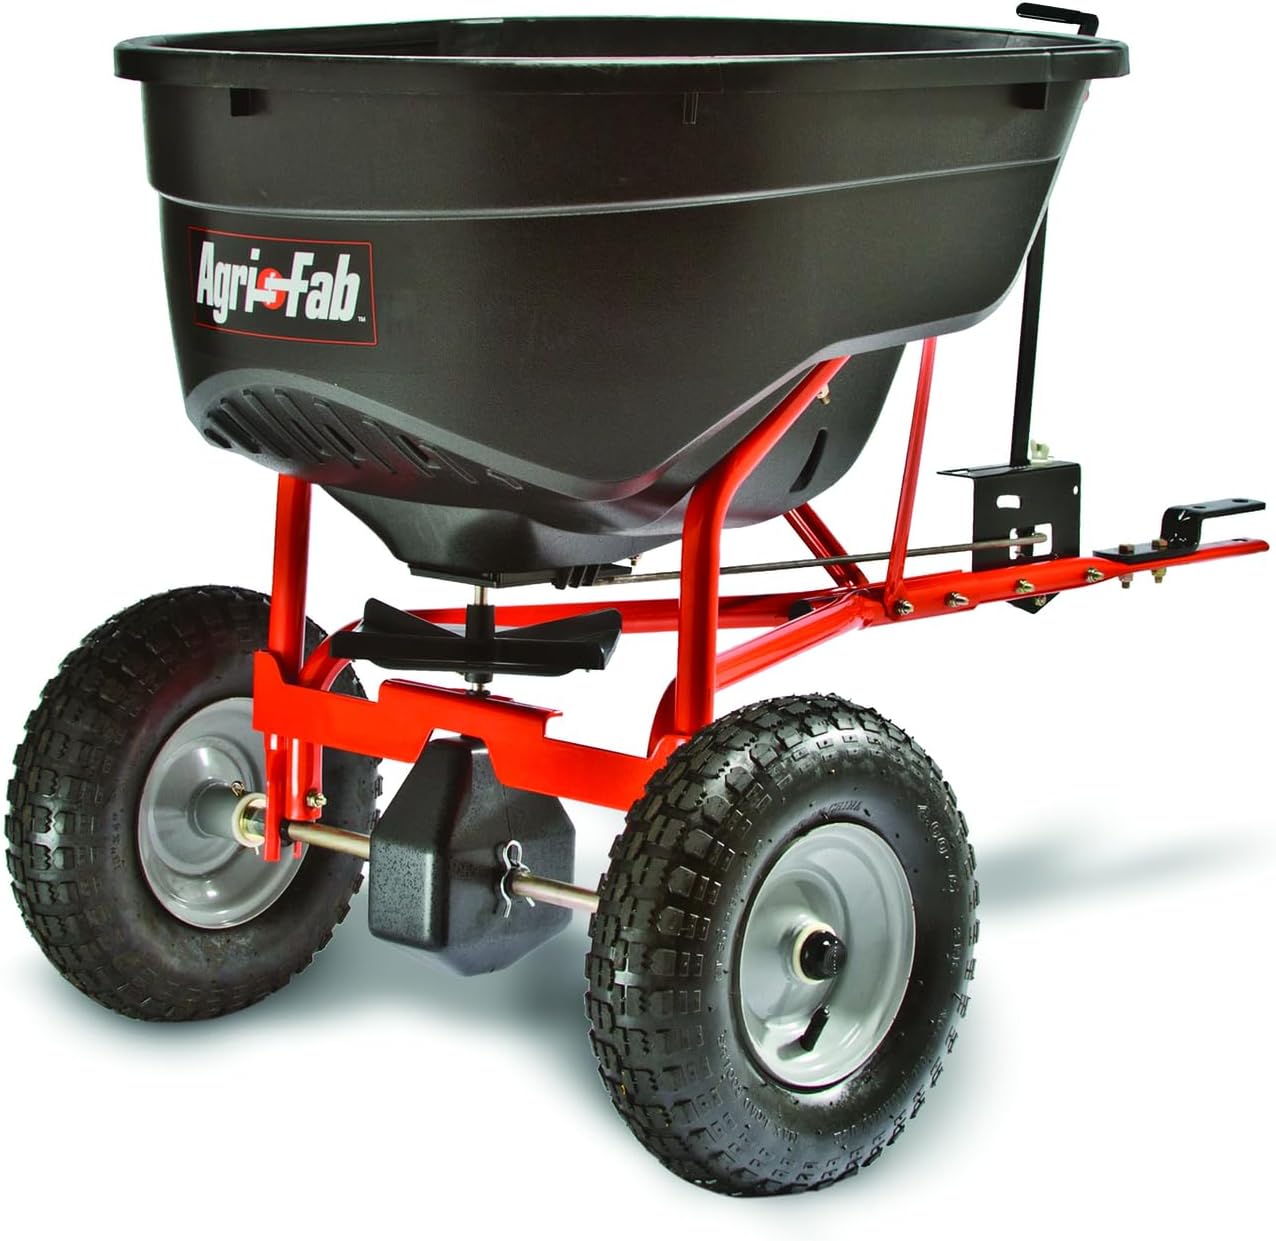
Check current pricing and availability on Amazon before it changes.
Check Price on Amazon2. Who This Spreader Is For
Not every lawn needs a tow-behind spreader, and being upfront about that matters more than trying to sell you on a product you don’t need. If your property is under a quarter acre, a walk-behind or handheld spreader will likely serve you just fine and cost a lot less. But once your lawn stretches past that threshold — especially if you’re managing anything close to half an acre or more — pushing a spreader on foot turns into an hour-plus chore that eats into your weekend.
The Agri-Fab pull behind broadcast spreader is built specifically for that middle-to-large lawn owner who already has a riding mower, lawn tractor, ATV, or zero-turn mower sitting in the garage. It’s also a solid match for anyone managing rental properties, HOA common areas, or a few acres of pasture edge that need periodic seeding or fertilizing. If you fall into any of these categories, this spreader earns its keep quickly.
Ideal Use Cases
- Homeowners with half-acre to multi-acre lawns
- Anyone already using a riding mower or garden tractor for mowing
- Seasonal overseeding, fall fertilization, and winter de-icing tasks
- Property managers handling multiple lots
- Farm and hobby-acreage owners spreading lime or seed along fence lines
On the flip side, if your yard is small, oddly shaped with tight corners, or you don’t own a tow vehicle, a walk-behind unit will be more practical. Towing something this size around flower beds and narrow side yards isn’t fun, and you’ll end up doing edge work by hand regardless.
3. Agri-Fab Model Lineup: Choosing the Right Variant
Agri-Fab has been manufacturing lawn and garden attachments since the early 1970s, and their broadcast spreader line has evolved through several generations. If you’ve started browsing product listings, you’ve probably noticed that “Agri-Fab pull behind broadcast spreader” isn’t a single product but rather a family of models with different hopper sizes, feature sets, and price points. Understanding the differences between these variants is the first step toward avoiding buyer’s remorse.
The Core Models
At the time of writing, the most commonly available Agri-Fab tow-behind broadcast spreaders break down roughly into three tiers:
| Model Tier | Hopper Capacity | Spread Width | Ideal Property Size | Notable Features |
|---|---|---|---|---|
| 45-0462 (130 lb) | 130 lbs | Up to 10-12 ft | 0.5 – 1.5 acres | Enclosed gearbox, universal hitch |
| 45-0530 (175 lb) | 175 lbs | Up to 10-12 ft | 1 – 3 acres | Larger hopper, same frame footprint |
| Commercial / Pro Series | 175+ lbs | Up to 12 ft | 2+ acres / commercial | Heavier-duty axle, wider tires |
The 130-pound model is by far the most popular choice for residential homeowners. It hits the sweet spot between capacity and price — large enough to cover most suburban and semi-rural properties in a single fill, but not so bulky that it becomes unwieldy in tighter spaces. The 175-pound variant is essentially the same frame with a taller hopper, which adds capacity without meaningfully changing the spread pattern or towing behavior. If you’re managing more than an acre regularly, the extra 45 pounds of capacity saves you a refill cycle per session.
What Changes Between Generations
Agri-Fab periodically refreshes these models, and the differences between recent production runs are mostly incremental rather than revolutionary. Common year-over-year tweaks include upgraded gate cables, revised agitator blade geometry, and small changes to the hitch bracket design. None of these affect compatibility with standard riding mower hitches, but if you’re buying a replacement agitator or gate assembly, matching the exact model number to the parts diagram matters.
One distinction worth noting: some older units used a different rate-control lever position than current models. If you’re buying used or refurbished, check that the lever assembly includes the numbered dial plate — missing plates make calibration much harder since you’re guessing at gate openings rather than reading a repeatable number.
Which Model Should You Buy?
For most residential users with a half-acre to one-acre lawn, the base 130-pound model does everything you need. If your lawn exceeds 1.5 acres, the 175-pound version makes more sense since you’ll spend less time driving back to refill. The commercial tier is genuinely unnecessary for homeowners — it’s designed for landscapers and property maintenance crews running the spreader daily, and the price premium reflects that durability target rather than any meaningful performance advantage for occasional residential use.
4. Unboxing & Assembly
The spreader typically ships semi-disassembled in a single box, with the hopper, frame, wheels, axle, and hitch hardware packed separately. Most buyers report assembly taking somewhere between 20 and 40 minutes with basic hand tools — a wrench and a screwdriver cover nearly everything. The included instructions are simple line diagrams rather than detailed paragraphs, so if you’re someone who prefers written steps, it helps to have patience or a spare hand.

What’s in the Box
| Component | Notes |
|---|---|
| Poly hopper | Pre-formed, UV-resistant plastic |
| Steel frame | Requires bolting together |
| Two wheels + axle | Pneumatic tires, snap onto axle pins |
| Hitch pin & clip | Universal-style hitch for most tow vehicles |
| Rate control lever & cable | Pre-attached to the hopper gate on most units |
| Hardware bag | Bolts, nuts, washers |
One tip that saves frustration: assemble the unit on a flat driveway or garage floor rather than grass, since it’s much easier to get bolts aligned on a hard, stable surface. Once assembled, the spreader stays together permanently — you won’t need to disassemble it again except for occasional wheel maintenance.
Detailed Assembly Walkthrough
While the manual covers the basics, there are a few steps that benefit from more context than the diagram provides:
Step 1 — Frame Assembly: Lay out the two frame rails and connect them using the cross-brace bolts. Finger-tighten all bolts before torquing any of them down — this gives you the play you need to align everything. Once the frame is square, go back and tighten each bolt firmly.
Step 2 — Axle and Wheels: Slide the axle through the frame’s lower bracket holes. The wheels go on next, secured by cotter pins or snap rings depending on your model generation. Make sure both wheels spin freely and that the axle sits level — an uneven axle causes the hopper to tilt, which throws off your spread pattern later.
Step 3 — Hopper Mounting: The hopper sits on top of the frame and bolts down through pre-drilled holes in the frame rails. Line up all four mounting holes before inserting any bolts. The hopper should sit level and not rock when you press down on its edges.
Step 4 — Gate and Agitator: Most models ship with the gate assembly and agitator already installed inside the hopper. If yours arrives separately, install the agitator first (it sits on a central shaft at the bottom of the hopper), then attach the gate mechanism underneath. The rate control cable connects from the gate to the external lever with a simple pinch connector.
Step 5 — Hitch Bracket: Bolt the hitch bracket to the rear of the frame. The universal pin-and-clip style fits standard tow brackets on most riding mowers without modification.
Assembly Pitfalls to Watch For
The most common assembly mistake is overtightening the hopper mounting bolts. The poly hopper is durable but can crack if you crank down bolts with excessive force — hand-tight plus a quarter turn is sufficient. Another frequent issue is forgetting to check the gate clearance before loading material. The gate should open and close smoothly through its full range without catching on the hopper lip. If it catches, loosen the gate mounting screws, reposition slightly, and retighten.
5. Build Quality & Materials
The hopper is made from a rotationally molded polyethylene that resists cracking in cold weather better than the thinner plastics used on cheaper spreaders. It’s UV-stabilized too, which matters if the unit is going to spend summers sitting in a shed with a window or, worse, out in direct sun. The frame underneath is powder-coated steel, and this is really where the spreader’s durability comes from — the tubing feels substantial compared to the flimsier tow-behinds in the same price bracket.
The wheels are pneumatic (air-filled), which makes a noticeable difference in ride comfort over bumpy or root-covered lawns compared to the solid plastic wheels found on entry-level models. Air-filled tires absorb small dips and rocks, keeping the hopper level and the spread pattern more consistent, though it does mean you’ll want to check tire pressure occasionally.
Where the Build Falls Short
The rate control lever and the internal agitator are both plastic components, and this is the area most owners flag in long-term reviews. It’s not a dealbreaker, but if you’re spreading heavier materials like wet lime or ice melt repeatedly, that agitator does more work and shows wear faster than the frame or hopper does. Treat it gently and it’ll last; force it while it’s jammed with clumped material and you risk snapping a tab.
Build Strengths
- UV-resistant poly hopper
- Powder-coated steel frame
- Pneumatic tires for smoother towing
- Rust-resistant hardware
Build Weak Points
- Plastic agitator can wear with heavy use
- Rate control cable can stretch over time
- Gate spring occasionally needs adjustment
6. Hopper Capacity Explained
Capacity is one of the biggest selling points of any tow-behind spreader, and this is where the Agri-Fab pulls ahead of most walk-behind alternatives. Depending on the specific model variant you purchase, hopper capacity generally lands somewhere between 130 and 175 pounds of material, which translates to covering roughly one to two acres per fill depending on the product and application rate.
| Material | Approx. Coverage per Full Hopper |
|---|---|
| Grass seed | 1.5 – 2 acres |
| Granular fertilizer | 1 – 1.5 acres |
| Pelletized lime | 0.75 – 1 acre |
| Ice melt / rock salt | 0.5 – 0.75 acre |
What this means practically is that a typical half-acre to one-acre lawn can usually be seeded or fertilized in a single fill, which is a massive time-saver compared to refilling a 10-pound handheld hopper a dozen times. For anyone managing multiple acres, you’ll still need a couple of refills, but that’s still dramatically fewer trips back to the garage than any walk-behind unit would require.
Understanding Weight vs. Volume
A common point of confusion among first-time buyers is the difference between hopper capacity by weight and by volume. The 130-pound or 175-pound rating refers to maximum weight, not volume. Materials vary enormously in density — a cubic foot of grass seed weighs considerably less than a cubic foot of rock salt. This means you can fill the hopper to the brim with lightweight seed and still be well under the weight limit, whereas dense ice melt or lime can hit the weight maximum with the hopper only two-thirds full.
Staying within the weight limit matters because overloading the hopper puts excess stress on the axle, wheels, and hitch. The pneumatic tires are rated for a specific load, and exceeding it causes premature wear or, in extreme cases, a flat at the worst possible time mid-application. If you’re spreading dense material, err on the side of filling the hopper to about three-quarters capacity rather than maxing it out.
7. Grass Seed Types and How They Perform in Broadcast Spreaders
Not all grass seed behaves the same way inside a broadcast spreader. Seed size, shape, coating, and moisture content all influence how smoothly it flows through the gate, how evenly the spinning disc distributes it, and how much calibration tweaking you need to get an accurate application rate. Understanding these differences before you load up saves you from the frustration of discovering mid-pass that your seed is bridging, clumping, or dropping in uneven clumps.
Cool-Season Grass Seeds
Kentucky Bluegrass is one of the finer grass seeds commonly spread, and its small, lightweight individual seeds tend to flow well through broadcast spreader gates. However, because the seeds are so light, they’re more affected by wind than heavier types. On breezy days, you’ll notice the spread pattern drifting downwind, which can waste seed on driveways and garden beds rather than lawn. Spreading on calm mornings or evenings is ideal for Kentucky bluegrass.
Perennial Ryegrass has a slightly larger, more elongated seed shape than bluegrass. It flows through broadcast spreaders reliably and is one of the easiest seeds to spread evenly because its weight-to-size ratio gives it enough momentum to fly straight off the impeller without being deflected by light breezes. If you’re new to broadcast spreading, perennial ryegrass is arguably the most forgiving seed to start with.
Tall Fescue seed is the largest of the common cool-season grasses, and its size means it moves through the gate at a slightly slower rate than finer seeds at the same dial setting. This isn’t a problem — it just means you may need to bump the rate setting up one or two numbers compared to what the chart suggests for a generic “grass seed” category. The larger seed size also makes it less susceptible to wind drift, which is one reason tall fescue is a popular choice for wide-open rural properties where wind exposure is constant.
Fine Fescue blends (creeping red fescue, chewings fescue, hard fescue) are among the lightest and smallest grass seeds. They flow well through spreaders but are highly wind-sensitive. Fine fescue is often included in shade mixes, and since shade areas tend to be sheltered by trees or buildings, wind drift is less of a concern in practice than it might seem.
Warm-Season Grass Seeds
Bermudagrass seed is extremely fine — almost dust-like compared to cool-season types. It requires a very narrow gate opening and low dial setting to avoid overseeding, and it’s prone to bridging in humid conditions because the tiny seeds pack together tightly. If you’re spreading bermudagrass seed, keeping the material absolutely dry is critical. Some professional landscapers mix bermuda seed with a carrier like rice hulls or vermiculite to improve flow, effectively giving the tiny seeds a larger, more flowing particle to ride alongside.
Zoysiagrass seed is similarly small and presents many of the same spreading challenges as bermuda. Coated zoysia seed (seed with a clay or polymer coating applied by the manufacturer) is significantly easier to spread because the coating increases each seed’s size and weight, improving flow consistency. The trade-off is that coated seed costs more per pound and the coating adds to the overall weight, so you’re paying for less actual seed by volume.
Seed Coatings and Coated Seed
Many modern grass seeds come with coatings — polymer layers, clay coatings, or biological treatments that may include fungicides or beneficial microbes. Coated seed is bulkier and heavier per unit of actual seed inside, which has a practical impact on spreader calibration. If your spreader settings were calibrated using uncoated seed and you switch to a coated variety without adjusting, you’ll under-apply because the larger, heavier coated seeds flow more slowly through the gate at the same setting.
Always recalibrate when switching between coated and uncoated seed, even within the same grass species. The weight-per-bag difference alone can be 30-50%, which translates directly into a meaningful gap in your actual application rate.
Seed Blends and Mixes
Most residential grass seed products are blends (multiple cultivars of the same species) or mixes (multiple species). The different seed sizes within a blend don’t separate inside the hopper the way you might expect — the spinning disc’s centrifugal force tends to distribute them more or less uniformly because they’re all roughly similar in size. However, if you’re using a mix that combines a very fine seed like bluegrass with a much larger seed like tall fescue, you may notice slight size-sorting in the spread pattern, with the lighter seeds traveling farther from the spreader than the heavier ones.
In practice, this effect is small enough that it doesn’t cause visible striping in the lawn, especially if you overlap passes by 10-15%. But if you want to be meticulous about it, running the spreader at a slightly lower ground speed gives the disc more time to distribute all seed sizes evenly across the full spread width.
8. Spread Pattern & Coverage Width
Spread width is advertised at up to 10-12 feet depending on material density and how open the gate setting is. In practice, most users find the effective, evenly-covered width closer to 8-10 feet, with the outer edges of that range getting slightly lighter coverage — this is normal for broadcast-style spreaders and not unique to Agri-Fab.
The spinning disc mechanism (called the impeller) sits at the bottom of the hopper and flings material outward in a fan-shaped pattern as you tow. Because the pattern tapers at the edges, most experienced users recommend overlapping each pass by about 10-15% to avoid faint striping in your lawn — a common issue if you space passes exactly at the full width rating.

For anyone new to broadcast spreading, our guide on how to spread grass seed evenly covers overlap technique in more depth, and it applies directly to getting the most consistent results from this spreader.
How Spreader Deflectors Affect the Pattern
A spreader deflector is an optional accessory that clips onto the side of the hopper and blocks material from being thrown in one direction. If you’re spreading near a driveway, flower bed, sidewalk, or property line, a deflector keeps granules and seed off those surfaces where they’d be wasted or cause unwanted weed growth. The trade-off is that a deflector narrows your effective spread width by roughly half on the blocked side, which means you need more passes to cover the same area.
Some Agri-Fab models include a basic deflector in the box; others don’t. If yours doesn’t, it’s a worthwhile accessory to purchase separately, particularly if your lawn has borders that you’d rather not broadcast fertilizer onto. Third-party universal deflectors fit most tow-behind models, but checking compatibility with your specific hopper shape before buying saves a return.
9. Best Fertilizers for Tow-Behind Spreader Application
Choosing the right fertilizer for your lawn involves more than just reading the three numbers on the bag. When you’re applying with a tow-behind broadcast spreader, the physical characteristics of the fertilizer — granule size, coating type, moisture sensitivity, and density — all affect how evenly it spreads and how well your spreader handles it without clogging or bridging.
Granular Fertilizers: The Standard Choice
Granular fertilizers are the most common type applied with broadcast spreaders, and for good reason. They’re dry, flow well through gate openings, and the spinning disc distributes them in a predictable pattern. Most major brands — Scotts, Lesco, Milorganite, Pennington — manufacture granules sized specifically for broadcast spreader application, with particle diameters in the 2-4mm range.
Within the granular category, there are meaningful differences worth understanding:
| Fertilizer Type | Granule Characteristics | Spreader Behavior | Best For |
|---|---|---|---|
| Quick-release synthetic | Small, dense, uniform | Flows easily, wide pattern | Fast green-up, spring feeding |
| Slow-release coated | Larger, polymer-coated | Slightly slower flow, needs wider gate | Season-long feeding, less burn risk |
| Organic (e.g., Milorganite) | Irregular, lightweight | Can bridge in humid conditions | Soil health improvement, low burn |
| Weed-and-feed | Granules + herbicide coating | Requires dry conditions for adhesion | Simultaneous feeding and weed control |
| Winterizer | Dense, high-potassium | Standard flow, heavier per volume | Fall root strengthening |
Slow-Release vs. Quick-Release
Slow-release fertilizers have a polymer or sulfur coating that dissolves gradually over weeks or months, feeding the lawn steadily instead of all at once. From a spreading perspective, these coated granules are larger and heavier than quick-release granules, so they require a wider gate opening (typically 1-2 numbers higher on the dial) to achieve the same application rate in pounds per thousand square feet.
The main advantage of slow-release for tow-behind spreader users is that application mistakes are less punishing. If you overlap a pass slightly too much or accidentally double back on a section, the slow-release coating prevents the grass roots from receiving a sudden, concentrated dose of nitrogen that causes burning. Quick-release fertilizers don’t offer that forgiveness — an over-applied section can turn brown within days.
Organic Fertilizers and Spreader Performance
Organic fertilizers like Milorganite, Espoma, or Ringer present unique challenges for broadcast spreaders. Their granules are irregularly shaped, lighter per volume, and more prone to absorbing ambient moisture from the air. In humid climates or on mornings with heavy dew, organic fertilizer can start clumping inside the hopper within 15-20 minutes of loading.
If you prefer organic fertilizers, a few habits make spreading smoother:
- Load the hopper immediately before spreading — don’t let the material sit for an hour while you do something else
- Keep the bag sealed until you’re ready to pour it in
- Run the agitator for 30 seconds before opening the gate to break up any settling
- Spread on dry days with humidity below 60% when possible
- If the material starts bridging, stop and manually break up the clump with a stick or your hand (engine off, of course)
Weed-and-Feed Products
Weed-and-feed fertilizers combine granular fertilizer with a pre-emergent or post-emergent herbicide. These are specifically engineered for broadcast spreader application, and the herbicide is applied as a coating on each granule rather than mixed into the core. This means the distribution pattern matters more than with straight fertilizer — if you apply unevenly, some areas get full weed control while adjacent strips get none, and you’ll see the difference within weeks as weeds emerge in the untreated gaps.
Calibration is particularly important with weed-and-feed products. Follow the product label’s recommended spreader setting precisely, and don’t try to stretch coverage by lowering the rate. The manufacturer’s rate is calculated to deliver enough herbicide per square foot to actually kill the target weeds — going below that threshold gives you the fertilizer benefit without the weed control you’re paying for.
Lime and Soil Amendments
Pelletized lime is commonly applied with tow-behind spreaders to raise soil pH in acidic lawns. It’s denser than fertilizer, which means it flows through the gate faster at the same setting and burns through the hopper more quickly per acre. If you’re liming a large area, expect to refill more often than you would with fertilizer.
Gypsum, sulfur, and other soil amendments have similar density characteristics to lime and spread using comparable settings. The key with all of these heavier materials is keeping the tow speed slow and consistent — the extra weight means particles have more momentum off the disc and travel farther, so a faster ground speed combined with heavier material amplifies any inconsistencies in the spread pattern.
10. Towing Compatibility
The hitch is a universal pin-and-clip style that fits the standard hitch bracket found on most riding mowers, garden tractors, and lawn tractors from major brands. It also tows fine behind small ATVs and UTVs for anyone spreading on rougher terrain like pastures or long driveways.
Compatible Tow Vehicles
- Riding lawn mowers (most major brands)
- Garden and lawn tractors
- Zero-turn mowers with a rear hitch attachment
- ATVs and UTVs
- Small garden tractors with 3-point or drawbar hitches
One thing to double-check before buying: some zero-turn mowers don’t come with a rear hitch bracket standard, so you may need to purchase that attachment separately if your mower doesn’t already have one. It’s a minor extra cost but worth confirming before you commit to towing rather than pushing a walk-behind unit.
Towing Speed and Ground Conditions
The optimal towing speed for even coverage is a slow, steady walking pace — roughly 3 to 4 miles per hour. This feels painfully slow when you’re sitting on a riding mower capable of twice that speed, but it’s critical for two reasons: it gives the spinning disc enough time to distribute material evenly across the full spread width, and it prevents the hopper from bouncing over uneven terrain, which disrupts the flow rate through the gate.
On wet or soft ground, the spreader’s tires can sink slightly, which tilts the hopper and shifts material to one side. If you must spread on soft ground, reducing speed further and making wider turns helps maintain even coverage. Avoid spreading immediately after heavy rain — not only does the soft ground cause sinking, but wet material in the hopper clumps and bridges far more readily than dry material.
Turning Radius Considerations
When towing a spreader, tight turns at the ends of your passes cause the spreader to whip around behind the mower, which temporarily shifts material to one side of the hopper and creates an uneven dump at the turn point. The wider you can make your turns, the less material piles up at the ends. A good practice is to lift the spreader’s gate lever closed before entering a turn, then reopen it once you’re straight on the next pass. This takes a bit of coordination at first but becomes second nature after a session or two.
See the latest price and current stock status.
View on Amazon11. Rate Settings & Calibration
The rate control dial sits on top of the hopper and adjusts how wide the gate opening is, which controls how much material drops onto the spinning disc per second. Settings are numbered rather than labeled by material, so you’ll need to reference the printed settings chart (usually on the inside of the hopper or in the manual) to match a number to a specific brand and type of seed, fertilizer, or ice melt.
This is a step a lot of first-time buyers skip, and it’s the single biggest reason people come away disappointed with uneven results. Calibration takes maybe ten extra minutes but makes a dramatic difference in application accuracy. Our full walkthrough on how to calibrate a spreader breaks down the simple catch-and-weigh method that works for any broadcast spreader, including this one.
General Setting Guidance
| Material Type | Typical Setting Range |
|---|---|
| Fine grass seed | Low-mid (3-6 on most dials) |
| Granular fertilizer | Mid (5-8) |
| Pelletized lime | Mid-high (7-10) |
| Ice melt | High (9-12) |
Always cross-check with the product bag’s spreader settings chart, as formulations vary by manufacturer even within the same material category.
12. How to Read Spreader Settings Charts Like a Pro
Almost every bag of grass seed, fertilizer, lime, or ice melt includes a spreader settings chart printed somewhere on the packaging — usually on the back panel or a side flap. These charts list specific spreader brands and models alongside the recommended dial setting for that product, and they’re the fastest path to an accurate application rate without doing your own calibration math. The problem is that many homeowners either don’t notice the chart, can’t find their specific spreader model listed, or misread the information.
Where to Find the Chart
Turn the bag around. Most major manufacturers — Scotts, Pennington, Lebanon Turf, Lesco, Jonathan Green — print a table that looks something like this:
| Spreader | Setting | lbs/1000 sq ft |
|---|---|---|
| Scotts EdgeGuard Mini | 4 | 3.0 |
| Scotts Elite | 5.5 | 3.0 |
| Agri-Fab (tow-behind) | 7 | 3.0 |
| Earthway 2050P | 14 | 3.0 |
The columns tell you three things: which spreader the setting applies to, the dial number to use, and the resulting application rate in pounds per thousand square feet. The application rate is the most important column because it lets you verify that you’re applying the product at the rate the manufacturer intended — and, critically, the rate that the product was tested at to achieve its labeled results.
When Your Spreader Isn’t Listed
Older spreaders, off-brand models, or discontinued units often don’t appear on product charts. When this happens, you have three options:
Option 1: Find a Close Match. Look for a spreader with a similar hopper size and disc diameter. A 130-pound tow-behind with a standard-size impeller is mechanically similar enough to most other tow-behinds that their settings will be within one or two numbers of each other.
Option 2: Use the Catch-and-Weigh Method. This is the gold standard for calibration. Set up a collection container (a tarp, a bucket, or a plastic tray) on a flat surface, load a known weight of material into the hopper, and drive over a measured distance at your normal towing speed. Weigh what was collected and calculate pounds per thousand square feet. Adjust the dial and repeat until you match the target rate on the bag. Our detailed walkthrough on how to calibrate a spreader covers this method step by step.
Option 3: Contact the Manufacturer. Agri-Fab’s customer service line can provide recommended settings for specific products that aren’t listed on the bag’s chart. They maintain an internal database that’s more comprehensive than what fits on packaging.
Understanding Application Rate Math
The application rate — expressed as pounds per thousand square feet — is the universal language of lawn product application. If a fertilizer bag says “apply at 3.5 lbs per 1,000 sq ft,” and your lawn is 15,000 square feet, you need 52.5 pounds of product total. Divide that by your hopper’s capacity to know how many fills you’ll need (52.5 / 130 = roughly half a hopper for the 130-pound model).
This math matters because the spreader setting dial is a proxy for a physical measurement — the gate opening width. It doesn’t tell you directly how many pounds per thousand square feet you’re applying; it just controls the flow rate. The actual application rate depends on three variables working together: the gate setting, the ground speed, and the material density. Change any one of those and the application rate changes, even if the dial stays in the same position.
13. Common Mistakes First-Time Spreader Owners Make
Buying a tow-behind broadcast spreader is only half the equation. How you use it determines whether your lawn looks professionally maintained or patchy and streaked. Here are the most common mistakes that first-time spreader owners make, drawn from homeowner forums, product reviews, and lawn care community discussions — along with straightforward fixes for each.
Mistake #1: Skipping Calibration Entirely
This is the number one error and the one with the most visible consequences. Every spreader model flows material at a slightly different rate even at the same dial number, and every product has a different density, granule size, and recommended application rate. Trusting the dial number without verifying it against actual output is like setting your oven to “medium” without knowing what temperature that corresponds to.
The fix takes ten minutes: do one catch-and-weigh test with the product you’re about to apply. If you’re not sure how, our how to calibrate a spreader guide walks through it.
Mistake #2: Towing Too Fast
At walking speed (3-4 mph), the spinning disc has time to distribute material evenly across its full spread width. At double that speed — which is what many riding mower operators do instinctively — the disc can’t keep up, and the material lands in uneven clumps with visible gaps between them. The result looks like faint stripes in your lawn a few weeks later when the over-applied areas green up faster than the under-applied strips.
If you find yourself wanting to go faster because the slow pace is tedious, break the lawn into sections and do one section per session rather than rushing through the whole thing at once.
Mistake #3: Not Overlapping Passes
Broadcast spreaders produce a fan-shaped pattern with the heaviest concentration directly behind the spreader and progressively lighter coverage toward the outer edges. If you align each pass at the exact edge of the previous one, the gap between the two passes receives roughly half the intended application rate — enough to create a visible lighter stripe in the lawn within weeks.
Overlap each pass by about 10-15% of the spread width. For a spreader with an 8-foot effective spread, that’s roughly one foot of overlap. It feels like you’re double-applying to that narrow strip, but the tapered edges of each pass actually combine to produce a uniform rate in the overlap zone.
Mistake #4: Spreading in Windy Conditions
Wind is the enemy of broadcast spreading. Even a moderate breeze of 8-10 mph can deflect lightweight material like grass seed or fine fertilizer granules several feet off course, dumping your application onto the driveway or into the neighbor’s yard instead of your lawn. Check the weather forecast before loading up, and if wind speeds exceed 8 mph, reschedule for a calmer day. Early mornings typically offer the calmest wind conditions in most climates.
Mistake #5: Using Damp or Clumped Material
Moisture is the silent spreader killer. Fertilizer or seed that absorbed humidity during storage doesn’t flow through the gate smoothly — it bridges, clumps, and creates blockages that either stop material flow entirely or force it through in uneven bursts. Before loading, check the material by running your hand through it. If it feels damp, sticky, or forms clumps when squeezed, spread it out on a tarp in the sun for an hour or use a different bag.
Mistake #6: Forgetting to Close the Gate at Turns
When you make a tight turn at the end of a pass, the spreader pivots behind the mower and the spinning disc flings material in an arc rather than a straight line. This dumps extra material at the turning points, creating dark green spots in the lawn. Get in the habit of flipping the gate lever closed before each turn and reopening it once you’re straight on the next pass.
Mistake #7: Leaving Material in the Hopper Overnight
Fertilizer left in a hopper overnight absorbs ambient humidity and begins clumping by morning. Seed left in the hopper attracts rodents and insects. Always empty the hopper after each use — even if you plan to spread more tomorrow — and store unused material in its original sealed bag. It takes two minutes to dump the remaining material into a bucket and saves you from clogged gates and wasted product.
Mistake #8: Ignoring Tire Pressure
Pneumatic tires lose pressure gradually, and underinflated tires on one side cause the hopper to tilt. A tilted hopper distributes more material to the low side, creating uneven coverage that you might not notice until the grass starts showing color differences. Check tire pressure before each use with a basic gauge — most spreader tires run at 15-25 psi, but check the sidewall for the specific rating.
Mistake #9: Spreading on Wet Grass
Wet grass blades catch and hold granules, preventing them from reaching the soil surface. For seed, this means germination failure. For fertilizer, it means uneven absorption and potential burning where granules sit on wet leaf tissue. Wait until the morning dew has dried before spreading — typically mid-morning in most seasons.
Mistake #10: Applying Products That Aren’t Meant for Broadcast Spreaders
Some lawn products — particularly liquid concentrates, fine powders, and uncoated organic meal products — are not designed for broadcast spreader application. If the product bag doesn’t list spreader settings, it’s probably not intended for that application method. Forcing incompatible products through a broadcast spreader results in clogged gates, ruined agitators, and wasted product. When in doubt, check the manufacturer’s website or call their support line.
14. Real-World Performance
Out in the field, the spreader performs best on relatively flat to gently sloped terrain towed at a slow, steady mower speed — think walking pace, not full throttle. Going too fast is the most common complaint in user reviews, and it’s almost always an operator habit rather than a flaw in the machine. At higher tow speeds, the disc doesn’t have time to fling material evenly before the next section of lawn passes underneath, leaving faint gaps.
On uneven or hilly lawns, the pneumatic tires help keep the hopper level, but very steep slopes can still cause material to shift toward one side of the hopper, throwing off the pattern temporarily. If your property has significant grade changes, splitting your route into shorter passes rather than long diagonal runs tends to produce more even results.
Seeding Performance
For overseeding, the spreader handles both fine fescue blends and coarser rye seed mixes without clogging, provided the seed is dry. Damp seed is the main culprit behind bridging (clumping inside the hopper that blocks flow), which applies to literally every broadcast spreader on the market, not just this one. For a full seasonal walkthrough, see our guide on how to overseed a lawn with a spreader.
Fertilizing Performance
Granular fertilizers spread cleanly at mid-range settings, and the wider hopper opening compared to walk-behind units means less bridging even with pelletized products that tend to clump in humid storage conditions.
Ice Melt Performance
For winter use, rock salt and calcium chloride pellets flow well, though the higher density of these materials means you’ll burn through a hopper faster than with seed or fertilizer. Some users report light corrosion on the frame’s lower brackets after repeated salt exposure if the unit isn’t rinsed after use — a quick hose-down solves this.
15. De-Icing and Winter Spreading: A Complete Guide
One of the most underrated uses for a tow-behind broadcast spreader is winter de-icing. If you’ve ever walked up and down a long driveway flinging rock salt from a bag by hand, you know how uneven and wasteful that approach is. A spreader distributes ice melt products uniformly and at controlled rates, which means better ice coverage with less product wasted.
Which Ice Melt Products Work Best
Not all de-icing materials behave the same in a broadcast spreader. Here’s what to expect from the most common options:
| Ice Melt Type | Granule Size | Spreader Performance | Temperature Effective To |
|---|---|---|---|
| Rock salt (sodium chloride) | Large, irregular | Flows well, high density | 15°F (-9°C) |
| Calcium chloride pellets | Small, round | Excellent flow, very dense | -25°F (-32°C) |
| Magnesium chloride | Medium, flake-shaped | Good flow, moderate density | 5°F (-15°C) |
| Calcium magnesium acetate (CMA) | Small, granular | Good flow, lighter weight | 20°F (-6°C) |
| Potassium chloride | Medium, uniform | Good flow, similar to fertilizer | 25°F (-4°C) |
| Urea | Small, uniform | Excellent flow, low density | 25°F (-4°C) |
Rock salt is the most commonly used de-icer because of its low cost, but it’s also the most corrosive. Calcium chloride is more effective in extreme cold and less damaging to concrete, but it costs significantly more. For most residential driveways and walkways, a magnesium chloride blend offers the best balance of effectiveness, cost, and reduced corrosion.
Spreader Settings for Ice Melt
Because ice melt products are denser than grass seed or fertilizer, they require wider gate openings — typically settings in the 9-12 range on the Agri-Fab dial, depending on the specific product. Check the ice melt bag for a spreader settings chart; most major brands include one. If no chart is available, start at the higher end of the fertilizer range and increase if coverage looks thin.
Protecting Your Spreader from Salt Corrosion
The biggest concern with using a broadcast spreader for ice melt is corrosion. Salt is aggressively corrosive to steel, and the frame, fasteners, and axle are all steel components. The powder-coated finish on the Agri-Fab frame provides good initial protection, but chips and scratches in the coating — inevitable with regular use — expose bare steel to salt.
After every winter spreading session, hose down the entire spreader with fresh water, paying particular attention to the frame underside, the axle area around the wheels, and any bolts or fasteners. Let it dry completely before storing. At the end of winter, apply a light coat of spray-on rust inhibitor or WD-40 to all steel surfaces. This simple routine can add years to the frame’s lifespan.
Post-Application: What to Do After the Ice Melts
Once the ice has melted and the surface is clear, sweep up any remaining ice melt residue. Concentrated salt residue left on driveways and walkways can damage concrete over time through freeze-thaw cycling, and tracked salt residue damages grass at driveway edges where vehicles deposit it. A quick broom sweep after the thaw prevents both issues.
16. How It Compares to Other Spreaders
It’s worth seeing how this spreader stacks up against other popular options, particularly the Earthway 2050P, which is one of the most recommended tow-behind alternatives in the same price tier. If you’re still deciding between models, our dedicated Earthway 2050P 80lb broadcast spreader review covers that unit in full detail.
| Feature | Agri-Fab Pull Behind | Earthway 2050P | Typical Walk-Behind |
|---|---|---|---|
| Hopper Capacity | 130-175 lbs | ~80 lbs | 20-40 lbs |
| Spread Width | Up to 10-12 ft | Up to 10 ft | 2-4 ft |
| Requires Tow Vehicle | Yes | Yes | No |
| Best For | Large lawns, acreage | Mid-large lawns | Small yards |
| Physical Effort | Low | Low | High |
The main takeaway: the Agri-Fab wins on raw hopper capacity, which matters most if you’re covering more than an acre and don’t want to stop for refills. The Earthway edges it out slightly in build reputation among long-time users, but comes with a smaller hopper. If your lawn is under an acre, either works well; above that, the extra capacity here becomes genuinely useful.
17. Beyond Agri-Fab: Scotts, VEVOR, and Other Alternatives
The Agri-Fab pull behind broadcast spreader competes in a crowded market segment. While it’s one of the most popular options, several alternatives deserve consideration depending on your priorities — whether that’s build quality, price, capacity, or specific features. Here’s an honest look at the main competitors and where each one shines or falls short relative to the Agri-Fab.
Scotts Elite Spreader
The Scotts Elite Spreader is a walk-behind model rather than a tow-behind, which makes it a fundamentally different category of product. It’s designed for homeowners with smaller to mid-size lawns who don’t own a riding mower. The hopper capacity is significantly smaller — around 25 pounds of material — which means frequent refills on larger properties.
Where the Scotts Elite wins is in precision and maneuverability. Its EdgeGuard technology prevents material from spreading to the left side, which is useful for spreading along driveways, sidewalks, and garden beds without wasting product on hard surfaces. For a half-acre or smaller property where you’re navigating around landscaping features, the Scotts Elite is arguably more practical than hooking up a tow-behind unit.
Where it loses is raw coverage capacity. If you have an acre or more of open lawn, the Scotts Elite will have you walking back and forth dozens of times, refilling after every few passes. At that property size, a tow-behind spreader like the Agri-Fab or the VEVOR makes dramatically more sense.
VEVOR Tow Behind Broadcast Spreader
The VEVOR Tow Behind Broadcast Spreader is a direct competitor to the Agri-Fab, targeting the same homeowner segment with a similar price point. VEVOR’s model typically features a 125-pound hopper capacity — slightly smaller than the Agri-Fab’s entry model — but includes some design differences worth noting.
Build quality is comparable at the frame level, with a powder-coated steel chassis and poly hopper. Where the VEVOR differs is in its gate mechanism and rate control system, which some users find less intuitive than Agri-Fab’s numbered dial. The VEVOR also tends to ship with more assembly required, and the instructions are less clear than Agri-Fab’s already-minimal diagrams.
The main advantage of the VEVOR is its price — it typically undercuts the Agri-Fab by $20-40 depending on the retailer and current promotions. If budget is your primary concern and you’re willing to invest a bit more patience in assembly, the VEVOR delivers similar performance for less money. If you value easier setup, a more established brand with better parts availability, and a larger hopper, the Agri-Fab is the safer bet.
Earthway 2050P
The Earthway 2050P is a tow-behind spreader with an 80-pound hopper capacity, positioning it between walk-behind units and the larger Agri-Fab models. Earthway has a loyal following among professional landscapers and serious lawn enthusiasts who appreciate the brand’s attention to spread pattern accuracy and build quality. The 2050P’s enclosed gearbox is often cited as a durability advantage over open-gear designs found on some competitors.
The smaller hopper is both the 2050P’s limitation and its advantage. On lawns under an acre, the 80-pound capacity is perfectly adequate and the lighter overall weight makes towing more nimble. On larger properties, the refill frequency becomes a noticeable inconvenience. For a full comparison, our Earthway 2050P 80lb broadcast spreader review covers the specifics.
Chapin 8620E Tow-Behind
Chapin’s 8620E is another tow-behind option with a 150-pound hopper capacity that falls between the Agri-Fab’s two main model sizes. It features a stainless steel axle and a slightly different gate design that some users prefer for fine seed application. However, it’s typically priced higher than the Agri-Fab for similar capacity, and the parts ecosystem (replacement agitators, gate components, cables) is smaller, which can make long-term maintenance more challenging.
Brinly-Hardy Tow-Behind Spreaders
Brinly-Hardy is a legacy brand in lawn attachments, and their tow-behind spreaders are well-regarded for build quality. However, they tend to be priced at a premium that puts them more in the professional or enthusiast category than the average homeowner segment. If you’re managing multiple properties professionally or want a spreader that will last 15+ years with basic maintenance, Brinly-Hardy is worth looking at. For typical residential use a few times per season, the Agri-Fab delivers 90% of the performance at 60% of the price.
Choosing Between Them
For most residential users, the decision comes down to three questions:
- How large is your lawn? Under half an acre — walk-behind (Scotts Elite). Half to one acre — either Agri-Fab or Earthway 2050P. Over one acre — Agri-Fab’s larger capacity model or the VEVOR.
- How important is price? VEVOR is cheapest, Agri-Fab is mid-range, Earthway and Chapin are slightly higher, Brinly-Hardy is premium.
- How important is long-term parts availability? Agri-Fab and Earthway have the widest replacement parts networks. VEVOR and Chapin parts can be harder to source locally.
18. Pros and Cons
Pros
- Large hopper capacity reduces refill trips
- Wide, adjustable spread pattern
- Pneumatic tires smooth out towing
- Universal hitch fits most riding mowers
- Handles seed, fertilizer, and ice melt equally well
- Competitive price versus similar-capacity competitors
Cons
- Plastic agitator is a long-term wear point
- Assembly instructions are minimal
- Requires a tow vehicle with a rear hitch bracket
- Edge coverage tapers, requiring overlap technique
- Not ideal for small or tightly landscaped yards
19. Troubleshooting Common Spreader Problems
Even a well-maintained broadcast spreader will occasionally give you trouble. Most issues are simple mechanical problems with straightforward fixes that take minutes rather than hours. Here’s a systematic guide to diagnosing and resolving the most common problems Agri-Fab owners encounter.
Problem: Material Won’t Flow Through the Gate
Symptoms: The hopper is loaded but nothing comes out when you open the gate, or material flows in spurts and stops.
Most Likely Cause: Bridging — material has clumped together inside the hopper, forming an arch over the gate opening that blocks flow. This is most common with damp fertilizer, organic products, and fine seed stored in humid conditions.
Fix: Stop the mower, engage the parking brake, and turn off the engine. Reach into the hopper and manually break up the clump. Use a stick or your hand to push material away from the gate opening. To prevent recurrence, use only dry material, keep bags sealed until loading, and don’t let material sit in the hopper for extended periods between spreading sessions.
Problem: Uneven Spread Pattern (Stripes in the Lawn)
Symptoms: After a few weeks of growth, you notice alternating dark green and lighter green stripes running the direction you spread.
Most Likely Cause: Either insufficient overlap between passes or inconsistent ground speed. The darker stripes received full coverage; the lighter stripes fall in the gap where two passes didn’t overlap enough.
Fix: On the next application, increase your pass overlap to 15% of the spread width. If your effective spread is 8 feet, overlap by about 14-15 inches. Also check tire pressure — uneven tire pressure tilts the hopper and shifts the pattern to one side.
Problem: Gate Lever Sticks or Won’t Move
Symptoms: The rate control lever is difficult to move or stuck in one position.
Most Likely Cause: The gate cable has corroded or the gate mechanism has accumulated dried material residue. Salt residue from winter de-icing is a particularly common culprit.
Fix: Spray the gate mechanism and cable with a penetrating lubricant like PB Blaster or WD-40. Work the lever back and forth gently until it moves freely. If the cable itself is frayed or kinked, it may need replacement — Agri-Fab sells replacement cable assemblies that are straightforward to install.
Problem: Material Throws Further on One Side Than the Other
Symptoms: You notice the spread pattern is significantly wider on one side of the spreader than the other.
Most Likely Cause: The impeller disc is loose on its shaft, the agitator is bent, or the hopper is tilted due to uneven tire pressure or a bent frame bracket.
Fix: Check tire pressure first — both tires should match the recommended PSI on the sidewall. If tires are equal, inspect the impeller disc for looseness on its central shaft. Tighten the mounting hardware if needed. If the frame appears bent (usually from hitting a curb, tree root, or rock while towing), straighten with a pry bar or replace the affected bracket.
Problem: Spreader Bounces Excessively While Towing
Symptoms: The hopper shakes or bounces noticeably on uneven ground, causing material to spray unevenly.
Most Likely Cause: Underinflated tires, towing too fast on rough terrain, or a loose hopper mounting.
Fix: Inflate tires to the recommended PSI. Reduce towing speed on rough or uneven ground. Check all hopper mounting bolts and tighten if loose. On very rough terrain, a slightly lower speed combined with a route that avoids the worst bumps produces dramatically more even coverage.
Problem: Excessive Material Waste (Using Product Too Fast)
Symptoms: You run through a bag of fertilizer or seed much faster than the coverage area on the label suggests you should.
Most Likely Cause: The rate setting is too high for the material being spread, or the towing speed is faster than the calibration speed.
Fix: Recalibrate using the catch-and-weigh method at your actual towing speed. Reduce the dial setting by one or two numbers and retest. Material density varies between products, so a setting that’s correct for one brand of fertilizer may over-apply another brand.
Problem: Hitch Won’t Fit Tow Vehicle
Symptoms: The hitch pin doesn’t align with the tow bracket on your mower or tractor.
Most Likely Cause: Your mower uses a non-standard hitch bracket size or the hitch bracket hasn’t been installed.
Fix: Check your mower’s manual for hitch bracket specifications. Most riding mowers use a standard 1/2-inch or 5/8-inch hitch pin, which the Agri-Fab hitch accommodates. If your mower doesn’t have a rear hitch bracket, the mower manufacturer sells universal-fit brackets for most models. For zero-turn mowers, a rear hitch accessory may need to be ordered separately.
20. Spreader Accessories and Upgrade Options
While the Agri-Fab pull behind broadcast spreader works well out of the box, a few accessories can improve your experience, extend the machine’s lifespan, or expand what you can do with it. None of these are strictly necessary, but each solves a specific annoyance or limitation that regular users eventually encounter.
Spreader Deflector Kit
A deflector attaches to the side of the hopper and blocks material from being thrown in one direction. This is essential if you’re spreading along driveways, sidewalks, garden beds, or property lines where you don’t want seed or fertilizer landing on non-target surfaces. Most universal deflectors attach with spring clips or bolts and can be removed in seconds when you don’t need them. A deflector narrows your effective spread width on the blocked side, so plan for extra passes in the deflected direction.
Spreader Cover
A fitted poly or vinyl cover protects the hopper from rain, UV exposure, and debris during storage. While the hopper itself is UV-stabilized, prolonged outdoor storage without cover accelerates degradation of the plastic rate lever, gate cable, and other exposed components. A $15-25 cover is cheap insurance against premature aging. If your spreader lives in a garage or enclosed shed, a cover is less critical.
Replacement Agitator
The plastic agitator inside the hopper is the most common replacement part for long-term Agri-Fab owners. After several seasons of spreading abrasive materials like lime and ice melt, the agitator blades can wear down, reducing their effectiveness at keeping material flowing uniformly onto the disc. Agri-Fab sells replacement agitators, and swapping one out takes about five minutes with a screwdriver. Keeping a spare on hand means you’re never stuck mid-season with a worn agitator and a half-fertilized lawn.
Replacement Gate Cable
The gate control cable stretches over time with repeated use, which can make the rate control lever feel sloppy or fail to hold a specific setting precisely. Replacement cables are inexpensive and relatively easy to thread through the existing cable housing. If your gate lever no longer holds position consistently or feels loose, the cable is usually the culprit.
Upgraded Hitch Pin
The stock hitch pin and clip work fine, but some owners prefer a locking hitch pin that doesn’t rely on a friction-fit clip to stay in place. Locking hitch pins cost a few dollars more but eliminate the risk of the spreader separating from the mower during transit over rough ground. This is a particular concern on properties with steep slopes, tree roots, or uneven terrain where the tow bar experiences lateral stress.
Tire Sealant
Pneumatic tires are vulnerable to punctures from thorns, sharp rocks, and debris on rough terrain. A tire sealant product like Slime, injected through the valve stem, coats the inside of the tire and automatically seals small punctures as they happen. This is particularly useful if you’re spreading on pasture edges, wooded areas, or any property with rough ground conditions. One treatment lasts for months and costs under $10.
Anti-Rust Treatment
If you live in a humid climate or use the spreader for ice melt application, investing in a can of rust-preventive spray (such as Boeshield T-9 or Fluid Film) for annual treatment of the frame, axle, and hardware extends the spreader’s service life significantly. Apply it at the end of each season after cleaning, focusing on bolt heads, the axle area, and any scratches in the powder coating where bare steel is exposed.
Measuring Wheel or GPS App
For precision calibration and consistent application, knowing your exact ground speed and the exact area of your lawn is essential. A measuring wheel helps you map your lawn’s square footage accurately, and a GPS speedometer app on your phone (mounted on the mower dashboard) helps you maintain consistent towing speed during application. Both are inexpensive tools that pay dividends in application accuracy.
21. Maintenance & Storage Tips
Keeping this spreader running smoothly for years mostly comes down to a few habits: rinsing it after use with salt or fertilizer, storing it dry, and occasionally lubricating the gate mechanism. None of this takes more than a few minutes, but skipping it consistently is what leads to premature rust and a sticky gate lever.
End-of-Season Checklist
- Empty the hopper completely and brush out residual material
- Hose down the frame, wheels, and underside of the hopper
- Dry thoroughly before storing to prevent rust on metal fasteners
- Apply a light coat of lubricant to the gate cable and agitator pivot
- Store indoors or under cover to protect the poly hopper from prolonged UV exposure
- Check tire pressure before the next season’s first use
For a deeper cleaning routine, especially after using corrosive materials like ice melt, our guide on how to clean a lawn spreader covers step-by-step methods that extend the life of any broadcast spreader, tow-behind or walk-behind alike.
Between-Use Maintenance
If you’re using the spreader regularly through a growing season — say, spring fertilizer, summer lime, fall overseed, and winter ice melt — a quick rinse and wipe-down after each use prevents material from building up and hardening inside the hopper. Pay special attention to the underside of the gate and the area around the agitator shaft, where material tends to accumulate out of sight.
Inspect the gate cable tension every few uses. If you notice the lever doesn’t hold its position as crisply as it did when new, the cable has likely stretched slightly. A simple adjustment at the cable clamp — usually a small bolt on the gate mechanism — takes up the slack. If the cable is visibly frayed or kinked, replace it entirely rather than trying to adjust around the damage.
Wheel and Axle Care
The pneumatic tires lose air gradually, especially in temperature fluctuations between seasons. Check pressure before each major use with a standard tire gauge. Most spreader tires run between 15 and 25 psi — check the sidewall for the exact specification. Underinflated tires cause uneven spreading, increased tow resistance, and premature tire wear.
The axle itself requires minimal attention, but applying a light coat of grease to the axle ends once per season prevents the wheel bearings from seizing. If you hear squeaking while towing, that’s the axle telling you it wants lubrication.
22. Safety Tips for Operating Tow-Behind Equipment
Towing any attachment behind a riding mower changes the machine’s handling characteristics, braking distance, and turning behavior. A loaded broadcast spreader adds 150-200+ pounds behind your mower, which is a meaningful weight increase that every operator should respect. Here are the safety fundamentals that apply specifically to tow-behind spreader operation.
Before You Start
- Read both manuals. Your mower’s owner manual and the spreader’s manual both contain towing-related safety information specific to their respective products. The mower manual specifies maximum tow weight, hitch compatibility, and speed limitations that directly apply to spreader use.
- Inspect the hitch connection. Before every use, verify the hitch pin is fully inserted and the clip is secure. Give the spreader a firm push by hand to confirm it’s locked to the mower. A spreader that separates while moving can roll uncontrolled across a lawn or into traffic.
- Check tire pressure. Underinflated tires don’t just cause uneven spreading — they affect the spreader’s tracking behind the mower, especially on slopes. Correctly inflated tires track straighter and tow more predictably.
- Survey the terrain. Walk or drive your route once without the spreader to identify hazards: hidden stumps, irrigation heads, large rocks, soft spots, or steep drop-offs. Mark anything dangerous with a flag or temporary stake so you can avoid it during spreading.
During Operation
- Maintain a slow, steady speed. Walking pace (3-4 mph) isn’t just better for even spreading — it’s safer. Higher speeds increase stopping distance and make the spreader more likely to whip around corners, potentially jackknifing into the mower or tipping over.
- Avoid sharp turns. Wide, gradual turns keep the spreader tracking behind the mower predictably. Sharp turns can cause the spreader to clip obstacles, jackknife, or tip. Close the gate before entering a turn and reopen once you’re straight.
- Be cautious on slopes. A loaded spreader behind a mower on a slope adds momentum going downhill and resistance going uphill. Cross slopes rather than driving straight up and down them when possible, and reduce speed significantly on any grade.
- Keep children and pets away. A tow-behind spreader’s path is wider than the mower itself, and the spinning disc throws material outward at considerable speed. Anyone standing near the spreader can be hit by fertilizer or seed pellets. Clear the area of bystanders before spreading.
- Never reach into the hopper while the agitator is moving. Always stop the mower, disengage the PTO (if applicable), and turn off the engine before reaching into the hopper for any reason. The agitator can pinch or cut fingers if it moves unexpectedly.
Chemical Safety
- Wear gloves when handling fertilizer and ice melt. Granular fertilizers contain concentrated chemicals that can irritate skin with prolonged contact. Ice melt products, especially calcium chloride, can cause chemical burns on sensitive skin. Nitrile gloves are sufficient for most products.
- Wear eye protection. On windy days, even light breezes can blow fine particles back toward your face. Safety glasses or sunglasses prevent eye irritation from fertilizer dust, seed chaff, or lime particles.
- Wash hands after handling products. This sounds obvious but is easy to skip when you’re in a hurry. Lawn chemicals are not something you want transferring to food, drinks, or your face.
- Store products according to label instructions. Fertilizers, herbicides, and ice melt products have specific storage requirements regarding temperature, moisture, and ventilation. Follow the label.
Transport Safety
If you need to drive the spreader across a road, driveway, or any area shared with vehicle traffic, close the gate and be aware that the spreader’s width may extend beyond the mower’s width. On public roads, local regulations may require a slow-moving vehicle sign — check your local ordinances. Even on private property, be aware that material being spread can create slippery conditions on hard surfaces if it lands on driveways or patios.
23. Seasonal Lawn Care Calendar with Your Spreader
A tow-behind broadcast spreader isn’t a once-a-year tool. Used strategically through the seasons, it can handle virtually every granular application your lawn needs from early spring through late winter. Here’s a month-by-month framework for using the spreader to its full potential — adjust the specific timing based on your climate zone and grass type.
Early Spring (Feb-Mar)
- Apply pre-emergent herbicide/fertilizer combo when soil temperatures reach 55°F
- Soil test to determine lime needs
- Apply lime if pH is below 6.0
- Setting: 5-8 for pre-emergent granules
Late Spring (Apr-May)
- Apply slow-release nitrogen fertilizer
- Spot-treat bare areas with seed
- Apply grub control if historically needed
- Setting: 5-7 for granular fertilizer
Early Summer (Jun)
- Apply summer fertilizer (low nitrogen, higher potassium)
- Spot-seed thin areas in transition zone climates
- Apply iron supplement for color without growth surge
- Setting: 5-8 depending on product
Late Summer (Jul-Aug)
- Begin planning fall overseeding
- Soil test for fall amendments
- Apply potassium-rich fertilizer for heat stress recovery
- Setting: 6-8 for summer blends
Early Fall (Sep)
- Prime overseeding window for cool-season grasses
- Dethatch and aerate before seeding
- Apply seed at recommended rate with spreader
- Apply starter fertilizer over new seed
- Setting: 3-6 for seed, 4-6 for starter fertilizer
Late Fall (Oct-Nov)
- Apply winterizer fertilizer (high potassium)
- Final lime application if needed
- Last mowing and cleanup
- Setting: 6-8 for winterizer
Winter (Dec-Jan)
- Apply ice melt to driveways and walkways
- Apply sand/grit mix for traction on icy surfaces
- Keep spreader clean between freeze events
- Setting: 9-12 for rock salt, 8-10 for calcium chloride
Year-Round
- Calibrate spreader before each product switch
- Rinse after every use
- Store dry between sessions
- Check tire pressure monthly during active use season
Cool-Season vs. Warm-Season Timing Differences
The calendar above is oriented toward cool-season grasses (Kentucky bluegrass, perennial ryegrass, tall fescue), which dominate the northern two-thirds of the United States. If you’re growing warm-season grasses (bermuda, zoysia, St. Augustine, centipede), the timing shifts later in spring and earlier in fall:
- Warm-season pre-emergent: Apply when soil temperatures reach 65°F, typically 2-4 weeks later than cool-season zones
- Warm-season overseeding: Late spring (May-June) rather than early fall — or overseed with cool-season ryegrass in fall for winter green
- Warm-season fertilization: Peak feeding during active growth from late spring through mid-summer; no fertilizer after September to avoid cold-damage susceptibility
- Lime application: Can be done in either spring or fall for warm-season lawns; fall is often preferred because it has more time to react with the soil before the active growing season
How Much Product to Buy
Knowing your lawn’s square footage allows you to calculate exactly how many bags of each product you need, which prevents both over-buying and mid-application shortages:
| Lawn Size | Fertilizer (3.5 lb/1000 sq ft) | Seed (5 lb/1000 sq ft) | Lime (40 lb/1000 sq ft) |
|---|---|---|---|
| 1/4 acre (~10,900 sq ft) | 38 lbs (~1.5 bags) | 55 lbs (~3 bags) | 436 lbs (~11 bags) |
| 1/2 acre (~21,800 sq ft) | 76 lbs (~3 bags) | 109 lbs (~5 bags) | 872 lbs (~22 bags) |
| 1 acre (~43,560 sq ft) | 153 lbs (~6 bags) | 218 lbs (~11 bags) | 1,742 lbs (~44 bags) |
Actual bag sizes and coverage rates vary by product. These estimates assume standard bag sizes (25 lb fertilizer, 20 lb seed, 40 lb lime) at typical application rates. Always verify with the specific product label.
24. Frequently Asked Questions
How much weight can the Agri-Fab pull behind broadcast spreader hold?
Most models in this line hold between 130 and 175 pounds of material, depending on the exact version purchased, which is enough to cover roughly one to two acres per fill for seed or fertilizer.
Can I tow this spreader with a zero-turn mower?
Yes, as long as your zero-turn has a rear hitch bracket. Some models come with one standard, while others require a separate hitch attachment purchased from the mower manufacturer.
What’s the ideal towing speed for even coverage?
A slow, steady walking pace produces the most even spread pattern. Towing too fast is the most common reason for gaps or streaking in the lawn.
Does this spreader work for both seed and fertilizer?
Yes, it handles grass seed, granular fertilizer, pelletized lime, and ice melt equally well, provided the rate setting is adjusted appropriately for each material’s density.
How wide is the actual spread pattern?
It’s rated up to 10-12 feet, though the evenly-covered effective width in real-world use tends to be closer to 8-10 feet, with lighter coverage tapering at the edges.
Is assembly difficult?
Most owners complete assembly in 20 to 40 minutes using basic hand tools. The instructions are diagram-based rather than heavily written, so budget a little extra patience if you prefer detailed text steps.
Will this rust if I use it for ice melt?
Prolonged exposure to salt without rinsing can cause light corrosion on lower metal brackets over time. Hosing the unit down after winter use prevents most of this.
How do I calibrate the spreader for accurate application rates?
The simplest method is a catch-and-weigh test over a measured distance, then adjusting the rate dial accordingly. Our full guide on how to calibrate a spreader walks through this process step by step.
Can this spreader clog with damp seed or fertilizer?
Yes, like virtually all broadcast spreaders, damp material can bridge and clog inside the hopper. Always use dry material and store bags in a moisture-free area before spreading.
Is this spreader worth it for a small yard?
Probably not. For yards under a quarter acre, a walk-behind or handheld spreader is more practical and easier to maneuver around flower beds, trees, and tight corners.
What’s the best time of year to use this spreader for seeding?
This depends on your grass type and climate zone. Our guide on best time to spread grass seed breaks down seasonal timing for both cool-season and warm-season lawns.
How is this different from a walk-behind spreader?
A tow-behind unit like this one is pulled by a mower or ATV rather than pushed by hand, which allows for a much larger hopper capacity and covers ground far faster on large properties. If you’re comparing the two categories, our guide on how to use a broadcast spreader covers the operating differences in more depth.
Can I use this spreader to apply topdressing or compost?
No. Broadcast spreaders are designed for dry, granular materials with relatively uniform particle sizes. Compost, topsoil, and topdressing blends are too moist, too heavy, and too inconsistent in particle size for a broadcast mechanism. Topdressing is best applied with a dedicated topdresser or by hand with a shovel and rake.
How long does the spreader last with regular use?
With basic maintenance — rinsing after use, storing dry, occasional lubrication — most owners report 8-15 years of reliable service. The most common replacement parts are the agitator and gate cable, both of which are inexpensive and easy to swap.
Does Agri-Fab sell replacement parts?
Yes. Agri-Fab maintains a parts catalog and sells replacement agitators, gate cables, wheels, tires, hitches, and hardware through their website and through authorized parts retailers. Having your model number handy when ordering speeds up the process.
Can two people use the spreader — one driving, one operating the gate?
While technically possible, it’s unnecessary and potentially unsafe. The rate control lever is positioned within easy reach of the driver’s seat on most riding mowers, and pre-setting the gate before each pass eliminates the need for real-time adjustment. A second person standing on the spreader while it’s moving adds weight unevenly and creates a fall hazard.
25. Cost Analysis and Return on Investment
A tow-behind broadcast spreader isn’t a trivial purchase — it costs more upfront than a basic handheld or walk-behind unit. But for the right property owner, the math works out favorably when you consider the time savings, product waste reduction, and the avoided cost of hiring professional lawn care services. Let’s break down the real numbers.
Upfront Cost
The Agri-Fab pull behind broadcast spreader typically retails between $150 and $250 depending on the model variant and the retailer. This puts it in the mid-range for tow-behind spreaders — cheaper than premium brands like Brinly-Hardy but more expensive than budget options like VEVOR.
Product Waste Reduction
Spreading fertilizer or seed by hand results in significant waste. Without a calibrated spreader, most homeowners either over-apply (wasting product and risking lawn damage) or under-apply (wasting money on an application that doesn’t deliver its full benefit). Studies from university extension programs estimate that uncalibrated hand application wastes 20-30% of product compared to calibrated spreader application.
For a typical one-acre lawn receiving four fertilizer applications per year at $30-50 per bag, a 25% waste reduction saves $30-50 annually in fertilizer alone. Add in seed applications and the waste reduction compounds — you’re using fewer bags to cover the same area more effectively.
Time Savings
Walking a broadcast spreader across a one-acre lawn takes roughly 45-60 minutes per application, plus refill stops. Towing the same application with a riding mower takes 15-20 minutes with no refills for most products. Over four applications per year, that’s a time savings of 2-3 hours annually — modest in isolation but meaningful when it means getting your lawn care done before lunch instead of spending a whole Saturday afternoon on it.
Professional Lawn Care Comparison
The real ROI case for a tow-behind spreader becomes clear when you compare it against hiring a lawn care service. A typical professional lawn treatment (fertilizer plus weed control) for a one-acre property costs $50-80 per visit, and a full seasonal program runs $250-500 per year. A spreader plus DIY product costs roughly $100-200 per year in materials after the initial spreader investment, meaning the spreader pays for itself within one to two growing seasons compared to professional service.
Five-Year Cost Comparison
| Approach | Year 1 | Year 2 | Year 3 | Year 4 | Year 5 | 5-Year Total |
|---|---|---|---|---|---|---|
| Professional service | $400 | $400 | $400 | $400 | $400 | $2,000 |
| DIY with walk-behind | $180 | $150 | $150 | $150 | $150 | $780 |
| DIY with Agri-Fab tow-behind | $350 | $150 | $150 | $150 | $150 | $950 |
Estimates assume a one-acre property with 4 fertilizer/seed applications per year. Professional service cost based on national average for full-season programs. DIY costs include product plus amortized spreader cost. Walk-behind assumes a $50 spreader; Agri-Fab assumes a $200 spreader.
Over five years, the Agri-Fab tow-behind approach costs $950 versus $2,000 for professional service — a savings of over $1,000. Compared to the walk-behind approach, the tow-behind costs $170 more over five years but saves approximately 15 hours of physical labor during that same period. Whether those 15 hours are worth $170 is a personal calculation, but for most homeowners with large lawns, the answer is a clear yes.
Intangible Benefits
Beyond the pure cost analysis, owning a tow-behind spreader provides flexibility that neither professional services nor walk-behind units match:
- Apply when conditions are ideal, not when a service truck is scheduled. Timely application — hitting the perfect weather window for seeding or the ideal soil temperature for pre-emergent — produces dramatically better results than calendar-based service visits.
- Use exactly the products you prefer. Professional services use their standard products, which may not be your preferred brand, formulation, or organic/non-organic choice.
- Respond to problems immediately. If you notice bare patches, thinning areas, or weed breakthrough, you can treat them the same day instead of waiting for the next scheduled service visit.
- Multi-season versatility. The same spreader handles spring fertilizer, summer lime, fall seed, and winter ice melt. Professional services don’t typically offer de-icing, and hiring a separate snow service adds cost.
26. Final Verdict
The Agri-Fab pull behind broadcast spreader earns its reputation as one of the more practical choices for homeowners who’ve outgrown walk-behind spreaders. Its biggest strength is capacity — being able to cover a full acre or more without stopping to refill genuinely changes how much ground you can cover in a single afternoon. The build quality holds up well overall, with only the plastic agitator and rate cable standing out as long-term wear points worth keeping an eye on.
It’s not a flawless product. Assembly instructions could be more detailed, and the tapering spread pattern at the edges means you’ll need to overlap passes intentionally rather than assuming full-width coverage. But weighed against the time and physical effort it saves compared to walking a spreader across a large lawn, those are minor trade-offs.
If you already own a riding mower or tractor and manage more than half an acre of turf, this spreader is a smart, budget-conscious upgrade that will likely pay for itself in saved weekends within the first season alone.
See current pricing, availability, and customer reviews on Amazon.
Buy on Amazon