The Master Plan for Indoor Plant Nutrition: How and When to Feed Your Jungle
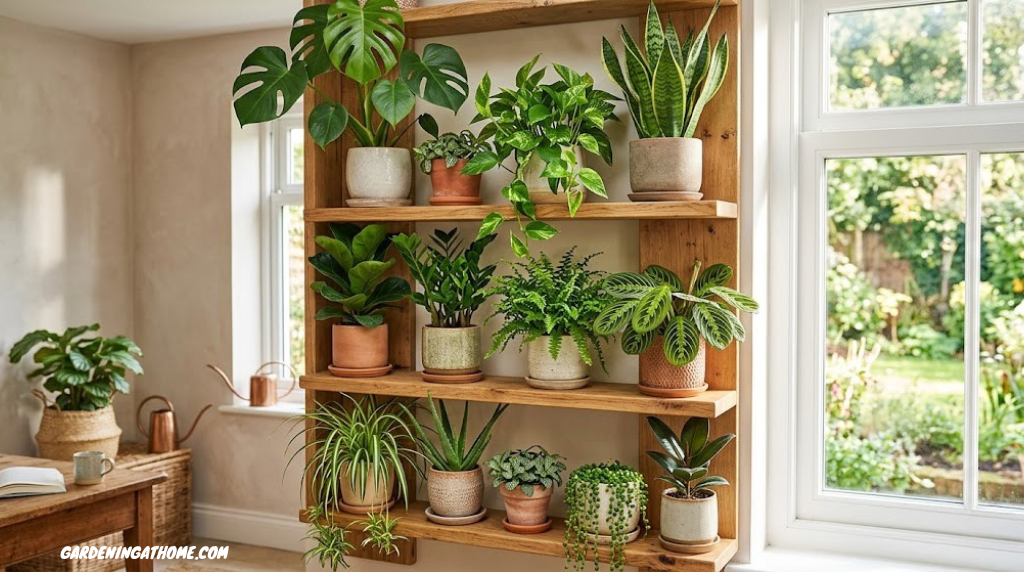

1. Introduction to Houseplant Nutrition (Why Fertilization Matters)
When you bring a beautiful new specimen into your space, it arrives packaged in a fresh, structural medium. This environment provides foundational stability, but it is fundamentally limited. Unlike outdoor ecosystems where continuous biological decomposition, rainfall, and root migration supply an ongoing stream of macronutrients, an indoor pot is an isolated micro-island. Once the initial nutritional load is consumed, the system stalls. Engaging in thoughtful gardening at home demands an appreciation for how these essential minerals directly empower fundamental physiological behaviors.
Without regular supplemental feeding, structural development decelerates, protective genetic systems collapse, and the vibrant pigmentation we prize begins to wash out. Plants do not simply eat dirt; they assemble chemical complexes using light energy, water, and specialized ionic charges extracted directly from their substrate. If you overlook this reality, your indoor jungle will quickly transition from an active, growing collection into a static, surviving asset that slowly wastes away.

Premium All-Purpose Indoor Liquid Plant Food
Give your indoor plants the exact chemical balance they need to unlock explosive new foliage and deep root health.
Shop Balanced Fertilizers on Amazon2. Understanding Fertilizer Basics: N-P-K Ratios Explained
Turn over any commercial container of plant food, and you will encounter three prominent numbers separated by dashes—for instance, 10-15-10 or 20-20-20. This sequence reflects the guaranteed percentage weight of Nitrogen (N), Phosphorus (P), and Potassium (K) inside the formula. Mastering these values prevents structural issues, much like configuring the right foundations when learning how to start a garden from scratch.
Let us break down what these elements actually manage within the plant structure:
- Nitrogen (N): The engine of structural canopy growth. It serves as a central structural component of chlorophyll, driving amino acid production and steering rapid leaf development.
- Phosphorus (P): The architect of root architecture and vascular expansion. It assists in metabolic transformations and energy transfers, laying the groundwork for robust floral blossoms.
- Potassium (K): The master cellular regulator. It controls the opening and closing of microscopic stomata, manages water transport systems, and hardens cellular walls against pathogens.
| Fertilizer Ratio Type | Target Botanical Application | Primary Physiological Impact |
|---|---|---|
| High-Nitrogen (e.g., 9-3-6) | Foliage heavy species (Monstera, Pothos, Ferns) | Accelerates leaf enlargement and enhances deep green hues |
| High-Phosphorus (e.g., 15-30-15) | Flowering specimens (African Violets, Peace Lilies) | Triggers bud formation and builds strong anchor roots |
| Balanced even blend (e.g., 10-10-10) | General maintenance across varied collections | Sustains overall structural health without erratic surges |
The Secondary Macronutrients: Calcium, Magnesium, and Sulfur
Beyond the headline N-P-K numbers, plants require three secondary macronutrients in significant quantities. Calcium serves as the structural cement between cell walls, determining stem strength and preventing blossom end rot in fruiting plants. Magnesium sits at the heart of every chlorophyll molecule—without it, photosynthesis grinds to a halt regardless of nitrogen availability. Sulfur is essential for synthesizing certain amino acids and oils that give herbs and aromatic plants their distinctive fragrances. Many commercial fertilizers include these elements, but it’s worth checking the label, especially if you’re growing plants with high calcium demands like Philodendrons or Ficus species.

High-Nitrogen Organic Leaf Max Solution
Formulated explicitly for large-leaf tropicals requiring a steady influx of bio-available nitrogen compounds.
Check Organic Emulsions on Amazon3. Types of Houseplant Fertilizers: Liquid, Granular, Spikes, and Organics
The medium you choose determines how quickly nutrients reach the roots and how much control you have over the feeding process. Utilizing premium essential gardening tools for beginners ensures you deliver these inputs accurately without damaging delicate root tissues.
Highly controllable and instantly available to root hairs. Excellent for tailoring specific dilutions according to changes in seasonal growth rhythms.
Requires less day-to-day effort but lacks precision control. Pellets can release elements unpredictably if ambient room temperatures spike suddenly.
Solid spikes are another common option, but they often struggle with uneven distribution. They concentrate a high volume of mineral salts into a single spot, creating localized hot zones that can easily burn adjacent root structures while leaving the rest of the root system starved.
Chelated Nutrients: The Bioavailability Advantage
Modern premium fertilizers often advertise “chelated” micronutrients on their labels, and this distinction matters significantly for indoor growing. Chelation is a chemical process where mineral ions are wrapped in organic molecular structures—typically amino acids, EDTA, or similar compounds—that protect the nutrient from reacting prematurely in the soil solution. This protective wrapping keeps iron, zinc, manganese, and other trace elements in a soluble, plant-available form across a wider pH range than non-chelated minerals. For indoor gardeners dealing with variable water quality or pH fluctuations, chelated nutrient formulas provide consistent delivery that non-chelated products cannot match. The additional manufacturing cost means these products command a premium price, but the improved reliability often justifies the investment, particularly for expensive or sentimentally valuable specimen plants.

Continuous Release Plant Food Granules
Set-and-forget nutrition providing continuous micro-dosing up to six months without risk of flash chemical shock.
View Smart Pellets on Amazon4. When to Fertilize: The Seasonal Houseplant Feeding Calendar
Timing your feeding routines depends entirely on light availability and temperature patterns, which is closely linked to understanding full sun vs partial shade dynamics. When natural solar energy spikes, metabolic processes inside the plant accelerate, creating a strong demand for raw materials to fuel new growth.
Never fertilize an indoor plant that is completely dormant during cold winter periods. Without active light-driven growth, unabsorbed minerals pool within the root zone, creating toxic salt concentrations that can dry out and kill delicate root tissues.
As spring warmth returns, start with quarter-strength applications to gently wake your plants up. Ramp up to full targeted concentrations throughout mid-summer when new leaves are actively uncurling. When autumn brings shorter days, gradually taper down your feeding schedule until it halts completely before winter sets in.
Temperature’s Role in Nutrient Uptake
Soil temperature profoundly influences how efficiently roots can absorb dissolved nutrients. Most tropical houseplants evolved in environments where root zone temperatures remain consistently between 65-80°F (18-27°C). When indoor temperatures drop below 60°F (15°C), root cell membranes become less fluid, and the active transport proteins that pump nutrients into root tissues slow dramatically. This means that even if your fertilizer solution is perfectly mixed, a cold root zone effectively blocks absorption. Winter windowsills are particularly problematic—the pot may be sitting in a cold microclimate while the air temperature feels comfortable. Using a soil thermometer and moving plants away from cold window glass during winter can significantly improve nutrient utilization during the cooler months when you might still be providing light feeding to plants that maintain slow winter growth.

Digital Photometer & Soil Analysis Probe
Track ambient light thresholds and soil readiness values accurately to ensure your timing matches the plant’s metabolic state.
Find Analysis Probes on Amazon5. Recognizing the Signs: When Your Plants Are Starving vs. Overfed
Your plants consistently communicate their internal health status through their leaves. Learning to read these visual cues helps you avoid costly feeding mistakes, allowing you to use cheap gardening ideas for beginners effectively without compromising on your collection’s long-term health.
When a plant is facing severe nutritional deficiencies, you will typically notice a gradual loss of color. This pattern often starts as chlorosis—where older, lower leaves turn a uniform pale yellow as the plant pulls mobile nitrogen upward to protect vulnerable new tips. Growth slows down dramatically, and new leaves emerge significantly smaller than previous ones.
Conversely, over-fertilization presents sudden, aggressive symptoms. Look for dry, crusty white mineral rings forming on clay pot rims or across the top soil. Leaves will often develop crisp brown tips or margins, and they may cup downward under stress as excess salt concentrations pull vital moisture directly out of the root cells.
The Mobile vs. Immobile Nutrient Distinction
One of the most powerful diagnostic tools available to indoor gardeners is understanding which nutrients can move within plant tissues and which cannot. Mobile nutrients—including nitrogen, phosphorus, potassium, and magnesium—can be translocated from older leaves to support new growth when soil supplies run low. This is why nitrogen deficiency first appears as yellowing of the oldest, lowest leaves while the newest growth remains green. The plant is cannibalizing its older tissues to protect its future. Immobile nutrients—including calcium, iron, manganese, zinc, copper, and boron—cannot be moved once they’re deposited in plant tissue. Deficiencies in these elements therefore appear first in the newest growth, causing distorted, stunted, or abnormally colored young leaves while older foliage looks normal. This distinction allows you to narrow down which specific nutrient is lacking by simply observing whether symptoms appear on old or new growth.

Stainless Precision Long-Neck Spout Watering Can
Control the volume and delivery of your nutrient solutions with pinpoint accuracy to keep leaves dry and root zones perfectly saturated.
Shop Precision Cans on Amazon6. Step-by-Step Guide: How to Properly Apply Liquid Fertilizers
Applying liquid nutrients requires precision and careful preparation. A calculated, methodical approach ensures that your fertilizer solution is evenly distributed throughout the root zone without causing sudden chemical shock. This controlled delivery method is especially helpful when maintaining intense setups, like those used for balcony gardening ideas for apartments.
Step 1: Assess Substrate Hydration Profile
Never apply concentrated liquid plant food directly into bone-dry potting mix. When soil is completely dry, liquid runs down the inner sides of the pot and misses the roots entirely. Even worse, any root zones that do come into contact with the concentrated mix can suffer immediate chemical burn. Always ensure the root zone is lightly damp before feeding.
Step 2: Dilute Liquid Concentrate
Fill a clean watering container with room-temperature water. If you are using tap water, let it sit out for a full day to allow dissolved chlorine gases to escape. Measure out your liquid concentrate using a clean syringe or calibrated dropper, then stir it thoroughly into the water. For standard indoor maintenance, a good rule of thumb is to mix the solution at half the strength recommended on the product label.

Cold-Processed Organic Kelp Juice Concentrate
Harvested trace minerals and bio-stimulants designed to naturally optimize enzymatic reactions at cellular junctions.
Shop Kelp Concentrates on Amazon7. Step-by-Step Guide: How to Apply Granular & Slow-Release Fertilizers
Slow-release granules are a reliable way to provide a steady, continuous supply of nutrients over time. Instead of an immediate burst, these coated spheres break down slowly through moisture and temperature exposure, feeding your collection consistently for months. This steady nutrient release is highly effective for supporting slow-growing varieties, like the best indoor plants for low light environments.
Step 3: Distribute Granules Evenly Across Soil Surfaces
Measure out the correct dosage based on the diameter of your container. Scatter the dry granules evenly over the entire soil surface, making sure to avoid clumping. Keep the pellets a safe distance away from the central trunk or stalks to prevent structural stem damage from direct contact.
Step 4: Incorporate Pellets into Top Layer
Use a miniature hand fork or a light scratching tool to gently work the granules into the top inch of soil. Mixing them in anchors the pellets into the potting mix, ensuring they stay put and interact properly with soil microbes instead of floating to the surface during future waterings.

Stainless Steel Miniature Cultivator Hand Tool
Perfectly sized for blending slow-release granular fertilizers smoothly into delicate indoor container soil profiles.
Find Miniature Hand Tools on Amazon8. The Critical Maintenance Routine: How to Flush Soil to Prevent Salt Buildup
Over time, even the most carefully managed feeding routines will lead to an accumulation of unused mineral salts within your containers. Periodically flushing the soil helps wash away these residual build-ups, keeping the root environment balanced and functional. This step is incredibly important for maintaining healthy roots, regardless of how to choose the right pot size for plants.
Step 5: Saturate Matrix with Fresh Water
Move your container to a sink, bathtub, or outdoor area where water can drain freely. Pour plain, un-fertilized water over the soil surface until it is completely saturated, letting the excess pour straight out of the drainage holes at the bottom.
Step 6: Maintain Active Care Logs
Keep a simple written or digital log of every fertilizing session and soil flush you perform. Tracking these dates gives you a clear view of your feeding patterns over time, helping you adjust your care routines as your plants mature and evolve.

Extra-Deep Heavy Duty Basin Collecting Saucer
Catch high-volume flushing run-off easily, protecting your household surfaces during intense soil rinsing sessions.
Shop Basin Saucers on Amazon9. Specialized Care: Tailoring Fertilizer Schedules for Specific Plant Families
A single, generic feeding approach won’t work for every plant in your collection. Different botanical families have vastly different nutritional requirements based on where they evolved in the wild. Tailoring your nutrient delivery ensures that delicate varieties thrive alongside robust, hardy indoor plants that purify the air.
For example, high-growth tropical plants like Monstera, Philodendron, and Ficus are heavy feeders that thrive on regular doses of nitrogen-rich formulas throughout the spring and summer. On the other hand, Cacti and Succulents need a completely different approach—they require minimal feeding, using highly diluted low-nitrogen, high-potassium formulas only once or twice a year to prevent weak, leggy growth.
Orchid Nutritional Requirements
Orchids deserve special mention because their epiphytic nature makes their nutritional needs fundamentally different from terrestrial houseplants. In nature, most ornamental orchids grow attached to tree bark, absorbing nutrients from dissolving leaf litter, bird droppings, and mineral-rich rainwater that flows over their exposed roots. This means they’ve evolved to accept extremely dilute nutrient solutions applied frequently rather than concentrated feedings at wider intervals. The classic orchid grower’s mantra is “weekly, weakly”—apply a balanced orchid-specific fertilizer at one-quarter to one-half the recommended strength every week during active growth, then reduce to monthly during rest periods. Orchids are also particularly sensitive to urea-based nitrogen sources, which require soil microbes to break down into usable forms. Since orchid bark media lacks these microbes, always choose nitrate or ammoniacal nitrogen formulations for epiphytic orchids.
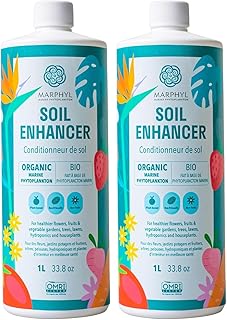
Ultra-Dilute Liquid Cactus & Succulent Drops
A gentle, low-nitrogen blend designed to strengthen cell walls without forcing weak, overly rapid elongation.
Browse Succulent Foods on Amazon10. Environmental Dynamics: How Light, Soil, and Pots Affect Nutrient Absorption
A plant’s capacity to absorb nutrients is limited by its surrounding environment. Even the highest-quality fertilizer won’t help if your plant doesn’t receive enough light to process those minerals. Understanding this relationship is key to success, whether you are managing decorative containers or setting up a how to start indoor herb garden project.
The structure of your potting mix also plays an important role. Heavy, compacted soils trap moisture and suffocate roots, preventing them from taking up nutrients and frequently leading to rot. For the best results, use a premium, open best potting soil mix for indoor plants that provides a good balance of moisture retention and aeration.
Root Zone Oxygen and Nutrient Absorption
The relationship between soil oxygen levels and nutrient uptake is frequently overlooked by home growers. Root cells require oxygen for aerobic respiration, which generates the ATP energy molecules that power active nutrient transport across cell membranes. When soil becomes waterlogged or heavily compacted, oxygen levels plummet within hours, and roots switch to inefficient anaerobic metabolism. Under these conditions, roots cannot actively pump nutrients into their tissues even if the soil solution contains abundant dissolved minerals. This explains why overwatered plants often display deficiency symptoms—the nutrients are present but the roots lack the energy to absorb them. Ensuring excellent drainage, using aerated potting mixes with perlite or pumice, and allowing the top layer of soil to dry between waterings all maintain the oxygen levels necessary for efficient nutrient uptake.

Perlite-Enriched Premium Aerated Potting Substrate
An open, well-draining soil mix that prevents compaction and allows roots to absorb nutrient solutions efficiently.
Shop Aerated Potting Mix on Amazon11. Common Mistakes to Avoid When Feeding Indoor Plants
Many common plant problems are caused by simple, easily avoidable fertilizing mistakes. These issues are very similar to the challenges faced when growing edibles, like managing the easiest vegetables to grow in pots or keeping pests at bay when figuring out how to grow tomatoes on a balcony.
The most common misstep is feeding a plant that is already struggling with root damage, pest infestations, or dehydration. Adding fertilizer to a stressed root system only compounds the problem, burning vulnerable tissues and accelerating the plant’s decline. Always address environmental stressors and get pests under control before reintroducing a regular feeding routine.
The Fertilizer Storage Mistake
Improper storage of fertilizer products reduces their effectiveness and can create safety hazards. Liquid concentrates, particularly organic formulations, degrade when exposed to temperature extremes. Freezing causes mineral salts to crystallize out of solution, while excessive heat accelerates chemical breakdown of complex organic molecules. Store all fertilizers in a cool, dry location between 50-80°F (10-27°C), away from direct sunlight which can photodegrade sensitive compounds. Always keep fertilizers in their original containers with labels intact—transferring to unmarked bottles risks dangerous misidentification. Keep all plant nutrition products out of reach of children and pets, as even organic formulations can cause illness if ingested in concentrated form. Check expiration dates on organic products, as microbial inoculants and enzyme-based formulas lose viability over time even under ideal storage conditions.

Ready-to-Use Triple Action Organic Neem Spray
Keep foliage clean and free of pests so your plants can focus their energy on converting nutrients into healthy new growth.
Shop Protective Sprays on Amazon12. Organic and DIY Alternatives: Pros, Cons, and Best Practices
Choosing between organic and synthetic fertilizers depends on your personal preferences and your plants’ specific needs. While organic solutions provide gentle, long-term enrichment, synthetic formulas offer precise control over nutrient delivery—a balance that is also a key consideration when growing microgreens at home without soil.
Organic options like worm castings and compost teas excel at building long-term soil health by introducing beneficial microbial life. However, they break down slowly and can occasionally attract common household pests. If your indoor space develops a minor pest issue from organic amendments, knowing how to get rid of fungus gnats naturally will help keep your indoor garden clean and thriving.
Mycorrhizal Fungi: The Underground Alliance
One of the most significant advantages of organic growing methods is the ability to cultivate beneficial mycorrhizal fungi. These microscopic organisms form symbiotic relationships with plant roots, extending thread-like hyphae far beyond the root zone to access water and mineral nutrients that roots alone cannot reach. In exchange for sugars produced through photosynthesis, mycorrhizal networks deliver phosphorus, zinc, copper, and nitrogen directly to root cells. Research demonstrates that well-colonized plants require significantly less fertilizer input while showing improved drought tolerance and disease resistance. For indoor gardeners, powdered mycorrhizal inoculants can be applied directly to roots during repotting or mixed into potting soil at planting time. The fungi establish permanently in organic growing media but are killed by synthetic salt buildup, making them compatible primarily with organic feeding approaches.

Pure Organic Worm Castings Soil Amendment
An odorless, non-burning organic option that enriches potting mix with beneficial microbes and essential trace minerals.
Shop Worm Castings on Amazon13. The Micronutrient Universe: Tiny Elements, Massive Impact
While nitrogen, phosphorus, and potassium capture most of the attention, plants require at least seven essential micronutrients to complete their life cycles. These trace elements function primarily as enzyme cofactors—they don’t become structural components of plant tissue but instead enable the chemical reactions that build those structures. Without adequate micronutrients, even perfect NPK levels cannot produce healthy growth.
| Micronutrient | Primary Function | Deficiency Symptom | Mobility Status |
|---|---|---|---|
| Iron (Fe) | Chlorophyll synthesis, electron transport | Interveinal chlorosis on new leaves (green veins, yellow tissue) | Immobile |
| Manganese (Mn) | Photosystem II water-splitting, enzyme activation | Interveinal chlorosis with necrotic spots on new growth | Immobile |
| Zinc (Zn) | Auxin synthesis, protein production | Severely stunted new leaves, “rosetting” of growth tips | Immobile |
| Copper (Cu) | Lignin synthesis, reproductive development | Dieback of shoot tips, distorted new leaves | Immobile |
| Boron (B) | Cell wall formation, pollen tube growth | Thickened, brittle new growth, hollow stems | Immobile |
| Molybdenum (Mo) | Nitrate reduction, nitrogen metabolism | Pale, distorted leaves, marginal scorch | Mobile |
| Chlorine (Cl) | Stomatal regulation, osmotic balance | Wilting, chlorosis, restricted root growth | Mobile |
Most quality commercial fertilizers include a full micronutrient package, but deficiencies can still develop under certain conditions. High soil pH (above 7.0) locks up iron, manganese, zinc, and copper, making them chemically unavailable even when present. Excessive phosphorus levels from over-fertilization can antagonize zinc and iron uptake. Very sandy or coir-based potting mixes may lack the cation exchange capacity to retain micronutrients, allowing them to leach out rapidly. If you observe deficiency symptoms in new growth despite regular feeding, suspect a micronutrient issue and consider a specialized micronutrient supplement or foliar spray for rapid correction.
Complete Chelated Micronutrient Formula
Restore iron, zinc, manganese, and copper balance with fully chelated minerals that remain available across wide pH ranges.
Shop Micronutrient Supplements on Amazon14. pH Management: The Key That Unlocks Nutrient Availability
Soil pH is arguably the single most important factor governing whether your fertilizer actually reaches your plants. The pH scale measures hydrogen ion concentration in the soil solution, and this chemical environment directly controls whether nutrient elements remain soluble or precipitate into insoluble forms that roots cannot absorb. Understanding pH transforms guesswork into precision, much like mastering the signs of overwatering vs underwatering transforms watering practices.
The Nutrient Availability Sweet Spot
Most tropical houseplants evolved in forest soils with pH ranging from 5.5 to 6.5, and this slightly acidic range represents the sweet spot where all essential nutrients are maximally available. At pH 6.0-6.5, nitrogen, phosphorus, potassium, sulfur, calcium, magnesium, and all micronutrients exist in plant-accessible forms. As pH rises above 7.0 (alkaline conditions), iron, manganese, zinc, copper, and boron begin precipitating out of solution—even though soil tests might show adequate total amounts, the plants cannot access them. Below pH 5.0, aluminum and manganese can become soluble to toxic levels while calcium, magnesium, and molybdenum become unavailable. This explains why plants in old, unflushed potting soil often show strange deficiency patterns: years of tap water irrigation have gradually shifted the pH into zones where certain nutrients lock up.
Measuring and Adjusting pH at Home
Home growers have several options for pH monitoring. Simple liquid pH test kits provide adequate accuracy for most indoor gardening purposes at minimal cost. Digital pH meters offer greater precision but require regular calibration with buffer solutions to remain accurate. Test the pH of both your irrigation water and the drainage water that runs through your pots—comparing these values reveals whether your soil is buffering pH up or down. If soil pH has drifted too high, flushing with water adjusted to pH 6.0-6.5 using phosphoric acid or citric acid can gradually bring it back into range. For persistently alkaline conditions, incorporating sphagnum peat moss or elemental sulfur into the potting mix provides longer-term acidification.
15. Water Quality and Its Hidden Impact on Plant Nutrition
The water you use to mix fertilizer solutions and irrigate your plants plays a far larger role in nutrition than most indoor gardeners realize. Tap water varies enormously in mineral content depending on your municipal source, and these dissolved minerals interact with your fertilizer in ways that can either enhance or severely inhibit nutrient availability.
Hard Water: The Calcium-Magnesium Double-Edged Sword
Hard water contains high levels of dissolved calcium and magnesium carbonates—the same minerals that form scale in kettles and showerheads. While plants need both calcium and magnesium, hard water delivers them in forms that gradually raise soil pH as carbonates accumulate. Over months of watering, this pH creep can push soil from the optimal 6.0-6.5 range into alkaline territory above 7.0, locking out iron and other micronutrients. If you have hard water, you may notice that your fertilizer seems to become less effective over time despite consistent application. The solution is periodic soil pH testing, regular flushing with pH-adjusted water, or switching to filtered, distilled, or rainwater for fertilizer mixing. Note that water softeners using sodium chloride exchange make water even worse for plants—the sodium is directly toxic to roots and destroys soil structure.
Chlorine, Chloramine, and Beneficial Microbes
Municipal water treatment adds chlorine or chloramine to kill pathogens, but these same disinfectants can harm the beneficial bacteria and fungi in your potting soil that help process organic nutrients. Chlorine dissipates naturally if water sits uncovered for 24 hours, but chloramine—increasingly used because it’s more stable in distribution systems—does not evaporate and must be removed through filtration or chemical treatment. For gardeners using organic fertilizers that depend on microbial activity to release nutrients, chloramine can significantly reduce effectiveness by suppressing the very organisms needed to mineralize organic compounds. Activated carbon filters (including most pitcher filters) effectively remove both chlorine and chloramine, making filtered water a worthwhile investment for serious indoor gardeners using organic feeding approaches.
Digital pH and TDS Water Quality Meter
Measure your water’s mineral content and pH accurately to customize fertilizer programs around your specific tap water chemistry.
Find Water Testing Meters on Amazon16. Foliar Feeding: Direct Nutrient Delivery Through Leaves
While roots are the primary nutrient absorption organs, plant leaves can also absorb dissolved minerals directly through their stomata and epidermal cells. Foliar feeding—spraying diluted nutrient solution onto leaf surfaces—offers a powerful supplemental technique for rapid correction of deficiencies and for delivering nutrients when root function is compromised by disease, transplant shock, or unfavorable soil conditions.
When Foliar Feeding Excels
Foliar applications are particularly valuable for addressing micronutrient deficiencies, especially iron and manganese, which often show symptoms in new growth while root absorption is inadequate. Because foliar-applied nutrients bypass the root-to-shoot transport system, they reach deficient tissues within hours rather than days. This makes foliar feeding the fastest method for greening up chlorotic plants. The technique also proves invaluable for plants recovering from root rot or repotting stress when damaged root systems cannot efficiently absorb soil nutrients. Additionally, foliar feeding allows you to provide targeted nutrition during periods when soil feeding would be risky—such as during mild winter growth when roots are sluggish but leaves are still photosynthesizing in bright windows.
Proper Foliar Application Technique
Successful foliar feeding requires attention to several details. Always use a highly diluted solution—typically one-quarter to one-eighth the strength used for root feeding—to prevent leaf burn. Apply during early morning or evening hours when stomata are open and temperatures are moderate; midday application causes rapid evaporation that concentrates salts on leaf surfaces. Use a fine-mist sprayer that creates droplets small enough to coat leaf surfaces without running off. Spray both upper and lower leaf surfaces, as the majority of stomata are located on leaf undersides. Add a few drops of mild liquid soap or commercial surfactant to your spray solution to break water surface tension and improve leaf coverage. Never foliar feed plants with hairy leaves (like African Violets) or plants in direct sunlight, as water droplets can act as magnifying lenses and burn leaf tissue.
Adjustable Fine-Mist Continuous Spray Bottle
Deliver ultra-fine nutrient mists that coat leaf surfaces evenly without dripping, maximizing foliar absorption efficiency.
Shop Precision Sprayers on Amazon17. Nutrient Lockout: Diagnosis, Treatment, and Prevention
Nutrient lockout is one of the most frustrating problems in indoor gardening because it mimics deficiency while the actual cause is excess. Lockout occurs when the chemical environment in the soil prevents roots from absorbing nutrients that are physically present—the fertilizer is there, but the plant cannot access it. This typically results from salt accumulation, pH imbalance, or antagonistic interactions between nutrient elements.
Recognizing Lockout vs. True Deficiency
The key diagnostic clue for nutrient lockout is that symptoms appear across multiple nutrients simultaneously rather than following the specific patterns of individual deficiencies. A plant suffering from true nitrogen deficiency shows uniform yellowing of older leaves while new growth remains green. A plant experiencing lockout often shows yellowing older leaves (nitrogen deficiency), interveinal chlorosis on new growth (iron deficiency), and brown crispy leaf edges (potassium deficiency)—all appearing at once. If your plant develops a confusing combination of symptoms despite regular feeding, suspect lockout. Additional confirmation comes from observing white mineral crust on soil surfaces or pot rims, indicating salt accumulation, and from testing soil pH, which often reveals values far from the optimal 6.0-6.5 range in locked-out containers.
The Lockout Recovery Protocol
Recovering from nutrient lockout requires patience and a systematic approach. Begin by thoroughly flushing the container with three to five times the pot volume of pH-adjusted water (target pH 6.3-6.5). This dissolves and removes accumulated salts that are causing the chemical imbalance. After flushing, allow the soil to dry to the appropriate moisture level before any additional watering. Do not fertilize for at least two weeks after flushing—the plant needs time to recover and resume normal metabolic function. When you resume feeding, start at one-quarter strength and use a complete fertilizer with balanced micronutrients. Monitor new growth carefully; existing damaged leaves will not recover, but new leaves should emerge healthy and properly colored. If they don’t, retest pH and consider whether your water source or fertilizer choice may be contributing to ongoing lockout conditions.
18. Advanced Biostimulants: Humic Acids, Fulvic Acids, and Seaweed Extracts
Beyond traditional fertilizers, a category of products called biostimulants has gained significant attention in professional horticulture for their ability to enhance nutrient uptake, stress tolerance, and overall plant vigor without directly providing significant NPK nutrition themselves. These compounds work by modifying plant metabolism and improving the growing environment rather than by feeding plants directly.
Humic and Fulvic Acids: Soil Conditioners Extraordinaire
Humic and fulvic acids are complex organic molecules derived from the decomposition of ancient plant material, typically extracted from leonardite or peat deposits. Humic acids are larger molecules that improve soil structure by promoting aggregation of soil particles, increasing water-holding capacity, and enhancing cation exchange capacity—the soil’s ability to hold and release positively charged nutrient ions like calcium, magnesium, potassium, and ammonium. Fulvic acids are smaller molecules that can actually enter plant cells, carrying mineral nutrients with them through chelation. Fulvic acid applications can dramatically improve micronutrient uptake even under challenging pH conditions. For indoor gardeners, humic and fulvic acid products are typically applied as dilute solutions every 4-6 weeks during the growing season, either as soil drenches or combined with regular fertilizer applications.
Seaweed Extracts: Nature’s Growth Hormone Cocktail
Cold-processed seaweed extracts (primarily from Ascophyllum nodosum) contain a remarkable array of natural plant growth hormones including cytokinins, auxins, gibberellins, and betaines. These compounds stimulate root development, enhance chlorophyll production, improve stress tolerance to drought and temperature extremes, and accelerate recovery from transplant shock or pest damage. Unlike synthetic hormones, seaweed extracts provide a balanced, gentle stimulation that works with the plant’s own regulatory systems. Regular application during the growing season—typically every 2-4 weeks as a soil drench or foliar spray—results in visibly improved root mass, thicker stems, and deeper leaf coloration. Many professional growers consider seaweed extract an essential component of their nutrition programs, using it as a complement to, not a replacement for, balanced mineral fertilization.
Concentrated Humic & Fulvic Acid Soil Conditioner
Unlock bound nutrients already in your soil and dramatically improve fertilizer efficiency with premium carbon-rich biostimulants.
Shop Humic Acid Products on Amazon19. Homemade Fertilizers: Safety Considerations and Proven Recipes
The internet contains countless recipes for homemade plant fertilizers using kitchen scraps, household products, and garden byproducts. While some DIY solutions have genuine merit, others range from ineffective to actively harmful. Understanding the science behind homemade options helps you separate useful techniques from dangerous misinformation.
Compost Tea: The Gold Standard of DIY Nutrition
Properly brewed aerated compost tea is perhaps the most scientifically validated homemade plant nutrient solution. The process involves suspending high-quality finished compost in dechlorinated water and aerating vigorously for 24-36 hours with an aquarium pump and air stone. This oxygen-rich environment selectively multiplies beneficial aerobic bacteria and fungi that contribute to nutrient cycling, disease suppression, and soil structure improvement. The resulting tea contains soluble nutrients extracted from the compost along with a diverse microbial community. Applied as a soil drench, compost tea enhances nutrient availability and suppresses root pathogens. For best results, use compost made from diverse feedstock materials including both green (nitrogen-rich) and brown (carbon-rich) ingredients, maintain strong aeration throughout the brewing period, and apply the finished tea within 4 hours of completion when microbial activity peaks.
Risky DIY Practices to Avoid
Several popular homemade fertilizer recipes circulating online should be avoided due to safety concerns or ineffectiveness. Raw egg whites applied to soil not only fail to provide meaningful calcium but attract pests and can introduce Salmonella bacteria into your home environment. Uncomposted coffee grounds are highly acidic and contain compounds that inhibit seed germination and root growth—only use grounds that have been fully composted. Banana peel water (soaking banana peels in water) extracts negligible potassium and primarily provides a breeding medium for fungus gnats. Rice water and pasta water contain starches that feed harmful bacteria and mold in potting soil rather than providing meaningful nutrition. The safest approach to homemade nutrition is to properly compost organic materials first, then use the finished compost to brew tea or as a top-dressing amendment, allowing soil microorganisms to complete the nutrient cycling process naturally.
20. Professional Nursery Feeding Schedules: How the Experts Do It
Commercial greenhouse operations approach plant nutrition with scientific precision, using carefully calibrated feeding schedules based on crop type, growth stage, and environmental conditions. While home growers don’t need commercial-level complexity, understanding professional approaches provides valuable insights for optimizing your own feeding program.
The Constant Liquid Feed Method
Many professional nurseries use constant liquid feed (CLF) programs where every irrigation water contains a low concentration of complete fertilizer—typically 100-150 parts per million nitrogen rather than the 200-400 ppm used in weekly feeding. This approach mimics natural nutrient availability, where roots constantly encounter low levels of dissolved minerals rather than feast-or-famine cycles. For home growers, CLF translates to using quarter-strength fertilizer solution with every watering during active growth periods, rather than full-strength applications every two weeks. This method reduces the risk of salt buildup, minimizes the shock of heavy feeding events, and produces remarkably steady, consistent growth. The primary challenge is accurately measuring and mixing small quantities consistently, which is where quality measuring tools become essential.
Crop-Specific Feeding Programs
Professional growers maintain separate feeding programs for different crop categories based on extensive research into each species’ nutritional requirements. Foliage plants (Ficus, Philodendron, Dracaena) receive nitrogen-forward formulas at 150-200 ppm nitrogen throughout production. Flowering crops (Orchids, African Violets, Anthuriums) transition to high-phosphorus bloom formulas as they enter reproductive phase. Succulents and cacti receive minimal feed at 50-75 ppm nitrogen only during active growth windows. Seedlings and rooted cuttings start with ultra-dilute solutions (50-75 ppm) until root systems establish, then gradually ramp up. Home growers can adopt this tiered approach by grouping plants with similar nutritional needs and maintaining separate fertilizer concentrates for each group—perhaps a high-nitrogen formula for foliage plants, a bloom formula for flowering specimens, and a diluted all-purpose mix for general collection maintenance.
Professional Three-Part Nutrient System
Mix custom NPK ratios tailored to each plant’s growth stage with a professional-grade base nutrient, bloom booster, and micronutrient supplement.
Shop Professional Nutrient Systems on AmazonFrequently Asked Questions
Cultivating Excellence: Your Next Nutritional Steps
Mastering indoor plant nutrition comes down to observation, consistency, and understanding the interconnected systems at play. By matching your feeding routine to your plants’ seasonal growth patterns, monitoring pH and water quality, addressing micronutrient needs, and using the right mix of nutrients, you can transform a struggling collection into a vibrant, thriving indoor jungle.
Take a close look at your plants this week. Check their growth status, inspect the soil for salt buildup, test your water pH, and set up a simple care log to track your feeding routine. Consider whether your plants might benefit from micronutrient supplementation, biostimulant applications, or a revised feeding schedule based on professional constant liquid feed approaches. Providing a balanced, well-timed supply of complete nutrition—including all essential macro and micronutrients—is the key to unlocking long-term health and beautiful, lush foliage across your entire collection.