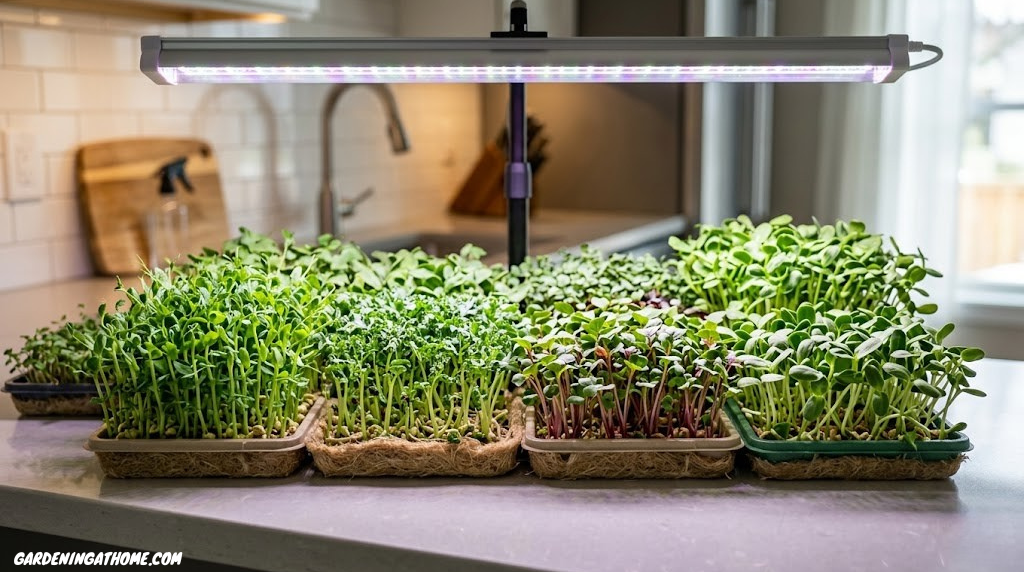
Growing Microgreens at Home Without Soil
No dirt. No garden. No guesswork. Here’s exactly how to grow nutrient-dense microgreens on your countertop using hydroponic mats and water alone.
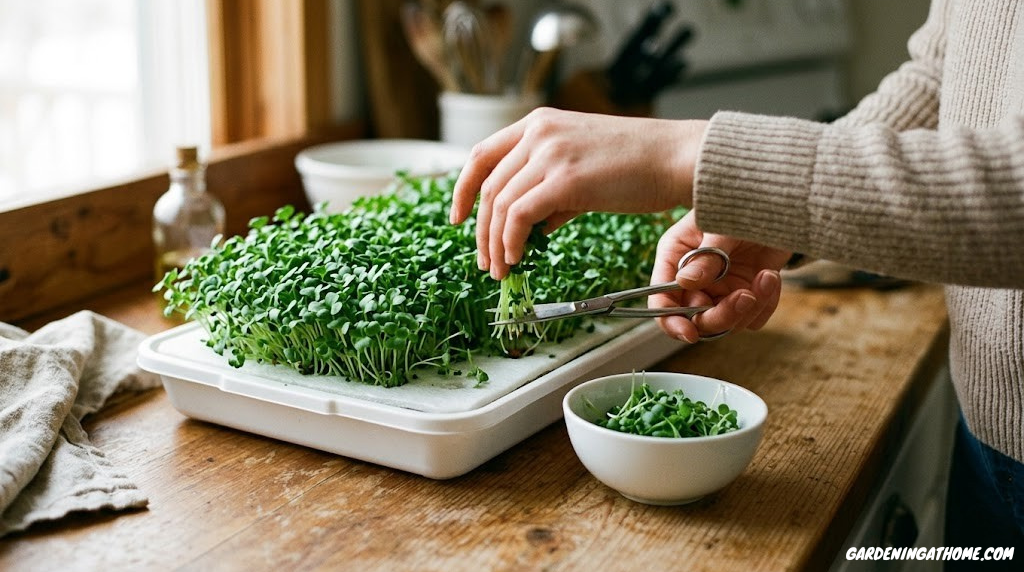
What Are Microgreens — and Why Is Everyone Growing Them?
Microgreens occupy a specific window in a plant’s life: they are harvested after the seed has germinated and the first true leaves have just begun to emerge, but before the plant establishes any root system worth speaking of. That window is usually 5 to 18 days after seeding, depending on the species.
They are not sprouts (which are germinated seeds eaten root and all) and they are not baby salad greens (which have been growing for weeks in soil). Microgreens sit right in the middle — old enough to have developed concentrated chlorophyll and a distinct flavor, young enough that you could grow an entire crop on your kitchen counter without a bag of compost in sight.
The appeal has grown beyond novelty. Research has found that the cotyledon stage — when those first small leaves open up — is when many plants pack in an extraordinary density of vitamins, antioxidants, and phytochemicals compared to their mature counterparts. Broccoli microgreens, for instance, contain significantly higher concentrations of sulforaphane (a compound linked to cellular protection) than mature broccoli florets.
But beyond nutrition, people grow them because they are genuinely one of the fastest, most satisfying crops you can produce indoors. If you have been thinking about starting a home garden but feel intimidated by the scale of it, microgreens are the perfect place to begin — no outdoor space, no large investment, and no long wait for results.
Fastest Crop Indoors
Most varieties go from dry seed to harvest in under 10 days.
Nutrient Dense
Cotyledon-stage plants concentrate nutrients before routing them outward.
Minimal Space
A 10×20 inch tray on a countertop is enough to feed a household weekly.
Whether you are in a small apartment, a house with no garden, or simply want fresh greens year-round without relying on the supermarket, microgreens solve the problem elegantly. And doing it without soil makes the whole operation cleaner, faster, and more consistent.
Why Skip the Soil? The Real Case for Soilless Microgreens
The instinct to reach for a bag of potting mix when growing anything is understandable — we associate soil with plant life. But for microgreens, soil is actually the least suitable growing medium for most home setups, and here is why.
Microgreens do not use soil nutrients before harvest. The cotyledon leaves (those first tiny leaves) are powered entirely by the energy packed inside the seed itself. The plant has not developed a mature enough root system to uptake nitrogen or phosphorus from the surrounding medium — it is drawing from its own reserves. This means a sterile, inert medium that simply holds moisture and provides structural support is all you need.
Soil also brings problems to a tight, humid growing environment. The warmth and moisture required for germination are also ideal conditions for fungus gnats, mold spores, and soil-borne pathogens. If you have ever struggled with fungus gnats in houseplants, you know how quickly a damp tray of potting mix can become infested. Soil-free microgreens sidestep that entire problem.
Cleanup is the other advantage that rarely gets mentioned. After a soil-based microgreen harvest, you have a tray of muddy root mass to deal with. With a hemp or coco coir mat, you lift the spent mat out as a single disc, toss it on the compost, rinse the plastic tray with hydrogen peroxide solution, and you are ready to go again in minutes.
✓ Advantages of Soil-Free Growing
- No fungus gnats or soil-borne pests
- Cleaner harvests — no grit in the greens
- Faster cleanup between batches
- Lower mold risk (sterile medium)
- Consistent moisture distribution
- No heavy bags of potting mix to buy or store
✗ Limitations to Know
- Some large-seeded varieties (sunflower) grip soil more reliably
- Ongoing cost of replacement mats
- Less forgiving if you forget to water (dries out faster)
- Mat size dictates tray size choices
The bottom line: for anything you want to grow in 14 days or less, indoors, with minimal fuss, soil-free is the smarter choice. If you are curious about when soil genuinely is the better option for indoor plants, that resource goes into detail — but for microgreens specifically, skip it.

Bootstrap Farmer 1020 Tray Kit (No-Hole + Hole Pairs)
The standard tray pairing used by professional microgreen growers. Bottom tray holds water; top tray holds the mat and seeds. Durable, reusable, the right size.
View on Amazon →The Best Soil-Free Growing Media for Microgreens
The term “growing medium” in this context means anything that holds moisture, provides a surface for roots to grip, and keeps seeds in place while they germinate. Here is a breakdown of every realistic option, ranked by overall performance for home growers.
| Medium | Best For | Moisture Retention | Mold Risk | Cost (per tray) | Reusable? |
|---|---|---|---|---|---|
| Hemp fiber mat | All varieties, especially fine seeds | ⭐⭐⭐⭐⭐ | Very low | $0.80–1.50 | No |
| Coco coir pad | Most varieties; heavier seeding rates | ⭐⭐⭐⭐ | Low | $0.60–1.20 | No |
| Jute / burlap mat | Large seeds (sunflower, pea, corn) | ⭐⭐⭐ | Low–Moderate | $0.50–1.00 | No |
| Biostrate (Grodan) | Professional / commercial use | ⭐⭐⭐⭐⭐ | Very low | $1.50–2.50 | No |
| Shallow water (raft) | Pea shoots, sunflower | N/A (liquid) | Low with airflow | Near zero | Yes (tray) |
| Paper towel (starter) | Testing germination rates only | ⭐⭐ | Moderate | Near zero | No |
Hemp Fiber Mats: The Gold Standard
Hemp mats are cut to fit standard 10×20 inch trays, are naturally antimicrobial, and hold moisture exceptionally evenly — no wet spots, no dry corners. Seeds rest on top and roots grow down through the fibrous mat structure, which means clean, grit-free cuts at harvest. For almost any microgreen variety under 14 days, hemp is the recommended starting point. Look for mats that are unbleached and untreated.
Coco Coir Pads
Compressed coconut fiber pads are slightly denser than hemp, which makes them better suited for heavy seeding rates. They soak up water readily and stay moist for slightly longer between watering cycles, which is useful in drier climates or if you sometimes forget to check your trays. The texture can trap a few seeds at harvest, so rinse thoroughly before eating.
Shallow Water Hydro (for Large Seeds)
For pea shoots and sunflower microgreens specifically, some growers use nothing but a thin layer of water in the bottom tray, allowing the seeds — which are soaked and pre-sprouted — to rest directly on the tray base. Roots reach the water; shoots grow upward into the air. This works because large seeds carry enough energy to germinate and produce substantial growth before needing any external support. It is the most minimal setup possible, and it requires excellent airflow to prevent stagnation.

Unbleached Hemp Fiber Growing Mats — 10×20 inch (Pack of 10)
Cut to fit standard 1020 trays. Naturally antimicrobial, excellent moisture distribution, produces clean harvests with minimal root debris.
View on Amazon →Best Seeds to Grow as Soil-Free Microgreens
Not every plant variety performs equally well in soil-free conditions. Large, hard seeds that need heavy soil contact to properly germinate, or slow varieties that develop extensive root systems before sprouting, are less suited to mat culture. The varieties below are specifically selected for their performance on mats and in hydroponic conditions — and for the flavors they deliver.
| Variety | Flavor Profile | Days to Harvest | Difficulty | Soak Seeds? |
|---|---|---|---|---|
| Radish | Spicy, peppery | 5–7 | Beginner | No |
| Broccoli | Mild, slightly earthy | 6–8 | Beginner | No |
| Arugula | Nutty, peppery | 6–9 | Beginner | No |
| Mustard | Sharp, wasabi-like heat | 5–8 | Beginner | No |
| Sunflower | Nutty, rich, creamy | 10–14 | Beginner–Intermediate | Yes (8–12 hrs) |
| Pea shoots | Sweet, fresh, like snap peas | 10–14 | Beginner–Intermediate | Yes (8–12 hrs) |
| Wheatgrass | Grassy, sweet (for juicing) | 8–12 | Intermediate | Yes (6–8 hrs) |
| Kale | Mild, slightly sweet | 8–12 | Beginner | No |
| Amaranth | Mild, earthy, colorful | 12–18 | Intermediate | No |
| Basil | Sweet, aromatic | 14–18 | Intermediate | No |
🌱 Beginner Recommendation
Start with radish or broccoli for your first two trays. Both germinate in 24–48 hours, tolerate beginner watering mistakes, and produce a harvest in under 8 days. Once you understand the rhythm, add sunflower and pea shoots for variety and larger yields. This mirrors the approach we recommend in our beginner gardening guide — start simple, add complexity once you have the fundamentals down.
Always source seeds labeled specifically for sprouting or microgreens — not treated garden seeds. Treated seeds have fungicide or pesticide coatings intended to survive in outdoor soil, which you do not want on food you are eating raw. Reputable seed suppliers like True Leaf Market, Johnny’s Selected Seeds, or Botanical Interests all offer untreated microgreen-specific varieties.
Equipment You Need (and What You Can Skip)
The microgreen industry has produced a dizzying array of specialty gadgets. The list below distinguishes between what actually matters and what is clever marketing.
| Item | Essential? | Budget Option | Notes |
|---|---|---|---|
| Shallow trays (10×20 pairs) | ✅ Yes | Repurpose food trays | One with drainage holes + one without |
| Growing mats | ✅ Yes | Paper towel (testing only) | Hemp or coco coir recommended |
| Spray bottle / mister | ✅ Yes | Any kitchen spray bottle | For initial germination misting |
| Humidity dome / lid | ✅ Yes | Damp newspaper works | Keeps moisture in during germination |
| Grow light | ⚠️ Recommended | Bright south windowsill | LED panel outperforms window reliably |
| Kitchen scissors | ✅ Yes | Any sharp scissors | Dedicated set kept clean |
| Small fan | ⚠️ Recommended | Any USB desk fan | Prevents mold, strengthens stems |
| Salad spinner | Optional | Pat dry with towel | Makes post-harvest drying faster |
| pH pen / nutrients | ❌ Not needed | — | Seeds feed themselves; skip this |
If you are just getting started and wondering about the broader category of essential gardening tools, microgreens are one of the most tool-light crops you can choose. Two trays, a mat, and a spray bottle is a complete setup. The grow light is the one item worth spending money on if you are serious about consistent results.
For container considerations relevant to other pot-grown vegetables, pot size really does matter — but for microgreens, the standard 10×20 inch tray is essentially universal and you do not need to think about it further.

Spider Farmer SF-300 LED Grow Light (45W Full Spectrum)
Full spectrum LED panel that covers 2–4 standard trays. Produces stockier, more flavorful microgreens than a windowsill in any season. Quiet, low heat, efficient.
View on Amazon →Step-by-Step: How to Grow Microgreens Without Soil
The method below works for hemp mats, coco coir pads, and jute mats. Steps 1 through 6 cover the complete cycle from dry seed to ready-to-eat harvest. For large seeds like sunflower and pea that require soaking, an extra pre-soak step is noted.
Prepare Your Tray and Mat
Place a growing mat inside your draining tray (the one with holes). The mat should sit flat, edge to edge, with no gaps at the sides. Pre-wet the mat by pouring water into the tray until it pools slightly, then let it absorb for 5 minutes. Tip out any standing water — the mat should be damp throughout but not waterlogged. Place this draining tray inside your solid (no-hole) tray, which will act as a water reservoir.
Measure and Sow Seeds Evenly
Measure seeds by weight or volume — use about 30–40g of small seeds (radish, broccoli, mustard) or 100–150g of large seeds (sunflower, pea) for a standard 10×20 tray. Scatter seeds as evenly as possible across the entire mat surface. They should be close but not piled on each other — a single, dense layer. After scattering, press gently with a flat object (a second tray works perfectly) to ensure every seed contacts the mat.
Cover and Begin Germination (Blackout Phase)
After sowing, mist the seeds lightly with a spray bottle — enough to wet the seed surface without washing them around. Place a humidity dome or a second tray on top, creating darkness. This blackout period does two important things: it keeps humidity high for uniform germination, and the slight pressure of the covering tray helps seeds root down into the mat rather than floating. Store in any warm location (65–75°F / 18–24°C). Do not place near a heat vent — warmth is good, drying wind is not.
Check the tray at 24 hours. If seeds have germinated and small white radicles are visible but the mat surface feels dry, mist once. Do not over-wet — the goal is damp, not dripping. Most small seeds (radish, broccoli) will have visible sprouting within 36–48 hours.
Remove the Dome and Expose to Light
Once you see the majority of seeds have germinated — white root tips down, pale shoots pushing upward — remove the dome and move the tray to your light source. This is typically 2–3 days after seeding for fast varieties. The pale shoots will “green up” (a process called de-etiolation) within 12–24 hours of light exposure. Do not rush the dome removal for slower varieties like pea and sunflower — wait until at least 80% of seeds have germinated to avoid uneven development.
Bottom-Water Daily and Maintain Airflow
Switch from top-misting to bottom-watering once the dome is removed. Add water to the outer reservoir tray — enough to pool at roughly 3–5mm depth — and let the growing mat wick it up from below. Check every 12 hours during the growing period. The mat should never dry out completely, but standing water that the mat cannot absorb within an hour means you have over-watered.
Airflow is the other critical variable. A small USB fan running on low, positioned to blow across (not down into) the tray, dramatically reduces mold risk and produces tougher, more upright stems. If you do not have a fan, at minimum open a window for a few hours each day to get fresh air moving. For more on recognizing stress signals, our guide on overwatering vs underwatering has clear visual markers that apply equally to microgreens.
Harvest at the Cotyledon or First True Leaf Stage
The harvest window opens when the first pair of true leaves (the leaves that look like miniature adult leaves, distinct from the rounded cotyledons) just begins to emerge. For most varieties, you can also harvest at the pure cotyledon stage for a more delicate flavor and slightly higher nutrient density. Cut just above the mat surface with clean scissors in a single smooth motion. Harvest the whole tray at once or cut sections progressively over 2–3 days. Rinse in cold water, spin dry or pat with a clean towel, and eat fresh or refrigerate.

Complete Microgreens Starter Kit — Trays, Mats, Seeds & Light
All-in-one kit with 1020 tray pairs, pre-cut hemp mats, a seed assortment (radish, broccoli, pea, sunflower), and a compact grow light. Everything in one box.
View on Amazon →Light Requirements for Soil-Free Microgreens
Light is the variable that separates mediocre microgreens from dense, flavorful ones. Get it wrong and you get leggy, pale, weak-stemmed plants that taste like wet paper. Get it right and you get stocky, vibrant, deeply flavored greens that genuinely improve whatever dish they land on.
Microgreens need 12–16 hours of bright light per day. This is non-negotiable — the shorter the crop cycle, the more important it is to front-load photon hours in those first few days after dome removal.
| Light Source | Hours Needed | Distance from Canopy | Results | Best For |
|---|---|---|---|---|
| South-facing window (direct sun) | 14–16 hrs total | N/A | Good in summer; variable in winter | Budget setups, summer growing |
| T5/T8 fluorescent shop light | 14–16 hrs | 2–3 inches | Good, reliable, low heat | Multiple trays on a budget |
| Full-spectrum LED panel | 12–14 hrs | 2–4 inches | Best results, most consistent | Year-round serious growing |
| Clip-on LED grow bulb | 14–16 hrs | 4–6 inches | Decent for 1–2 trays | Beginners, small setups |
For context on how light levels affect all indoor plants, our guide to full sun vs partial shade explains the underlying principles — microgreens specifically want full sun equivalent or better, for more hours than most houseplants. Unlike low-light tolerant houseplants, microgreens actively punish insufficient light with rapid etiolation.
💡 The Two-Inch Rule
For LED and fluorescent lights, keep the light panel 2–4 inches above the top of the canopy. Closer than 2 inches risks heat stress and light bleaching; further than 4 inches results in leggy growth as the plants stretch toward the source. Raise the light incrementally as the greens grow. A simple way to manage this: set your light on a shelf and raise the tray using a small stack of books, then remove books as the greens grow upward.
Watering: The Bottom-Up Approach That Changes Everything
Top-watering microgreens is one of the most common beginner mistakes. Spraying or pouring water onto the canopy of developing microgreens does several damaging things: it knocks over fragile seedlings, wets the crowns (where stems meet roots, making them mold-prone), creates uneven moisture distribution, and washes seeds around the mat.
Bottom-watering solves all of this. Pour water into the outer reservoir tray — not onto the mat — and the mat absorbs it upward by capillary action. The growing surface stays properly moist while the vulnerable crowns and leaves stay dry.
Watering Schedule by Growth Phase
| Phase | Duration | Watering Method | Frequency |
|---|---|---|---|
| Pre-sowing | Before seeding | Flood mat, drain excess | Once |
| Germination (blackout) | Days 1–3 | Light top mist only if mat feels dry | Once daily at most |
| Light phase (growing) | Days 3–harvest | Bottom-water into reservoir | 1–2x per day |
The mat should feel like a wrung-out sponge at all times — moist throughout, but not dripping when pressed. In warm, dry environments (central heating in winter, or hot summers), you may need to check and bottom-water twice per day. In cooler, more humid conditions, once per day may be sufficient.
One practical trick: pour a set amount of water — say 200ml — into the reservoir tray each morning, then check in the evening to see if the mat absorbed it all. Adjust your amount based on what’s left. Within two or three days you will have a reliable sense of your specific setup’s needs.
Troubleshooting Common Problems
Soil-free microgreens are forgiving crops, but a few specific problems come up consistently. Here is what to look for and exactly how to fix it.
| Problem | Likely Cause | Fix |
|---|---|---|
| Leggy, floppy stems | Insufficient light intensity or hours | Lower light source to 2–4 inches; extend photoperiod to 16 hours |
| Pale yellow color after dome removal | Normal etiolation — no problem yet | Greens up within 24 hrs of light; if persists >48hrs, increase light intensity |
| White fuzzy growth at base | Likely root hairs (normal) — not mold | Check smell; root hairs are odorless, mold smells musty. Increase airflow if concerned |
| Actual mold (musty smell) | Overwatering + poor airflow | Remove affected section; add fan; switch entirely to bottom-watering |
| Seeds not germinating after 3 days | Old seeds or too cold | Check seed age; move to warmer spot (above 65°F); test germination rate on damp paper towel |
| Uneven germination (patchy) | Uneven seeding or mat contact | Press tray more firmly at seeding; re-press at 12 hrs with flat weight |
| Leaves taste bitter | Harvested too late (first true leaves mature) | Harvest earlier at cotyledon stage; try refrigerating immediately after harvest |
| Mat drying out fast | Too much heat from grow light or warm room | Raise light slightly; check reservoir more frequently; consider a tray cover between waterings |
The white fuzz confusion deserves extra attention because it causes a lot of first-time growers to throw away perfectly healthy trays. When seeds germinate and roots grow outward, they produce microscopic root hairs to maximize surface area for water uptake. These hairs look, from a distance, like white fuzzy growth at the mat surface. They are completely normal, appear on every healthy tray, and disappear once the green stems grow taller and the root zone is shadowed from light. Mold smells. Root hairs do not. If in doubt, get your nose close to the mat and take a breath.
For ongoing pest concerns in your broader home garden context, our resource on eliminating fungus gnats covers prevention strategies that apply if you have any soil-based plants nearby that might be harboring adult gnats who then investigate your microgreen trays.
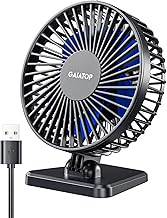
USB Mini Desk Fan (Adjustable 3-Speed, Quiet Motor)
A small fan running on low across your microgreen trays is the single most effective mold prevention tool. More reliable than any spray or treatment.
View on Amazon →Harvest, Rinse, and Storage
The harvest itself takes about three minutes for a full tray and is one of the most satisfying moments in any form of home food growing. Here is exactly how to do it and how to keep what you cut fresh for as long as possible.
How to Harvest
- Confirm the greens are ready: first true leaves just emerging, or full cotyledon stage, depending on your preference and variety.
- Do not water for at least 2–3 hours before harvest — slightly drier greens hold up better in storage.
- Hold a bundle of greens gently between your fingers and cut just above the mat surface with clean, sharp scissors or a small serrated harvest knife.
- Work across the tray in sections; do not attempt to cut it all in one pass if the scissors are not wide enough.
- Transfer cut greens to a colander and rinse thoroughly under cold water.
- Spin dry in a salad spinner or spread on a clean kitchen towel and pat gently.
Storage After Harvest
| Storage Method | Expected Freshness | Tips |
|---|---|---|
| Airtight container + paper towel lining, refrigerator | 5–7 days | The paper towel absorbs ethylene and moisture; replace if it becomes saturated |
| Produce bag (breathable), refrigerator | 3–5 days | Good for sunflower and pea shoots; they need slight airflow |
| Cut and left in tray, unrefrigerated | 2–4 hours | Only if consuming same day; wilts quickly once cut |
| Delayed harvest (leave in tray, stop watering) | Varies by variety | Some growers harvest progressively over 3 days; works better for slow varieties |
🌱 Harvest Alive When Possible
The freshest option of all: cut and eat in the same moment. Microgreens snipped directly onto a plate of eggs, into a sandwich, or over a bowl of soup deliver a different experience entirely from refrigerated greens. If your counter allows it, keep one tray in harvest-ready condition at all times and treat it like a living condiment dispenser.
Nutritional Value and How to Use Them
Microgreens have attracted genuine scientific interest because of the contrast between their small size and the density of bioactive compounds they contain. The cotyledon leaves concentrate the energy reserves of the seed into a compact, photosynthetically active package that is easier for the body to absorb than in the mature plant form.
Broccoli microgreens are among the most studied. They contain high levels of glucosinolates — precursors to sulforaphane, a compound with well-documented anti-inflammatory and chemoprotective properties — in far greater concentrations than mature broccoli. Radish microgreens are rich in anthocyanins, the same pigments responsible for the health benefits attributed to blueberries. Sunflower microgreens provide substantial levels of vitamin E and zinc.
But nutritional science aside, the real-world reason to grow microgreens is flavor. These are intensely concentrated versions of their parent plant’s taste — radish microgreens are more peppery than a whole radish, broccoli microgreens taste more like broccoli than most cooked broccoli does, and pea shoots deliver a fresh sweetness that no frozen pea ever matches.
Best Ways to Use Microgreens
Salad Base or Topper
Use as a full salad base (sunflower, pea) or as a finishing layer over dressed greens (radish, arugula, mustard).
Eggs and Breakfast Dishes
A small handful on scrambled eggs or avocado toast adds texture and flavor that no herb can quite replicate.
Sandwiches and Wraps
Replace lettuce with microgreens in sandwiches for more flavor and crunch from a thinner layer.
Hot Dishes (at the end)
Add to soups, ramen, or stir fries at serving — just enough residual heat to wilt slightly without cooking.
Blended / Juiced
Wheatgrass and sunflower microgreens blend or juice well. Add to green smoothies in small quantities.
Pizza and Flatbreads
Scatter arugula or basil microgreens over a hot pizza straight out of the oven for a restaurant-style finish.
If you enjoy growing food at home more broadly, pairing microgreens with a small indoor herb garden creates a complete countertop kitchen garden that covers both fresh greens and fresh aromatics year-round. Our overview of budget-friendly gardening ideas also includes microgreens as one of the highest-yield, lowest-cost starting points for anyone new to growing food. And if you are thinking about expanding to container vegetables, the easiest vegetables to grow in pots is a natural next step, with tips on soil, watering, and fertilizing that complement what you have already learned here. For those with outdoor space, growing tomatoes on a balcony is another excellent high-reward project.

True Leaf Market Microgreens Seed Variety Pack (10 Varieties)
Pre-selected variety pack including radish, broccoli, arugula, mustard, sunflower, and pea shoots. Untreated, non-GMO, specifically packaged for microgreen growing.
View on Amazon →Frequently Asked Questions
Can microgreens really grow without soil?
Yes. Microgreens are harvested so young that they rely almost entirely on the nutrients stored inside the seed itself. A moist, sterile growing medium — like a hemp mat, coco coir pad, or a shallow layer of water in a hydroponic tray — is all they need to germinate and push up their first true leaves. Soil adds nothing at this stage except mess and mold risk.
Which growing medium is best for soil-free microgreens?
Hemp fiber mats are the most popular choice for beginners because they are sterile, hold moisture evenly, and produce clean harvests with no substrate stuck to the roots. Coco coir pads are a close second. Burlap and jute mats work well for larger seeds. For a truly minimal setup, shallow water hydroponics works for fast growers like sunflower and pea shoots.
How much light do soil-free microgreens need?
Microgreens need 12–16 hours of bright light per day. A south-facing windowsill works if it gets direct sun for at least 4–6 hours, but a small LED grow light is more reliable and produces stockier, more flavorful greens. Keep the light 2–4 inches above the canopy and adjust upward as the plants grow.
How often do I water soil-free microgreens?
Bottom-watering once or twice a day keeps the mat moist without soaking the crowns of the seedlings, which reduces mold. Pour water into the bottom tray (not on top of the mat) until it is absorbed. During germination under a humidity dome, you may need to mist once daily. Once the dome is removed, check moisture every 12 hours.
Do I need to add nutrients or fertilizer?
For most microgreens, no. The seed cotyledons (first leaves) draw energy from the seed itself, so nutrients are rarely needed before harvest. If you are growing a slow variety like sunflower or beet that takes 14+ days and starts to yellow slightly, a very dilute liquid seaweed solution can help. Never use heavy fertilizers — they promote mold more than growth. If you do decide to fertilize later-stage plants, our guide on when and how to fertilize indoor plants covers the principles safely.
What seeds grow fastest as soil-free microgreens?
Radish, mustard, arugula, and broccoli are the speed champions, reaching harvest in 5–8 days. Sunflower, pea shoots, and wheatgrass take 10–14 days but produce large, meaty greens. Basil and amaranth are slower at 12–18 days but are worth the wait for flavor.
Why are my microgreens growing leggy and pale?
Leggy, pale microgreens are almost always a light problem. The seedlings are stretching toward the nearest light source because they are not getting enough intensity or hours. Move them closer to a window or lower your grow light to 2–4 inches above the canopy. Increase the photoperiod to 14–16 hours. Pale color without leggy growth usually signals the dome was left on too long after germination.
How do I prevent mold on soil-free microgreens?
Good airflow is the number-one mold preventer. Remove the humidity dome as soon as the seeds have germinated (usually day 2–3). Use bottom-watering only — never spray water directly on the leaves. Space seeds evenly so air can circulate between plants. If you see white fuzz at the base, it is almost always harmless root hairs, but if it smells musty, remove that section and increase airflow with a small fan.
Can I reuse the growing mat or tray?
The plastic or silicone trays can be rinsed with dilute hydrogen peroxide (3%) and reused many times. Growing mats (hemp, coco, jute) are single-use — after harvest, compost them along with the root mass. Reusing mats risks mold and cross-contamination from the previous crop’s residue.
When should I harvest microgreens?
Harvest when the first pair of true leaves just begins to unfurl, or at the cotyledon stage for fastest harvests. Use clean scissors and cut just above the mat surface. Rinse gently, spin dry, and store in a container lined with a dry paper towel in the refrigerator. Most varieties last 5–7 days after harvest.
Is it cheaper to grow microgreens at home than to buy them?
Yes, significantly. A 100g clamshell of microgreens at a supermarket often costs as much as a whole seed packet that produces 300–500g of greens across multiple trays. After the initial tray and mat investment (roughly $20–40 for a starter kit), ongoing costs drop to seeds and replacement mats only — usually $1–3 per harvest.
Do microgreens regrow after cutting?
Most microgreens do not regrow after a single cut. Unlike herbs, which have growth nodes above the soil, microgreens are harvested so close to their base that they cannot regenerate. Pea shoots are a partial exception — if you cut above the lowest leaf node, they may produce a small second flush, though it will be thinner than the first.
From Counter to Plate in Under Two Weeks
Growing microgreens without soil is one of the most genuinely accessible things you can do in a home kitchen. No outdoor space, no bulk bags of compost, no long wait. A tray, a mat, a light source, and a packet of seeds is a complete system — and two weeks later you have fresh, nutritious greens that cost a fraction of the supermarket equivalent.
Start with a single tray of radish or broccoli to get the feel for the timing and the watering rhythm. Add a second tray of sunflower or pea shoots once you are comfortable. Within a month, you will have a rolling production of fresh greens that feels like second nature.
Whether this is your first step into growing food at home or an addition to an existing indoor garden, microgreens reward the small amount of attention they ask for. The process is quick enough to remain exciting, and the results land directly on your plate — no storage, no preservatives, no air miles.
For more food-growing projects at any scale, explore our full collection at Gardening at Home — from windowsill herbs to container vegetables to balcony gardens.
Shop Microgreen Starter Kits on Amazon →