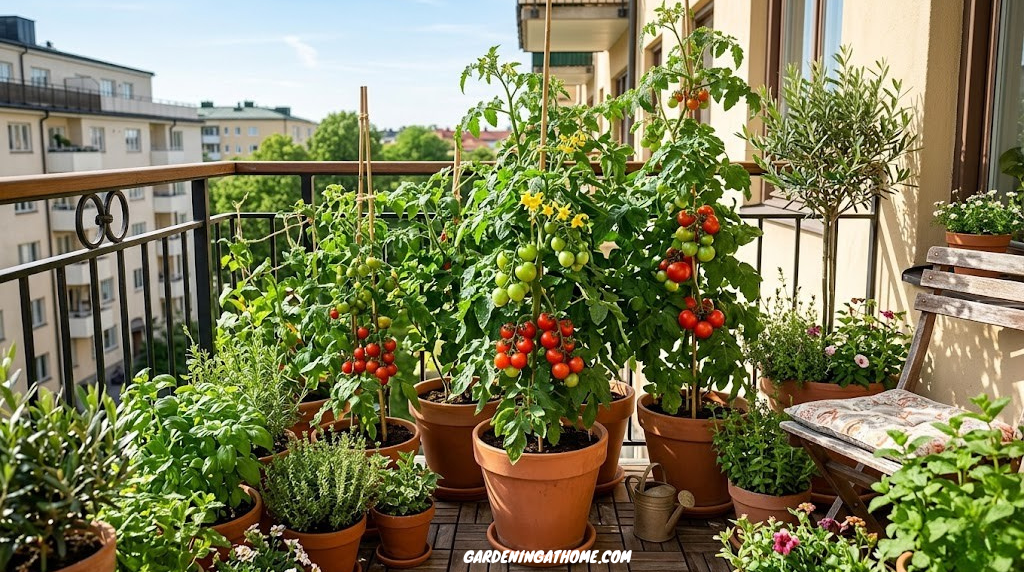
How to Grow Tomatoes on a Balcony: A Complete Step-by-Step Guide
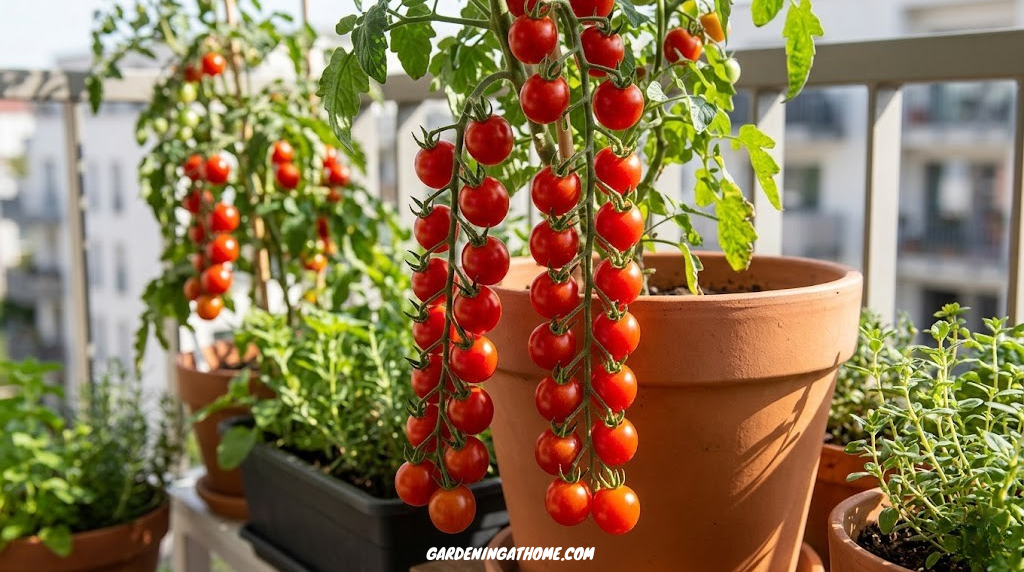
You don’t need an acre of land to grow your own tomatoes. A sunny balcony, a large container, and the right technique are all it takes — and the reward is fresh tomatoes that taste nothing like anything from a supermarket.
Can You Really Grow Tomatoes on a Balcony?
Absolutely — and with the right setup, your balcony tomatoes can outperform what many people manage in a full garden. Container growing eliminates weeds, gives you precise control over soil quality, and keeps plants at a comfortable working height.
The beauty of balcony tomato growing is that it removes almost every disadvantage that frustrates ground-garden beginners. There are no drainage issues from poor native soil, no root competition from nearby trees, and far fewer soil-borne diseases to contend with. You start fresh every season with exactly the growing medium your plants need.
That said, balcony growing introduces its own variables. Containers dry out faster than beds. High-rise balconies can be windier and hotter than ground level. And vertical space, while often plentiful, needs to be deliberately managed. Understanding these differences before you begin means you can design around them rather than react to them.
If you’re still in the early stages of getting your outdoor space set up, the broader guide to balcony gardening for apartment dwellers is a great starting point — it covers layout, weight limits, and the general principles that apply to all container crops, not just tomatoes.
Tomatoes are one of the most rewarding crops you can grow in a container because the yield-to-effort ratio is genuinely excellent. A well-chosen, well-tended plant in a 10-gallon pot can produce 10–20 lbs of fruit over a single season. That is real food, grown a few steps from your kitchen, with the flavor that only completely vine-ripened tomatoes can offer.
Success with balcony tomatoes depends on three non-negotiables: at least 6–8 hours of direct sun daily, a container large enough to sustain root growth, and consistent watering. Get those three right and almost everything else is adjustable.
Whether you’re a complete newcomer or you’ve tried and failed with tomatoes before, this guide walks through every step of the process with the kind of specific, actionable detail that makes the difference between a productive plant and a scraggly one. Tomatoes are forgiving when you understand what they need — and surprisingly unforgiving when you don’t.
Choosing the Right Tomato Variety for a Balcony
Variety selection is arguably the single most important decision you’ll make. The wrong variety doesn’t mean failure — you can grow any tomato in a container with a large enough pot — but the right variety makes everything measurably easier.
Tomatoes are broadly divided into two growth habits. Determinate (also called “bush”) types grow to a fixed height, set their fruit over a concentrated period, and stop. They’re naturally compact, making them ideal for containers and balconies with limited vertical space. Indeterminate types keep growing and producing continuously until frost — they’re vigorous and prolific but need serious support and larger containers.
| Variety | Type | Fruit Size | Container Size | Ideal For |
|---|---|---|---|---|
| Tumbling Tom | Determinate / Trailing | Cherry (1–2 oz) | 5–7 gal | Hanging baskets, small balconies |
| Patio | Determinate | Small-medium (3–4 oz) | 5–7 gal | Compact spaces, beginners |
| Balcony Star | Determinate | Cherry-medium | 7–10 gal | Named for balcony use, heavy yields |
| Tiny Tim | Dwarf determinate | Tiny cherry | 3–5 gal | Windowsills, small pots |
| Bush Early Girl | Determinate | Medium (5–7 oz) | 10 gal | Slicing tomatoes, early harvest |
| Sweet 100 | Indeterminate | Cherry | 15+ gal | Extended season, max flavor |
| Celebrity | Determinate | Medium-large | 10–15 gal | Disease resistance, good yields |
| Sun Gold | Indeterminate | Cherry (gold) | 15 gal | Exceptional sweetness, heavy yields |
For most apartment balconies where space is genuinely limited, cherry and small-fruited determinate types are the practical choice. They require less root volume, tolerate slightly more crowding, and produce prolifically relative to their size. If you want slicing tomatoes, Bush Early Girl or Celebrity in 10–15 gallon containers deliver excellent results.
Determinate Varieties — Pros
- Compact and self-limiting in size
- Easier to manage in small containers
- Less staking required
- Concentrated fruit set (great for preserving)
- Better wind resistance
Determinate Varieties — Cons
- All fruit ripens over a shorter window
- Season ends earlier than indeterminate types
- Smaller total harvest over a full season
When in doubt, start with Tumbling Tom or Balcony Star — both are bred specifically for container growing and give consistent results even with imperfect technique. As you get more comfortable with your balcony’s microclimate, you can experiment with the larger indeterminate types that reward the extra attention.

Tomato Container Starter Kit
Everything you need to get balcony-grown tomatoes off to the strongest possible start — from germination to transplant.
Shop on AmazonStep 1: Assess Your Balcony’s Sunlight
Before you buy a single pot or seed packet, spend a few days observing your balcony at different times. Tomatoes are sun-hungry plants — they need a minimum of 6 hours of direct, unobstructed sunlight to produce a worthwhile harvest, and 8 hours is significantly better. Track when direct sun hits your balcony floor, where it reaches mid-morning, and when it retreats behind the building above.
South-facing balconies in the northern hemisphere are the gold standard — they receive sun throughout the day. East-facing balconies get good morning sun but miss the stronger afternoon light. West-facing ones are the opposite, which actually suits tomatoes reasonably well since afternoon sun in summer is intense. North-facing balconies are genuinely challenging for tomatoes; cherry varieties in the sunniest corner are your best bet.
If your balcony gets fewer than 6 hours, you have options. Light-colored walls and flooring reflect sunlight onto your plants. Understanding the difference between full sun and partial shade helps you set realistic expectations for each variety. Reflective Mylar sheeting positioned at the back wall can meaningfully boost light levels in a shadowed corner.
Also consider wind exposure. High-rise balconies can experience wind speeds several times stronger than at street level. Wind causes rapid moisture loss from both soil and leaves, can physically damage plants, and seriously disrupts pollination. A simple windbreak — a trellis with fabric, a row of dense herbs, or a clear polycarbonate panel — can transform an otherwise difficult high-rise spot.
South and west-facing balconies in hot climates can accumulate intense radiant heat from walls and flooring. Containers sitting directly on a dark concrete floor can reach temperatures that damage roots. Place a layer of saucers or wooden pallets under containers to create an insulating air gap.
Step 2: Choose the Right Container
The container is your tomato plant’s entire world. Get this right and every subsequent challenge becomes more manageable. Container size directly determines root volume, which in turn determines plant size, fruit production, and how quickly the soil dries out. Going too small is one of the most consistent mistakes container tomato growers make.
For a deeper look at how container sizing affects all potted plants, the guide on how to choose the right pot size covers the underlying principles across species.
Material matters too. Here’s how common container materials compare for balcony tomato growing:
| Material | Weight (Empty) | Moisture Retention | Durability | Verdict |
|---|---|---|---|---|
| Fabric grow bags | Very light | Low–Medium (air prunes) | 2–4 seasons | ✓ Best for balconies |
| Plastic (thick) | Light | High | 5–10 years | ✓ Good value |
| Terracotta | Heavy | Low (porous) | Long if not frozen | ⚠️ Check weight limits |
| Glazed ceramic | Very heavy | High | Very long | ✗ Weight concern on balconies |
| Lightweight resin | Light | High | 3–7 years | ✓ Good compromise |
| Self-watering planter | Medium | Very high | 5+ years | ✓✓ Excellent for holidays |
Always check your balcony’s load rating before placing multiple large containers — a filled 15-gallon pot with soil weighs around 50–60 lbs. Spread containers along the outer edge of the balcony slab (where structural support is strongest) rather than placing them all in the center.
Every container must have adequate drainage holes. Tomatoes grown in waterlogged soil develop root rot quickly. If you’re using decorative pots without drainage holes, use a lightweight inner nursery pot with holes that sits inside the decorative outer pot, and never let the decorative pot collect standing water.

Heavy-Duty Fabric Grow Bags (10–15 Gallon)
Fabric grow bags are the top choice for balcony tomatoes — lightweight, breathable, and they naturally air-prune roots to prevent circling.
Shop on AmazonStep 3: Select the Best Potting Mix for Balcony Tomatoes
Garden soil from the ground is never suitable for containers. It compacts into a brick-hard mass in a pot, suffocates roots, drains poorly, and carries soil-borne pathogens. The only right starting point for container tomatoes is a purpose-made premium potting mix.
Understanding how to build and maintain good soil structure is covered in depth in the guide to choosing the best potting soil mix, and the same principles apply here. For tomatoes specifically, look for a mix that offers the following:
You have two practical routes: buy a high-quality pre-blended potting mix formulated for vegetables (look for ones that list perlite and compost on the label) or blend your own. If you buy a basic potting mix, you’ll almost always want to amend it with additional perlite — roughly 20% by volume — to improve drainage and prevent compaction over the season as the organic matter breaks down.
- Free-draining: Water should run through within 10 seconds of adding it, not pool on the surface
- Nutrient-retaining: Compost and coir hold nutrients between feeding sessions
- Lightweight: Perlite and vermiculite keep containers manageable on balconies with weight limits
- pH 6.0–6.8: Slightly acidic — tomatoes become chlorotic (yellowing leaves) in alkaline mixes
- Calcium-inclusive: Critical for preventing blossom end rot — add crushed oyster shell or lime if your mix doesn’t include it
Refresh your potting mix every season. Used mix compacts, loses nutrients, and can harbor disease spores. Remove and compost old mix (avoid reusing soil that had diseased plants), and refill with fresh mix amended with compost. This yearly practice alone eliminates most of the root health problems that plague experienced container growers.

Premium Vegetable Container Potting Mix
A ready-to-use mix formulated specifically for fruiting vegetables in containers — pre-amended with perlite, compost, and slow-release nutrients.
Shop on AmazonStep 4: Plant Your Tomato Seedlings Correctly
Timing is everything. Tomatoes are warm-season crops and will not merely underperform but can die if exposed to frost or temperatures that consistently dip below 50°F (10°C). If you’re starting from seed, sow indoors 6–8 weeks before your last expected frost date. For transplants purchased from a garden center, wait until nighttime temperatures are reliably above 50°F and all frost risk has passed.
One of the most powerful techniques in tomato planting is deep planting. Tomatoes are unique among vegetables in that they can form roots along their buried stems. Planting a seedling deep — up to two-thirds of the stem buried — results in a far more extensive root system, better nutrient uptake, and more drought resistance. Remove all leaves below the soil line before planting.
Hardening Off: The Step Most People Skip
If you’ve started seeds indoors or purchased greenhouse-grown transplants, they need a week to ten days to acclimatize to outdoor conditions before permanent placement. This process — called hardening off — prevents transplant shock that can set plants back by weeks.
Start by placing seedlings in a sheltered outdoor spot for just an hour on the first day, then gradually increase outdoor time over seven to ten days. Begin in a spot that’s shaded from direct midday sun and sheltered from wind, then progressively expose plants to more sun and air movement. By the end of the hardening period, plants should be able to tolerate a full day outdoors without wilting or leaf scorch.
Water the seedling thoroughly before transplanting. Choose a cloudy day or late afternoon to minimize stress. Bury two-thirds of the stem. Firm soil gently to remove air pockets. Water in with a dilute liquid fertilizer solution. Provide initial shade if temperatures exceed 85°F (30°C) on the first few days after transplanting.
Once planted, fill the container to within an inch of the rim — this makes watering easier and prevents soil wash-out. Placing a layer of mulch (straw, wood chips, or even shredded newspaper) over the soil surface significantly reduces evaporation between waterings and keeps root temperatures stable.
If you’re just getting started with growing edibles outdoors, the guide to starting a garden from scratch puts this step in the broader context of building your first productive growing space.
Step 5: Master the Watering Routine
Watering is where more balcony tomato crops fail than at any other point. Containers lose moisture many times faster than garden beds — a 10-gallon pot in full summer sun can go from adequately moist to bone dry in under 24 hours on a hot day. The goal is to keep the root zone consistently moist, never completely dry and never waterlogged.
Inconsistent watering is the single most common cause of two devastating problems: blossom end rot (a black, sunken patch at the fruit’s base, caused by calcium deficiency triggered by moisture fluctuations) and fruit cracking (when the skin can’t expand fast enough after a heavy watering following a dry period). Both are almost entirely preventable with a disciplined watering routine.
How to Water Properly
Water deeply and thoroughly each time rather than with quick, shallow additions. Apply water slowly until it flows freely from the drainage holes — this ensures the entire root ball gets moistened, not just the top layer. Shallow watering encourages surface-level roots that dry out even faster, compounding the problem.
The best time to water is early morning. This gives foliage that gets splashed time to dry before the heat of the day (reducing disease risk) and ensures the root zone starts the hottest part of the day with adequate moisture. Avoid watering in full midday sun if possible — the water evaporates before it can soak in effectively.
For an in-depth guide to reading your plant’s signals, the guide to spotting the signs of overwatering vs. underwatering is invaluable for understanding what your tomato plants are actually communicating.
A 2-inch layer of straw mulch on top of the potting mix reduces evaporation by up to 70% on a hot day. It also moderates soil temperature swings — keeping roots cooler in summer heat. Refresh the mulch layer when it compresses down below 1 inch.
Self-Watering Planters and Drip Systems
If you travel regularly or find daily watering challenging to maintain, self-watering planters with integrated reservoirs are worth the investment. They maintain consistent soil moisture through capillary action, dramatically reducing blossom end rot and the consequences of forgotten watering days. Simple gravity-fed drip systems connected to a tap timer are another practical solution for anyone away from their balcony for extended periods.
Step 6: Feed Your Tomatoes for Maximum Yield
Container-grown tomatoes are heavy feeders, and unlike garden beds where nutrients continuously release from the broader soil ecosystem, a container relies entirely on what you add. The nutrients that come with a fresh potting mix typically last four to six weeks. After that, your plants are dependent on your fertilizing program.
Understanding when and how to fertilize is a science worth learning properly — the guide to fertilizing container plants explains the nutrient cycle in detail, even if it focuses on houseplants. The principles of timing, dilution, and seasonal adjustment transfer directly to balcony tomatoes.
The Two-Phase Feeding Strategy
The most effective approach follows the plant’s changing needs across the season:
Phase 1 — Vegetative growth (from planting to first flower buds): During this phase, tomatoes need a balanced feed with higher nitrogen content to support rapid leafy growth and a strong root system. A granular slow-release fertilizer worked into the mix at planting, supplemented with a weekly liquid balanced fertilizer (something close to 10-10-10 or similar), keeps plants growing vigorously without excess.
Phase 2 — Flowering and fruiting (from first flower buds through harvest): This is where many growers go wrong. Continuing to apply nitrogen-heavy fertilizer after flowers appear promotes lush leafy growth at the expense of fruit. Switch to a high-potassium, low-nitrogen tomato-specific feed (often marketed as “tomato feed” or described as a high-K formula). The potassium and phosphorus support flower development, fruit set, and flavor development. Apply weekly as a liquid feed.
Excess fertilizer, especially nitrogen, causes plants to produce abundant lush foliage with few flowers and poor fruit set. Yellow or brown leaf edges can indicate fertilizer burn from salts building up in the container. If you suspect salt buildup, water heavily and repeatedly to flush the container, then resume feeding at half-strength.
Organic options like fish emulsion, seaweed extract, worm castings tea, and compost teas are excellent for container tomatoes. They feed the soil microbiology along with the plant, release more slowly than synthetic fertilizers, and are very forgiving of slight overapplication.

High-Potassium Liquid Tomato Fertilizer
The right feed for fruiting-stage tomatoes. Encourages heavy flower and fruit set rather than excessive leaf growth.
Shop on AmazonStep 7: Stake and Prune for Better Yields
Left unsupported, a heavy-fruiting tomato plant will eventually collapse under its own weight, snapping branches and leaving fruit on the ground. Getting support structures in place early — before plants need them — is far easier than wrestling a large plant into a cage after the fact.
Understanding Suckers — and When to Remove Them
A sucker is the new shoot that emerges in the axil between the main stem and a leaf stem — forming a distinctive V shape. Left to grow, each sucker becomes a full secondary stem, producing its own leaves, flowers, and fruit, but dramatically increasing the overall mass of the plant and placing enormous demand on the root system.
For indeterminate varieties, most experienced growers remove suckers below the second fruit cluster to channel energy into the primary stem and existing fruit. This is called single-stem or cordon training. It produces fewer but larger, better-quality tomatoes and keeps the plant manageable in a container.
For determinate varieties, the plant naturally limits its own branching. Aggressive sucker removal is less beneficial and can actually reduce yield for these types — a light touch, removing only the largest suckers low on the plant, is usually the right approach.
Pinch small suckers off with fingers when they’re under an inch long — this is the cleanest removal. Use clean, sharp scissors or pruning shears for larger ones to avoid tearing. Prune in the morning so wounds dry quickly in the day’s warmth, reducing infection risk. Never remove more than 30% of a plant’s foliage at one time.
Ensure your bamboo stake or metal stake is inserted at least 8–10 inches into the potting mix and as close to the center of the container as possible without damaging major roots. Use soft garden twine or purpose-made plant clips to attach the main stem to the support every 6–8 inches as the plant grows, keeping loops loose enough to not girdle the stem.
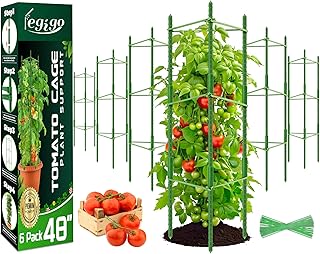
Tomato Cages + Bamboo Stakes Combo
Sturdy support for every growth style — heavy-gauge cages for bushy determinate varieties and robust bamboo stakes for cordon-trained indeterminate plants.
Shop on AmazonStep 8: Help Pollination Along
Tomatoes are self-fertile — each flower contains both male and female parts — but they still require physical vibration to release pollen effectively. In a garden, this vibration is provided by bees and wind. On a balcony, particularly a well-sheltered one, neither may be reliably present during the flowering period.
The practical fix is straightforward: once a day during the flowering period, gently tap or vibrate the flower clusters. You can tap the main stem or individual trusses with a finger, use a soft artist’s paintbrush to transfer pollen between flowers, or hold a running electric toothbrush against the stem near the flowers to simulate the buzz of a bumblebee. This simple 30-second daily task is often the difference between a plant full of fruit and one that drops every flower.
Flowers that drop without setting fruit are one of the most frustrating experiences in tomato growing. Besides lack of vibration, drop is also caused by temperature extremes. Pollen becomes non-viable when temperatures exceed 95°F (35°C) during the day or drop below 55°F (13°C) at night. If your balcony regularly hits these extremes, moving containers to a slightly more sheltered position during the most intense heat, or bringing plants indoors on cold nights early in the season, can protect the flowering window.
Also ensure your balcony tomatoes have some air movement. A completely wind-blocked location, while protective in one sense, eliminates the natural vibration that aids pollination. A gentle breeze — or a small oscillating fan — is genuinely beneficial during flowering.
Common Pests and Problems on Balcony Tomatoes
Container-grown balcony tomatoes generally have fewer pest and disease problems than ground-grown plants. The elevated environment makes them less accessible to soil-dwelling pests and makes physical inspection easy. Still, a handful of issues appear reliably enough to be worth knowing.
| Problem | Symptoms | Cause | Solution |
|---|---|---|---|
| Blossom end rot | Black, sunken patch on fruit base | Calcium deficiency from irregular watering | Consistent watering; calcium foliar spray |
| Leaf roll | Leaves curl inward lengthwise | Stress response (heat, overwatering) | Usually self-resolves; improve watering consistency |
| Aphids | Tiny green/black clusters on new growth | Insect infestation | Strong water jet; neem oil spray; insecticidal soap |
| Fungus gnats | Tiny flies around soil; seedling wilt | Overwatering, wet soil surface | Let surface dry; see guide on eliminating fungus gnats naturally |
| Early blight | Dark spots with yellow rings on lower leaves | Alternaria fungus (favors warm, wet conditions) | Remove affected leaves; improve airflow; copper fungicide |
| Whitefly | White cloud of tiny flies when disturbed | Whitefly infestation; worse in sheltered spots | Yellow sticky traps; neem oil; insecticidal soap |
| Fruit cracking | Radial or concentric cracks in fruit | Irregular watering; sudden heavy rain after drought | Consistent moisture; mulch; harvest at first color break |
| Yellow lower leaves | Lower leaves yellow and drop | Natural (often) / magnesium deficiency | If widespread: Epsom salt foliar spray (1 tsp/liter) |
The most important pest-prevention step is simple: inspect your plants daily. A five-second visual scan while you water is enough to catch infestations when they’re small enough to treat easily. Aphid colonies can double in population every 1–2 days, so catching them on the first day makes a world of difference compared to discovering them after a week.
Basil planted alongside balcony tomatoes is claimed to repel aphids and whitefly while improving flavor — and it’s at minimum an extremely useful herb to have within arm’s reach of the kitchen. Marigolds at the base of containers deter thrips and other common pests. They also look excellent against the terracotta aesthetic of a well-appointed balcony.
For beginners setting up their first outdoor container growing space, the guide to essential gardening tools covers what you actually need on hand (including sprayers and pruning tools) versus what’s marketing noise.

Organic Neem Oil Pest Control Spray
Safe, effective, and broad-spectrum — neem oil handles aphids, whitefly, and early fungal issues without harsh chemicals. Essential for any balcony tomato grower.
Shop on AmazonStep 9: Knowing When and How to Harvest
Harvesting tomatoes at precisely the right moment is what separates a genuinely excellent fruit from a technically adequate one. Timing varies by variety and use, but the general principle is: don’t wait for full color at the vine. Tomatoes continue to ripen after harvest, and leaving them on the plant too long after they reach full size exposes them to splitting, pest damage, and sunscald.
The “Breaker” Rule
Once a tomato reaches the “breaker” stage — the moment when any amount of pink, yellow, or orange color appears — the plant has stopped controlling its own ripening. From this point, the fruit will ripen just as well on a countertop at room temperature as it will on the vine. This insight frees you to harvest earlier, protect fruit from splitting and pest damage, and bring the harvest inside during unexpected temperature dips or storms.
To harvest, hold the fruit in one hand and twist it away from the vine with a slight rotating motion, or use clean scissors or snips to cut through the stem just above the calyx (the little green star at the top). Avoid pulling straight down, which can snap branches. Pick regularly — the act of removing ripe fruit signals the plant to continue producing. A plant with fruit left to over-ripen on the vine shifts energy toward seed production rather than new flower and fruit development.
Refrigerating tomatoes breaks down the cell structure that creates their characteristic texture and destroys volatile flavor compounds. Store at room temperature, out of direct sun, and eat within a few days of harvest. The only exception is an already-cut tomato that needs to be stored for next-day use.
For cherry tomato varieties, harvest daily or every other day during peak season. The window between perfect ripeness and over-ripeness is short, and birds will happily compete with you for the crop if you leave the fruit too long. For larger slicing types, every two to three days is usually sufficient — check by color and slight softness when gently pressed.
If you’ve enjoyed growing tomatoes and want to expand your edible balcony garden, there are many other vegetables that thrive in exactly the same conditions. The guide to easiest vegetables to grow in pots is the natural next step, and many of those crops can be interplanted with your tomatoes to make the most of your available container space.

Precision Garden Snips for Harvesting
Sharp, lightweight snips make harvesting faster and cleaner — essential for cherry tomato harvests where you’re picking dozens of fruits at a time.
Shop on AmazonExtending Your Balcony Tomato Season
One of the significant advantages of container growing is the ability to move plants. When outdoor temperatures begin to dip at the end of the season, you can extend your harvest by several weeks simply by bringing containers indoors on cold nights and moving them back out on warm days.
Fabric row cover (horticultural fleece) draped over plants on cool nights provides several degrees of frost protection without blocking daytime light. This technique is especially valuable for extending the fruiting window of indeterminate varieties that are still producing heavily when the first cold snaps arrive.
At the end of the season, if you have green tomatoes still on the plant that have reached full size but haven’t colored yet, harvest the entire plant’s unripe fruit before the first frost. Wrap them individually in newspaper and store in a cool (but not cold — around 55–65°F) dark space. They will ripen slowly over the following two to four weeks. This is not merely an emergency measure — the flavor of tomatoes ripened off the vine in cool conditions can be surprisingly good.
If you’ve developed a real passion for container food growing after this first season with tomatoes, exploring starting an indoor herb garden lets you continue growing through the winter months, or branching into growing microgreens without soil offers a fast-growing, year-round harvest that requires minimal space.
Start seeds early indoors, harden off carefully, bring containers in on frost nights, use fleece for shoulder-season protection, and ripen late-season fruit indoors. With all four techniques, a balcony tomato season can realistically run 50% longer than a traditional outdoor growing season in most temperate climates.
For those interested in going further with cheap, creative approaches to container gardening, the cheap gardening ideas for beginners article is full of resourceful solutions that work especially well in balcony settings where space and budget are both at a premium.
Growing Balcony Tomatoes from Seed vs. Buying Transplants
Both approaches work well, and the right choice depends on your circumstances, schedule, and whether variety selection matters to you.
Starting from Seed — Advantages
- Access to hundreds of varieties beyond what nurseries stock
- Significantly cheaper per plant
- Satisfaction of growing from the very beginning
- Can start earlier than transplants arrive in stores
- Healthier starts without root disturbance of mature transplants
Starting from Seed — Challenges
- Requires indoor lighting setup for 6–8 weeks
- Damping off disease can kill seedlings in humidity
- More hands-on time and attention required
- Hardening off is a mandatory extra step
If you’re new to growing and want the highest probability of success on your first attempt, purchasing a named balcony variety from a nursery as a transplant is the pragmatic choice. You skip the most technically demanding phase of growing — germination and seedling management — and start with a proven plant that is already through its most vulnerable period.
For those curious about expanding into full seed-starting operations, the fundamentals of growing in confined spaces are covered extensively in the start a garden from scratch guide, which walks through building a growing system suited to your exact circumstances.
Frequently Asked Questions
Can you grow tomatoes on a balcony?
What is the best tomato variety for balconies?
How big a pot do I need to grow tomatoes on a balcony?
How often should you water balcony tomatoes?
What fertilizer is best for container tomatoes?
Do balcony tomatoes need staking?
Why are my balcony tomatoes not setting fruit?
Can tomatoes survive on a north-facing balcony?
When should I start tomato seeds for balcony growing?
How do I prevent blossom end rot in container tomatoes?
Your Balcony Can Feed You — Start This Season
Growing tomatoes on a balcony is one of the most satisfying things you can do with a small outdoor space. The gap between a supermarket tomato and one you’ve grown yourself, harvested at the perfect moment, and carried ten steps to your kitchen — that gap is enormous. And it’s now within reach regardless of whether you have a garden.
The framework is simple: choose a variety bred for containers, give it the largest pot you can manage, feed it well, water it consistently, help it pollinate, and harvest promptly. Everything else is refinement and enjoyment.
As your confidence grows, the balcony garden expands naturally. Herbs alongside your tomatoes. Peppers in the same containers. A second season with a new variety. If you want a bigger picture view of what’s possible in a small outdoor space, the balcony gardening ideas for apartments guide will show you exactly where tomatoes fit within a broader productive growing setup.
The best time to start was a few weeks ago. The second best time is right now — with a good pot, the right variety, and this guide bookmarked for reference throughout the season.
Explore More Gardening Guides →