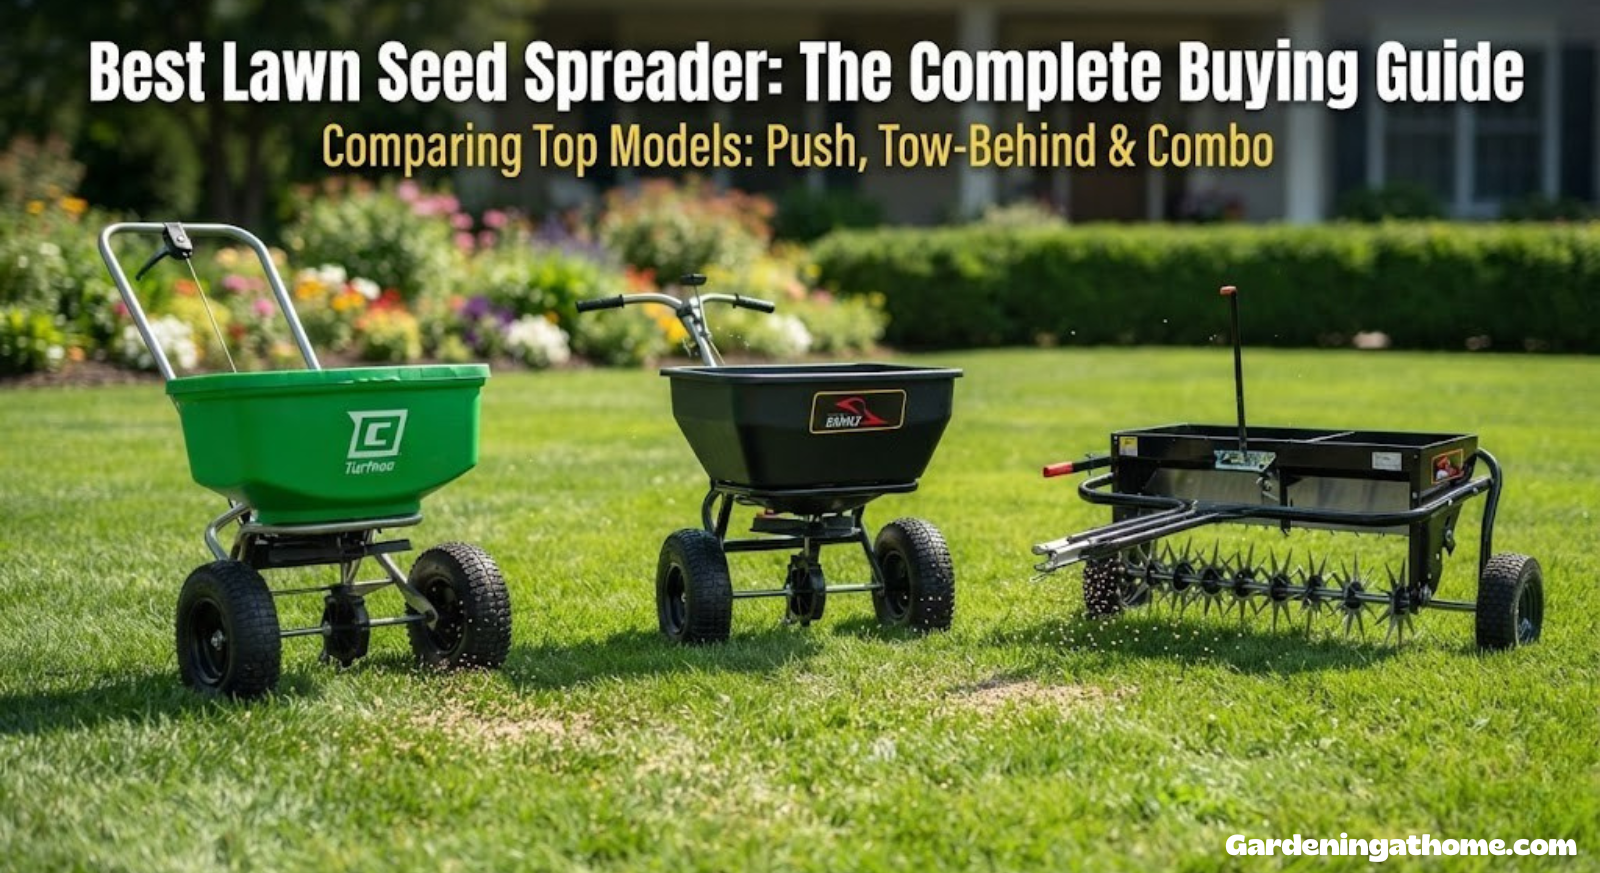
Best Lawn Seed Spreader: The Complete Buying Guide
Tow-behind, push, broadcast, and electric spreaders compared side by side — so you can put down seed and fertilizer evenly, without the streaky lawn regret.

Why the Right Spreader Matters More Than the Right Seed
You can buy the best grass seed on the market, the most expensive slow-release fertilizer, and the priciest lime blend — and still end up with a striped, patchy lawn if the spreader doing the work is wrong for your yard. A spreader isn’t just a bucket with wheels. It’s a precision tool that determines whether product lands evenly across every square foot of soil or piles up in clumps that burn the grass in one spot and leave bare patches ten feet away.
Most homeowners don’t think much about their spreader until something goes wrong: a fertilizer streak that scorches a stripe across the front yard, seed that never germinated because it blew into the flower bed, or a broadcast spreader that jams every third pass because the hopper wasn’t built for pelletized lime. These aren’t seed problems or fertilizer problems. They’re spreader problems, and they’re almost always fixable by matching the right type of spreader to your yard size, terrain, and the materials you plan to run through it.
This guide breaks down every major spreader category — tow-behind, push, broadcast, and electric — with real product picks, pros and cons, and the calibration knowledge most articles skip entirely. If you’re overseeding a thin lawn, laying down starter fertilizer, or building a full lawn care rotation, you’ll find a spreader here suited to the job.
There’s also a cost dimension people tend to overlook. Seed and fertilizer aren’t cheap, and an uncalibrated or poorly built spreader wastes both — either by dumping too much product in a small area (which you then have to buy more of to cover the rest of the yard) or by clogging mid-pass and forcing you to rebuy bags because half of what you purchased never made it onto the grass. Over a few seasons, the money lost to product waste from a bad spreader often exceeds the price difference between a budget model and a mid-tier one that actually performs consistently.
There’s also the time factor. A spreader that jams, clogs, or requires constant fiddling with the gate setting turns what should be a twenty-minute job into an hour of frustration. That’s especially true for tow-behind and push broadcast units carrying pelletized lime or coarse fertilizer, where a poorly designed agitator lets material bridge and stop flowing entirely. The models we’ve selected below were chosen specifically because they hold up to repeated use without needing constant troubleshooting.
Beyond the mechanical considerations, there’s an art to matching your spreader to the specific grass type you’re growing. Cool-season grasses like Kentucky bluegrass, perennial ryegrass, and fine fescue have different seeding rate requirements and germination windows than warm-season varieties such as Bermuda grass, Zoysia, centipede grass, and St. Augustine. A spreader that works perfectly for overseeding a fescue lawn in October might need entirely different calibration settings for spreading Bermuda seed in late spring. Understanding these grass-specific nuances transforms a spreader from a simple tool into a precision instrument that delivers exactly what your particular lawn needs, when it needs it. Kentucky bluegrass seed, for example, is notoriously fine and lightweight — a characteristic that makes it prone to drifting in even a mild breeze if your spreader’s drop height and pattern width aren’t adjusted properly. Perennial ryegrass germinates quickly and establishes fast, but its larger seed size means it flows through a hopper gate differently than the almost dust-like seeds of some warm-season grasses. These distinctions matter more than most guides acknowledge, and we’ll address them in detail throughout the sections ahead.
Types of Lawn Spreaders Explained
Before comparing individual models, it helps to understand the four broad categories these products fall into. Each one solves a different problem, and picking the wrong category is the single biggest reason people end up frustrated with a spreader that “just doesn’t work right.”
Broadcast (Rotary) Spreaders
Broadcast spreaders — sometimes called rotary spreaders — use a spinning disc to fling material outward in a wide fan pattern, typically covering 6 to 12 feet per pass depending on the model and setting. They’re fast, which makes them the go-to choice for larger lawns, but the wide throw pattern means less precision near flower beds, sidewalks, and driveways. If you want detailed instructions on getting the pattern even, our guide on how to use a broadcast spreader walks through the full process step by step.
The physics behind a broadcast spreader’s distribution pattern is worth understanding because it directly affects how you walk your lawn. The spinning disc creates a fan-shaped throw that’s heaviest directly behind the spreader and tapers off toward the edges of the pattern. This means the effective coverage width — the zone where product density is consistent enough for even results — is usually narrower than the maximum visible throw. A spreader rated for a 10-foot spread width might only deliver truly even coverage across 7 or 8 feet, with the outer edges receiving a lighter dose. Professional operators account for this by overlapping passes by roughly 20 to 30 percent of the effective width, not the maximum width, which is a nuance many homeowners miss when they first switch from a drop spreader to a broadcast model.
Drop Spreaders
Drop spreaders release material straight down through a row of holes along the bottom of the hopper, dropping it in a tight, controlled band roughly as wide as the spreader itself. There’s no flinging, no overspray, and no risk of seed or fertilizer landing where it shouldn’t. That precision comes at the cost of speed — covering the same lawn takes more passes than a broadcast model, and any overlap or gap shows up as a visible stripe.
Drop spreaders excel in situations where the lawn is surrounded by sensitive landscaping that can’t tolerate any fertilizer or herbicide drift. Flower beds with delicate perennials, vegetable gardens where chemical contamination is a concern, and ponds or water features where nutrient runoff can trigger algae blooms all benefit from the surgical precision of a drop spreader. The tradeoff is that drop spreaders demand more concentration from the operator — each pass must align perfectly with the previous one, and wheel tracks can compress soil or flatten grass in ways that become visible if you’re not varying your route between applications.
Push Spreaders
Push spreaders are walk-behind units, either broadcast or drop style, powered entirely by you pushing the handle. They’re the most common residential spreader because they’re affordable, easy to store, and give you full control over pace and direction. Most push spreaders in this guide use a broadcast mechanism for faster coverage.
Tow-Behind Spreaders
Tow-behind spreaders hitch to a riding mower, lawn tractor, or ATV, letting you cover large properties — often an acre or more — in a fraction of the time a push spreader would take. They typically hold significantly more material, so you’re refilling less often, but they need a tow vehicle and more storage space.
Handheld and Belly-Grip Spreaders
Though none of our featured picks fall into this category, it’s worth mentioning for completeness. Handheld spreaders are small, crank-operated units meant for spot treatments — patching a few bare spots, edging along a fence line, or reaching tight areas a push spreader can’t maneuver into. They’re not a replacement for a full-size spreader on an entire lawn, but they’re a useful supplement for touch-up work.
Choosing Between Broadcast and Drop for Your Yard
The broadcast-versus-drop decision usually comes down to how much delicate landscaping surrounds your lawn. If your yard is fairly open with grass running right up to a driveway or a simple lawn edge, a broadcast spreader’s wider throw isn’t a problem — any overspray lands on pavement you can just sweep off. But if your lawn is threaded with flower beds, vegetable gardens, ornamental shrubs, or a pond, a drop spreader’s tight, predictable band keeps fertilizer and seed exactly where you want it and nowhere else. Many experienced lawn owners actually keep both: a broadcast unit for the bulk of the yard and a smaller drop spreader for the fussy edges near beds.
Spreading by Grass Type: Cool-Season and Warm-Season Considerations
One of the most overlooked aspects of spreader selection and calibration is the specific grass type you’re working with. Grass seed isn’t a one-size-fits-all product — the physical characteristics of different grass seeds vary dramatically, and those variations directly affect how they flow through a spreader, what rate they should be applied at, and what time of year makes sense for spreading.
Cool-Season Grasses: Kentucky Bluegrass, Perennial Ryegrass, Fine Fescue, Tall Fescue
Cool-season grasses dominate lawns in the northern half of the United States, the Pacific Northwest, and higher-elevation regions throughout the country. These grasses grow most actively during spring and fall when soil temperatures range between 50 and 65 degrees Fahrenheit, and they typically enter a semi-dormant state during the hottest summer weeks. Understanding their growth cycle matters for spreading because the ideal seeding window aligns with their natural growth surge — late summer to early fall for most regions, with a secondary window in early spring for overseeding thin areas that didn’t fill in during the previous fall.
Kentucky Bluegrass presents a unique challenge for spreaders because its seed is extraordinarily fine and lightweight — roughly 1.5 million seeds per pound, compared to around 250,000 seeds per pound for perennial ryegrass. This means a bag of Kentucky bluegrass seed contains vastly more individual seeds than the same weight of ryegrass seed, and the tiny, almost dust-like particles drift easily in wind and tend to bridge or clump in humid conditions. When spreading Kentucky bluegrass, a drop spreader or a broadcast spreader with a very low gate setting and a wind-free day are essentially non-negotiable. The seed is also slow to germinate — typically 14 to 28 days — which means soil contact and consistent moisture during that extended window are critical. A spreader that deposits seed unevenly will produce a visibly patchy lawn that takes months to fill in, if it ever does.
Perennial Ryegrass is at the opposite end of the cool-season spectrum in terms of seed size and handling characteristics. Its larger, heavier seeds flow through spreader gates easily and resist drifting, making it one of the most forgiving grass types to spread. Perennial ryegrass germinates in as little as 5 to 10 days under ideal conditions, which means any spreading errors show up quickly — but also means corrective overseeding can happen in the same season if needed. The fast germination makes ryegrass a popular choice for overseeding dormant warm-season lawns in the South for winter color, a practice that requires precise spreader calibration because the ryegrass is being seeded into an existing turf that will compete with it once temperatures warm back up.
Fine Fescue encompasses several subspecies including creeping red fescue, chewings fescue, hard fescue, and sheep fescue. These are shade-tolerant, low-maintenance grasses with seed sizes that fall between Kentucky bluegrass and perennial ryegrass. Fine fescues are often included in shade-mixture seed blends, and their slightly larger seed size compared to Kentucky bluegrass makes them marginally easier to spread evenly. However, fine fescues are slow to establish and don’t tolerate heavy foot traffic, so precise seed distribution matters for achieving full coverage without thin spots that will struggle to thicken later.
Tall Fescue is a coarse-textured, deep-rooted cool-season grass that’s become increasingly popular for its drought tolerance and durability. Its seed is larger and heavier than other cool-season varieties, which makes it one of the easiest grass types to spread evenly — the seeds drop cleanly through a hopper gate and resist wind drift. Tall fescue is typically seeded at higher rates than other cool-season grasses because it’s a bunch-type grass that doesn’t spread via rhizomes, meaning each plant stays where it germinates. Any gaps in coverage remain as permanent bare spots unless manually reseeded, which makes spreader calibration especially important even though the seed itself is easy to work with.
Warm-Season Grasses: Bermuda, Zoysia, Centipede, St. Augustine
Warm-season grasses thrive in the southern United States and grow most actively during hot summer months when soil temperatures exceed 65 to 70 degrees Fahrenheit. Their seeding characteristics differ markedly from cool-season varieties, and spreader settings must be adjusted accordingly.
Bermuda Grass produces some of the finest seed in the grass world — hulled Bermuda seed is nearly powder-fine, with coated varieties being slightly larger and easier to handle. Unhulled Bermuda seed is larger but germinates more slowly. The fine texture of Bermuda seed means it’s prone to the same drifting and bridging problems as Kentucky bluegrass, and it requires very low spreader gate settings and calm conditions for even distribution. Bermuda is typically seeded in late spring through mid-summer when soil temperatures are consistently above 70 degrees, and the warm, often breezy conditions of that season make wind drift a constant concern. Many Bermuda lawns are established from sod or sprigs rather than seed specifically because of how challenging the fine seed is to spread evenly, but for those who choose to seed, a well-calibrated drop spreader or a broadcast spreader used on a still day with conservative settings is essential.
Zoysia Grass seed is also quite fine, though typically slightly larger than Bermuda seed. Zoysia is notoriously slow to germinate — often 14 to 21 days or more — and establishes slowly even after germination. This slow establishment means that even seed distribution is critical from the start, because bare spots won’t fill in naturally for a very long time. Zoysia is more commonly established from plugs or sod than from seed, but seeded varieties have improved in recent years and are worth considering for large areas where sod costs would be prohibitive.
Centipede Grass seed falls in a middle range — not as fine as Bermuda or Zoysia, but still smaller and lighter than most cool-season grass seeds. Centipede is often called “lazy man’s grass” because of its low maintenance requirements, but that low-maintenance reputation only holds if it’s established evenly. Patchy centipede lawns are slow to recover because the grass spreads via stolons at a relatively modest rate compared to aggressive spreaders like Bermuda. A properly calibrated spreader at the correct setting for centipede seed makes the difference between a uniform lawn and a perpetually spotty one.
St. Augustine Grass is almost never established from seed — it’s nearly always sodded or plugged because viable St. Augustine seed is difficult to produce and rarely available commercially. For the purposes of this guide, if you have a St. Augustine lawn, your spreader will be used for fertilizer, lime, and possibly weed control products rather than for seeding. The spreading considerations for St. Augustine revolve around fertilizer distribution and avoiding herbicide products that can damage this particular grass type, which is more sensitive to certain chemicals than Bermuda or Zoysia.
Grass Seed Mixtures and Blends
Many commercial grass seed products are mixtures or blends containing multiple grass types — a common cool-season mix might combine Kentucky bluegrass, perennial ryegrass, and fine fescue in varying proportions. These blends present a spreading challenge because the different seed sizes and weights within the same bag can separate during spreading, with heavier seeds flinging farther and lighter seeds dropping closer to the spreader. This segregation effect is one more reason why half-rate, double-pass criss-cross patterns produce better results than single-pass applications, particularly for seed blends with diverse particle sizes.
Seasonal Spreading Guide: Timing Your Applications for Maximum Results
Timing your spreading activities to match both your grass type’s growth cycle and your local climate zone can dramatically improve results while reducing waste. Spreading seed at the wrong time — even with a perfectly calibrated spreader — often means poor germination and money down the drain.
Early Spring (March–April): Pre-Emergent and Starter Fertilizer
For cool-season lawns, early spring is primarily about weed prevention and gentle feeding rather than seeding. Most cool-season seeding happens in fall, but if spring seeding is necessary due to bare patches that didn’t fill in over winter, aim for as early in the season as soil conditions allow — as soon as the ground is workable and not frozen or saturated. The challenge with spring seeding is that new grass seedlings have only a short window to establish before summer heat arrives, and they’ll be competing with germinating weeds throughout that period. A starter fertilizer applied through a properly calibrated spreader gives new seedlings their best chance, but avoid high-nitrogen fertilizers in spring for established cool-season lawns — they promote top growth at the expense of root development heading into summer stress.
For warm-season lawns, early spring is too early for seeding — soil temperatures haven’t reached the 65 to 70 degree threshold most warm-season seeds need for germination. Instead, use this window for pre-emergent weed control if crabgrass has been a problem in previous years. The timing of pre-emergent application is critical: it needs to go down before soil temperatures reach about 55 degrees, which is when crabgrass seeds begin to germinate. A spreader that distributes pre-emergent evenly and at the correct rate is essential because gaps in coverage are gaps in weed prevention.
Late Spring (May–June): Warm-Season Seeding Window Opens
As soil temperatures climb past 65 degrees, the seeding window for Bermuda, Zoysia, and centipede grass opens. This is also when established warm-season lawns begin their most active growth phase and benefit from a balanced fertilizer application. The combination of warm soil, longer days, and increasing temperatures means any spreading errors — uneven fertilizer distribution in particular — show up quickly as visible stripes or patches of darker and lighter green growth. Taking extra care with spreader calibration during late spring applications pays off in a uniformly green lawn rather than a patchwork.
Cool-season lawns in late spring are entering the transitional period before summer heat stress. Avoid heavy nitrogen applications that push soft, lush growth just as temperatures are rising — that tender new growth is the first to scorch when summer heat arrives. If you’re applying any product through a spreader during this window, a light, balanced feeding at a conservative rate is safer than a heavy application.
Summer (July–August): Maintenance and Spot Treatment
For most lawns, summer is a maintenance period rather than a major spreading season. Cool-season lawns are often semi-dormant and shouldn’t be fertilized during heat stress, as pushing growth when the grass is struggling can damage the turf. Warm-season lawns are in peak growth and can handle fertilizer applications, but avoid spreading during the hottest part of the day when granular fertilizer sitting on sun-baked grass blades can cause leaf burn. Early morning or late evening applications, watered in immediately afterward, minimize this risk.
Summer is also when grub damage becomes visible, and granular insecticide applications through a spreader are one common treatment approach. The low application rates typical of granular insecticides demand precise spreader calibration, and watering in the product immediately after application is usually required for effectiveness. We cover granular insecticide spreading in more detail in the chemicals section below.
Early Fall (September–October): Prime Seeding Season for Cool-Season Lawns
This is the single most important spreading window for cool-season lawns. Soil temperatures are warm enough for quick germination, air temperatures are cooling so seedlings aren’t stressed by heat, and weed competition is declining as many annual weeds finish their life cycle. The combination makes early fall the ideal time for overseeding thin cool-season lawns, establishing new lawns from seed, and applying a balanced fall fertilizer that supports root development through the winter months.
For cool-season lawns, a typical fall routine involves core aeration followed by overseeding and a starter fertilizer, with the spreader playing a central role in both the seed and fertilizer applications. The half-rate, double-pass criss-cross pattern described in the technique section is especially valuable for fall overseeding because the stakes are higher — if the seeding is uneven, you’ll be looking at bare patches all winter and into the following spring.
Late Fall (November): Winterizing Fertilizer
After the last mowing of the season but before the ground freezes, a winterizing fertilizer application helps cool-season lawns store carbohydrates in their root systems for winter survival and early spring green-up. This is typically a higher-potassium, lower-nitrogen formulation spread at a moderate rate. The spreader should be cleaned especially thoroughly after this final application of the year, since any fertilizer residue left in the hopper over winter will absorb moisture and corrode metal components by spring.
Soil Preparation Before Spreading: The Foundation Even the Best Spreader Can’t Fix
A perfectly calibrated spreader applying exactly the right amount of seed or fertilizer will still produce disappointing results if the soil underneath isn’t prepared to receive it. Soil preparation is the step most skipped by homeowners eager to get product down quickly, and it’s also the step that most separates professional-quality results from amateur ones.
Soil Testing Before Any Application
Before spreading lime, fertilizer, or specialized soil amendments, a soil test tells you what your lawn actually needs rather than what you assume it needs. Soil test kits are available through county extension offices and commercial labs, and they provide pH readings along with levels of key nutrients including nitrogen, phosphorus, and potassium. Spreading lime without a soil test is a gamble — you might be correcting a pH problem that doesn’t exist, or applying too little lime to move the needle on a genuinely acidic soil. Similarly, fertilizer blends vary in their N-P-K ratios, and the right blend for your lawn depends on what your soil already has in abundance versus what it lacks. A soil test costs a fraction of what a season’s worth of unnecessary products costs, and it takes the guesswork out of every spreader pass you make.
Raking and Debris Removal
Seed needs contact with soil to germinate. If you’re spreading seed over a layer of thatch, fallen leaves, or grass clippings, a significant percentage of what comes out of your spreader will never reach the soil surface — it’ll sit on top of the debris, dry out, and fail to germinate. A thorough raking before seeding removes surface debris and lightly scratches the soil surface, creating micro-furrows where seed can settle and make contact. On compacted lawns, a core aerator run before seeding opens holes that capture seed and give it protected pockets for germination, which is why the combination aerator-spreader models in the tow-behind section are so effective for renovation projects.
Leveling and Grading
A spreader distributes product evenly across whatever surface it travels over, but if that surface is uneven — with dips, mounds, or ruts — the product lands on an uneven topography that affects germination and growth. Low spots collect water and can drown seedlings or concentrate fertilizer to the point of burning; high spots drain quickly and can leave seed too dry to germinate. While major grading is beyond the scope of spreading itself, filling obvious low spots with topsoil and raking them smooth before spreading seed produces noticeably more uniform results than spreading seed over an uneven surface and hoping for the best.
Pre-Watering for Seed Applications
Spreading seed onto bone-dry soil means the seed sits in dry conditions until the first watering or rain arrives, potentially losing viability during that wait. Lightly watering the soil surface before spreading seed — just enough to dampen it without creating mud — helps seed stick where it lands and begins the moisture-absorption process that triggers germination. This is especially helpful when spreading fine, lightweight seeds like Kentucky bluegrass or Bermuda grass that are prone to blowing around on dry, dusty soil.
How We Picked These Spreaders
Every spreader on this list was evaluated against a consistent set of criteria: hopper capacity relative to lawn size, build quality of the gear box and agitator (the part most likely to fail on cheap units), spread-pattern consistency, calibration options, and how well the unit handles the full range of materials — seed, granular fertilizer, pelletized lime, and ice melt where applicable. We also weighed price against durability, since a spreader with a plastic gear box that strips out after one season isn’t actually a bargain no matter what it costs upfront.
If your lawn is on the smaller side, a lot of this decision comes down to matching capacity to yard size rather than chasing the largest hopper available — our breakdown of the best time to spread grass seed is worth a look too, since timing affects which spreader style makes the most sense for your climate.
We also paid close attention to how easy each unit is to disassemble for cleaning, since this is one of the most commonly skipped maintenance steps and one of the leading causes of premature spreader failure. A spreader with a gate mechanism that’s a nightmare to access for rinsing tends to get neglected, which shortens its usable life regardless of how well it’s built otherwise.
Matching Spreader Size to Lawn Size
One of the most common buying mistakes is picking a spreader based on price or brand recognition alone, without considering how its capacity lines up with the actual size of the lawn it needs to cover. A 50-pound push spreader on a two-acre property means constant refilling trips back to the garage, while a 175-pound tow-behind unit on a small quarter-acre lot is unnecessary bulk that’s harder to store and awkward to maneuver around tight corners.
| Lawn Size | Recommended Spreader Type | Typical Hopper Capacity |
|---|---|---|
| Under 1/4 acre | Push spreader (broadcast or drop) | 25–50 lb |
| 1/4 to 1/2 acre | Push spreader, larger hopper | 50–100 lb |
| 1/2 to 1 acre | Push spreader or entry-level tow-behind | 100–130 lb |
| 1 to 3 acres | Tow-behind spreader | 130–200 lb |
| 3+ acres or rural acreage | ATV-mounted electric spreader | 130 lb+ |
Best Tow-Behind Spreaders
Tow-behind models are built for acreage. If you’re covering more than half an acre regularly, walking a push spreader back and forth stops making sense — a tow-behind unit hitched to your mower cuts that job down dramatically.

Brinly Tow Behind Combination Aerator Spreader
This is the rare spreader that doubles as a core aerator, which makes it a strong choice if you’re overseeding a compacted lawn and want to aerate and seed in close succession without buying two separate implements. The removable weight tray lets you add up to 150 pounds of ballast for deeper aeration tine penetration in harder soil.
What sets this unit apart from a standalone spreader is the sequencing it enables. Compacted clay soil is one of the biggest reasons overseeding fails — seed simply can’t make good contact with soil that’s been packed hard by years of foot traffic and mowing. By aerating and seeding in the same session, the pulled soil plugs create pockets where seed can settle in and establish roots far more reliably than seed broadcast over unbroken, compacted ground. The weight tray is a smart addition here, since aeration tines need real downward force to penetrate anything but the loosest soil, and without added ballast, a lightweight tow-behind aerator often just bounces across the surface instead of pulling proper plugs.
Pros
- Combines aeration and spreading in one pass of the yard
- Weight tray improves tine penetration in compacted soil
- Durable poly hopper resists cracking
Cons
- Heavier and bulkier to store than a standalone spreader
- Aerator tines need occasional sharpening

Brinly BS36BH-A Tow Behind Broadcast Spreader
The universal hitch on this model is the standout feature — it’s designed to clamp onto nearly any riding mower or lawn tractor without needing a brand-specific attachment kit. The 175-pound capacity hopper and 10-foot spread width make quick work of half-acre-plus lawns.
This is a genuine time-saver for anyone who’s outgrown a push spreader but doesn’t want to be locked into a single mower brand’s proprietary hitch system. Since it clamps rather than bolts, you can also switch it between multiple tow vehicles if your property uses more than one — useful for larger operations managing several plots of land. The 10-foot spread width means a typical half-acre lawn can be covered in a handful of passes rather than dozens, and the large hopper means you’re not stopping every few minutes to top it off.
Pros
- Universal hitch fits most riding mowers
- Large hopper minimizes refill stops
- Rust-resistant poly construction
Cons
- Spread pattern can be uneven on hills without speed adjustment
- Assembly takes longer than push models

Agri-Fab Tow Behind Drop Spreader
For anyone nervous about overspray near garden beds, a tow-behind drop spreader like this Agri-Fab model delivers a tight, controlled band of material directly beneath the hopper rather than flinging it outward. It’s slower per acre than a broadcast unit, but the precision is worth it on properties with a lot of landscaping to protect.
The tradeoff with any tow-behind drop spreader is that overlap discipline becomes non-negotiable. Because the drop pattern is essentially the width of the hopper itself, even a small gap between passes shows up as a visible, unfertilized (or unseeded) strip a few weeks later. The upside is that there’s zero risk of flinging fertilizer granules into a koi pond, vegetable bed, or a neighbor’s driveway, which makes this style worth the slower pace for properties where precision genuinely matters more than raw speed.
Pros
- No overspray onto beds, driveways, or walkways
- Simple, low-maintenance drop mechanism
- Good for precise fertilizer or lime application
Cons
- Requires careful overlap to avoid striping
- Slower coverage than broadcast tow-behinds
Best Broadcast Spreaders
Broadcast spreaders are the workhorses of most residential and semi-commercial lawn care routines. They trade a bit of precision for a lot of speed, and the models below represent a range of capacities and price points.

EarthWay 2050P 80lb Broadcast Spreader
This model has been a landscaper favorite for years, and for good reason — the pneumatic tires roll smoothly over uneven turf, and the calibrated shutoff system gives a consistent, repeatable pattern once it’s dialed in. We cover the exact setup process in our dedicated EarthWay 2050P review if you want a deeper look before buying.
What keeps this model at the top of professional recommendation lists is consistency across repeated use, not just performance out of the box. The enclosed gearbox keeps grit and moisture away from the drive mechanism, which is usually the first thing to fail on cheaper units after a season or two of exposure to fertilizer dust and rain. The calibrated shutoff — which stops flow instantly when you release the handle — also prevents the common problem of dribbling extra product in one spot every time you pause to turn around at the end of a row.
Pros
- Pneumatic tires handle bumps and slopes well
- Consistent, repeatable spread pattern
- Gearbox is enclosed and sealed against debris
Cons
- 80 lb capacity means more refills on very large lots
- Assembly instructions could be clearer
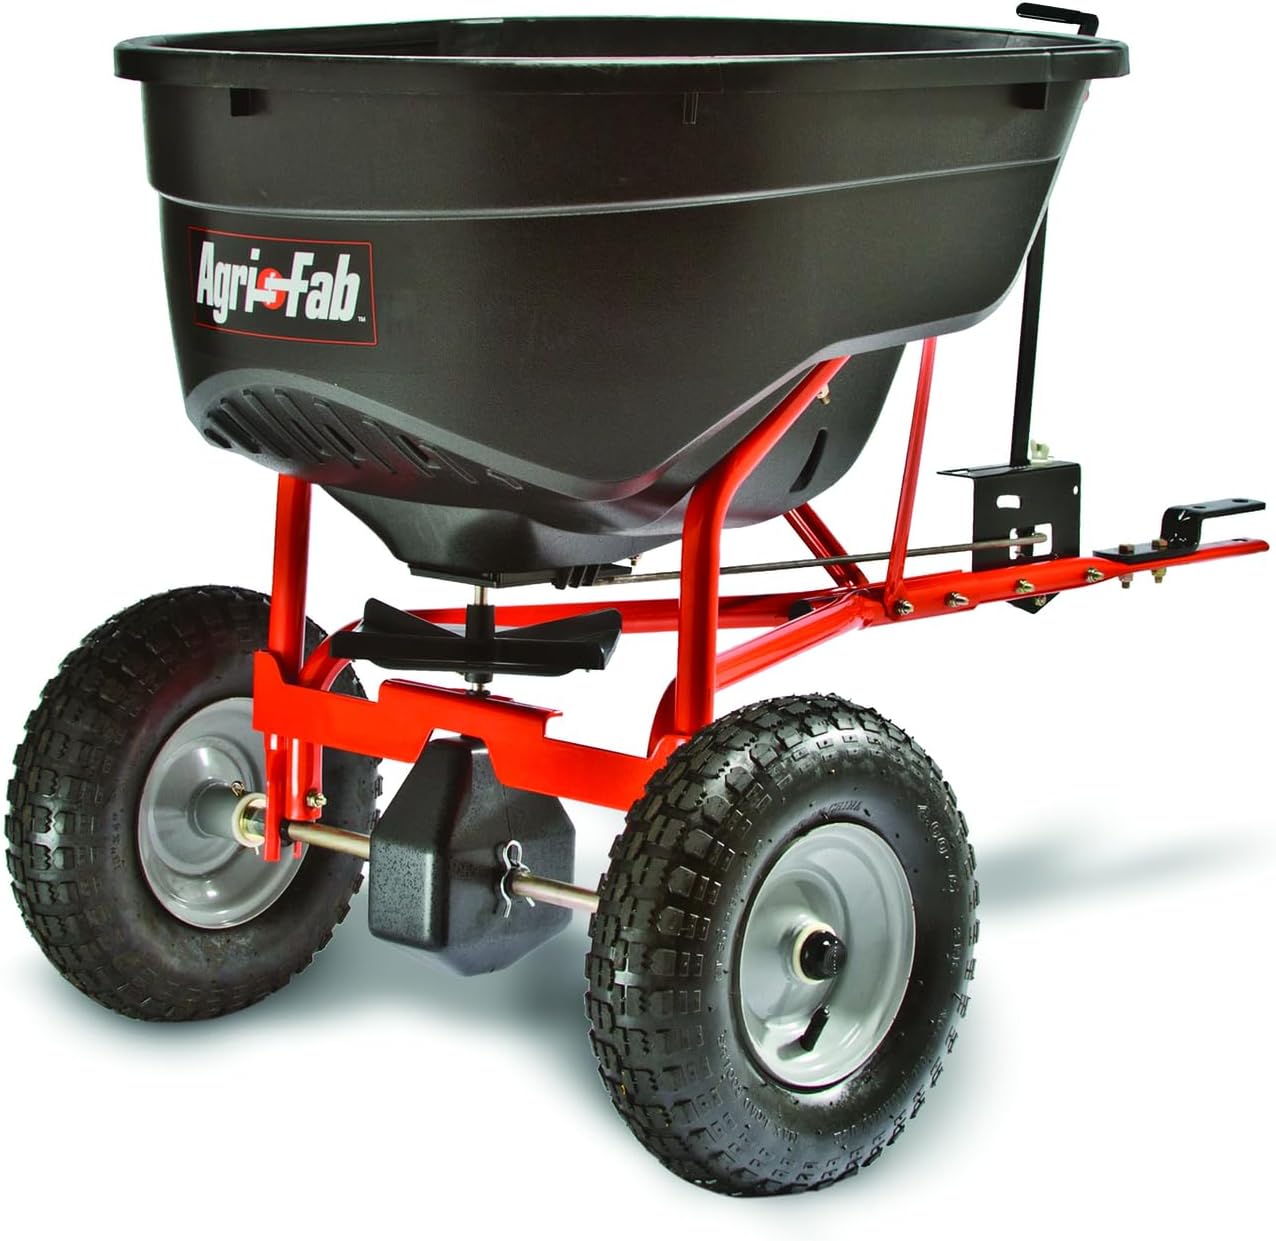
Agri-Fab Pull Behind Broadcast Spreader
A dependable mid-tier option that bridges the gap between push and full tow-behind spreaders. Our step-by-step walkthrough on the Agri-Fab pull-behind spreader covers assembly and calibration in more detail.
Pros
- Affordable relative to hopper capacity
- Adjustable flow rate control
- Easy to hitch and unhitch
Cons
- Plastic components feel less rugged than metal-frame competitors
- Not ideal for very hilly terrain

John Deere 130 lb. Capacity Push Broadcast Spreader
With a 130-pound hopper, this model sits between standard push spreaders and full tow-behind units, giving larger residential lots serious coverage without needing a tow vehicle.
Pros
- Large capacity reduces mid-job refills
- Trusted brand build quality
- Wide wheelbase for stability
Cons
- Heavier to push when hopper is full
- Higher price point than basic push spreaders

AugFir Tow Behind Broadcast Spreader
A solid entry-level tow-behind option for homeowners who want tractor-towed convenience without the price tag of premium brands.
Pros
- Budget-friendly for a tow-behind unit
- Simple assembly
- Adequate hopper size for quarter- to half-acre lots
Cons
- Build materials are lighter-duty than premium brands
- Shutoff mechanism needs regular checking for drift
Best Push Spreaders
For lawns under half an acre, a push spreader is usually the smartest buy — lower cost, easier storage, and no towing vehicle required. Here are the standouts.

Lesco 50Lb Push Spreader
Lesco spreaders show up on lawn care trucks for a reason — the stainless steel frame and heavy-duty gearbox are built to handle daily commercial use, which means residential owners get a spreader that will comfortably outlast several seasons of weekend use.
Pros
- Commercial-grade stainless steel frame
- Smooth, consistent flow control lever
- Pneumatic tires handle bumpy lawns well
Cons
- Pricier than typical homeowner push spreaders
- Heavier frame than plastic competitors
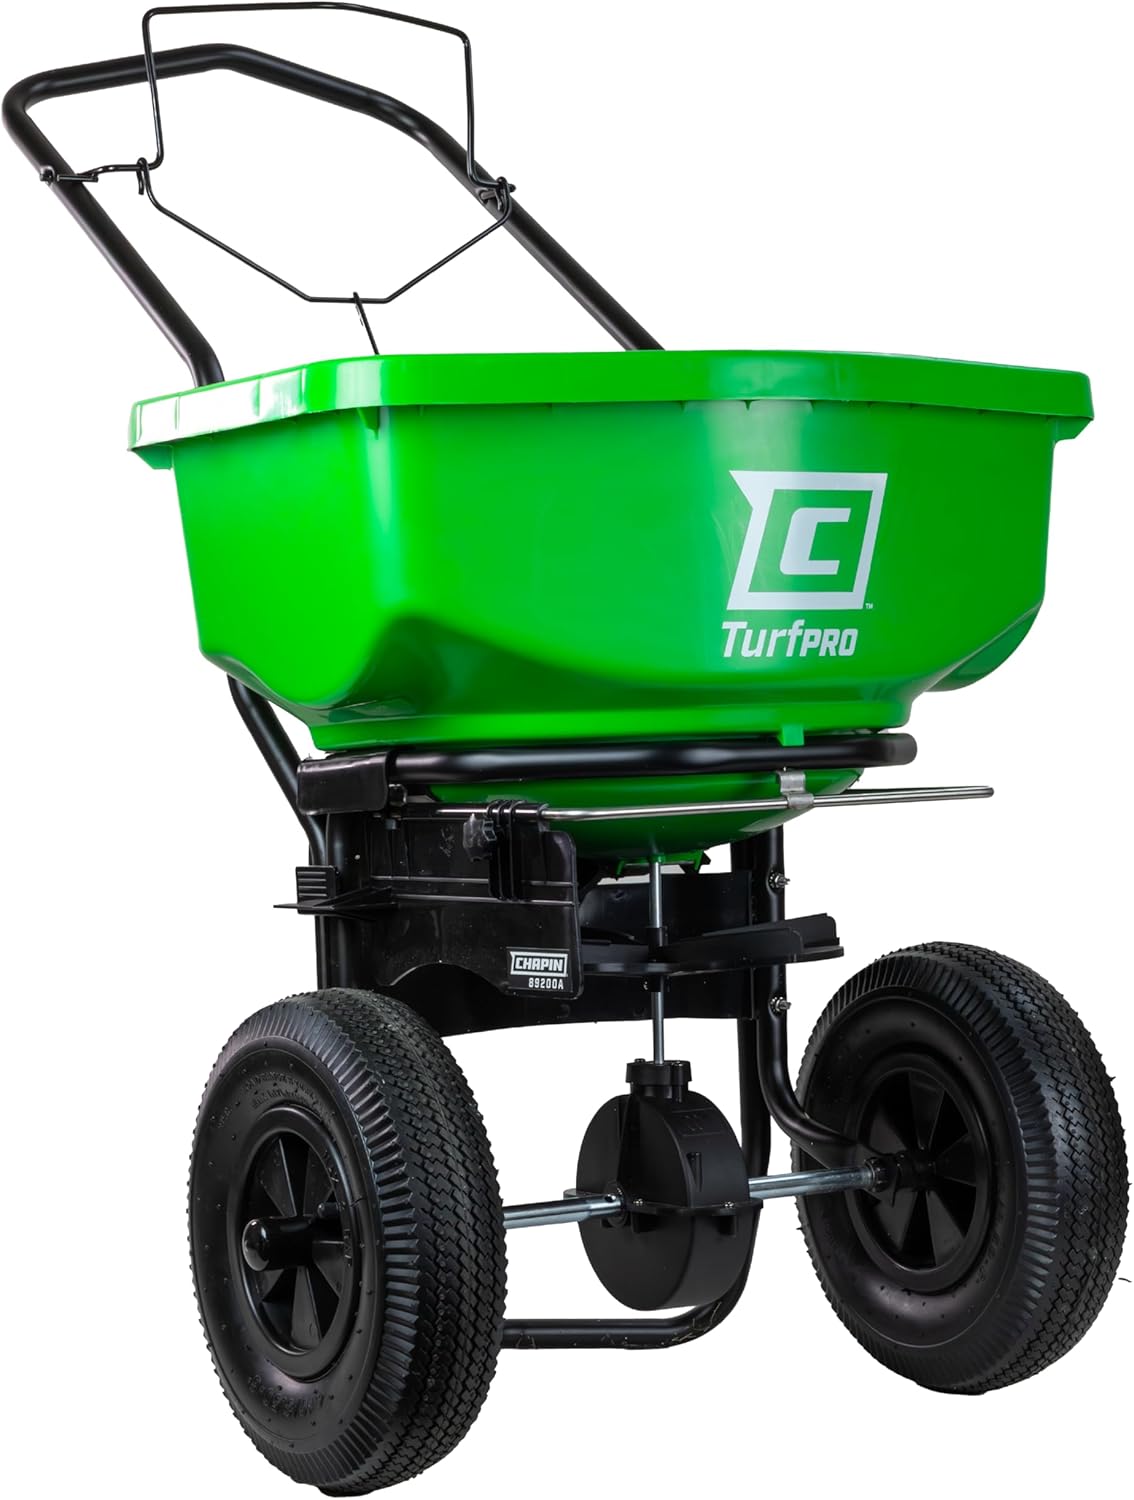
CHAPIN 80 lb Push Spreader
Chapin’s 80-pound push spreader hits a comfortable middle ground — big enough hopper for a standard suburban lot, small enough frame to store in a garage corner without hassle.
Pros
- Good balance of capacity and maneuverability
- Rust-proof poly hopper
- Easy on/off flow control
Cons
- Wheels can feel narrow on soft or wet turf
- Calibration chart is limited to common brands

EarthWay 2170 Commercial 100 LB Spreader
Built for larger residential lawns or small commercial routes, this 100-pound EarthWay model carries the same reputation for reliable, repeatable spread patterns as its smaller 2050P sibling.
Pros
- Large 100 lb hopper for fewer refills
- Commercial-grade agitator prevents clumping
- Durable pneumatic tires
Cons
- Bulky footprint for smaller storage spaces
- Heavier to push when fully loaded

Brinly P20-500BHDF-A Push Spreader
A dependable, no-frills push spreader well suited to smaller suburban lots where a massive hopper isn’t necessary and easy storage matters more.
Pros
- Lightweight and easy to maneuver
- Simple calibration dial
- Compact for storage
Cons
- Smaller hopper means more frequent refills on bigger lots
- Basic wheel design struggles on rough terrain
Best Electric & ATV-Mounted Spreaders
If you’re managing a large property with an ATV or UTV, or you simply want to skip the manual labor of pushing or towing altogether, electric and ATV-mount spreaders are worth considering.

Buyers Products ATVS15A 12V Broadcast Spreader
This 12V electric spreader mounts to an ATV and covers large acreage far faster than any push or even most tow-behind units, making it a strong pick for rural properties, pastures, and food-plot seeding.
Pros
- Electric spread rate control from the driver’s seat
- Covers large acreage quickly
- Durable poly hopper resists weather damage
Cons
- Requires a compatible ATV/UTV mount
- Higher price point than manual spreaders

CHAPIN 100 lb Turf Spreader
Chapin’s 100-pound turf spreader is built for serious volume — ideal for larger properties running frequent fertilizer or seed applications throughout the growing season.
Pros
- Large capacity for extended runs without refilling
- Heavy-duty frame holds up to frequent use
- Wide spread pattern for efficient coverage
Cons
- Bulky to store in smaller sheds or garages
- Overkill for small residential lots
Matching Your Spreader to What You’re Actually Spreading
Not every spreader handles every material equally well, and this is one of the most overlooked factors in the buying decision. Fine grass seed, granular fertilizer, pelletized lime, and ice melt all have different particle sizes, weights, and flow characteristics, and a spreader’s gate design and agitator style determine how well it manages that variety.
Grass Seed
Fine grass seed is lightweight and prone to bridging — clumping together and refusing to flow evenly — especially in humid conditions. Spreaders with a wider gate opening and an active agitator (a rotating bar or paddle inside the hopper) handle seed far better than basic models that rely on gravity alone. Nearly every model featured in this guide includes some form of agitation, which is one reason we included them.
Granular Fertilizer
Granular fertilizer is denser and less prone to bridging than seed, but the granules vary significantly in size between brands and formulas. A spreader with a wide range of gate settings gives you more flexibility to dial in the correct rate regardless of which fertilizer brand you’re using that season.
Pelletized Lime
Lime pellets are heavier and coarser than either seed or standard fertilizer, and they can be tough on cheaper plastic gears over time. This is where the build quality differences between budget and premium spreaders become most apparent — a metal gearbox handles repeated lime applications far better than a plastic one, which is worth factoring in if soil pH correction is a regular part of your lawn care routine.
Terrain Considerations
Flat, level lawns are forgiving of almost any spreader. Sloped or uneven terrain is a different story — pneumatic tires roll more smoothly over bumps and dips, keeping your walking pace (and therefore your application rate) more consistent than hard plastic wheels that jolt and stall on rough ground. If your property has noticeable grade changes, prioritize a model with pneumatic tires even if it costs a bit more.
Full Comparison Table
Here’s how the top picks stack up side by side across capacity, type, and best use case.
| Model | Type | Capacity | Best For |
|---|---|---|---|
| Brinly Aerator Spreader | Tow-Behind | Varies + 150 lb weight tray | Aerating and seeding compacted lawns |
| Brinly BS36BH-A | Tow-Behind Broadcast | 175 lb | Universal hitch compatibility |
| Agri-Fab Tow Drop Spreader | Tow-Behind Drop | ~175 lb | Precision near beds and walkways |
| EarthWay 2050P | Push Broadcast | 80 lb | Repeatable, professional-grade spread |
| Agri-Fab Pull Behind | Tow-Behind Broadcast | ~130 lb | Budget-friendly mid-size lots |
| John Deere Push Broadcast | Push Broadcast | 130 lb | Large lots without a tow vehicle |
| AugFir Tow Behind | Tow-Behind Broadcast | ~130 lb | Budget tow-behind option |
| Lesco 50Lb Push | Push Broadcast | 50 lb | Commercial-grade durability |
| Chapin 80 lb Push | Push Broadcast | 80 lb | Balanced size and maneuverability |
| EarthWay 2170 | Push Broadcast | 100 lb | Larger residential lots |
| Brinly P20-500BHDF-A | Push | ~65 lb | Small to medium lawns |
| Buyers ATVS15A | Electric ATV-Mount | ~130 lb | Rural acreage and food plots |
| Chapin 100 lb Turf | Push Broadcast | 100 lb | Frequent, high-volume applications |
Calibration & Settings Guide
Even the best spreader will give inconsistent results if it isn’t calibrated to the specific product going into the hopper. Grass seed, granular fertilizer, and pelletized lime all have different densities and particle sizes, which means the same setting number can deliver wildly different application rates depending on what’s loaded.
Most bag labels list a recommended setting for major spreader brands, but if your model or your product isn’t listed, a simple test works just as well: fill the hopper, walk a measured 100-square-foot area at a fixed setting, then weigh what’s left to calculate how much was actually applied. Our full walkthrough on how to calibrate a spreader covers this process with exact math you can copy for your own yard.
| Material | Typical Setting Range | Notes |
|---|---|---|
| Grass seed (fine) | Low-mid | Light particles drift easily — avoid windy days |
| Granular fertilizer | Mid | Check bag for exact spreader-specific setting |
| Pelletized lime | Mid-high | Heavier particles need a slightly higher setting |
| Ice melt (where applicable) | High | Coarser granules require wider gate opening |
Spreader Settings Chart by Brand
This is the single most-searched question we see about spreaders, and it’s also the one most buying guides skip entirely: “what number do I actually put my spreader on?” The honest answer is that there’s no universal setting scale — a “6” on a Scotts spreader and a “6” on an EarthWay spreader can deliver completely different application rates, because each manufacturer designs its own gate opening geometry and calibrates its dial against its own product line. That’s why bag labels from major fertilizer and seed brands print a settings table on the back listing specific numbers for specific spreader models, rather than a single universal number.
Below is a general cross-reference chart built from the settings ranges most commonly published on popular lawn product labels. Treat these as reasonable starting points rather than gospel — always confirm against the actual bag in your hands, since formulas change between product lines even within the same brand.
| Spreader Brand/Model | Grass Seed Setting | Granular Fertilizer Setting | Pelletized Lime Setting |
|---|---|---|---|
| EarthWay 2050P / 2170 | 8–12 | 15–20 | 18–22 |
| Scotts Push/Drop (for reference) | Low third of dial | Middle of dial | Upper third of dial |
| Agri-Fab Push/Tow Broadcast | 3–5 | 6–8 | 8–10 |
| Brinly Tow-Behind Broadcast | 3–4 | 5–7 | 7–9 |
| Chapin Push Spreaders | 4–6 | 7–10 | 10–13 |
| Lesco Commercial Push | 10–14 | 18–24 | 24–28 |
Notice how wildly the numbers swing between brands for what is functionally the same task. This is precisely why using a generic “medium setting” guess is such a common source of striping and burn spots — a “10” that’s perfectly calibrated for seed on an EarthWay unit would massively over-apply seed on a Brinly, because the gate mechanisms simply aren’t built to the same scale.
Why Settings Numbers Aren’t Interchangeable Between Brands
Every spreader manufacturer engineers its own gate opening shape, agitator speed, and disc height, and the numbered dial is simply a proxy for how far that particular gate slides open. There’s no industry standard governing what a “10” means across brands, the way there is for something like tire pressure or screw sizes. Some manufacturers use a 1–10 scale, others use 1–20, and some use letter grades or percentage-based dials entirely. When a fertilizer bag prints a settings table on the back, it’s translating its recommended application rate (measured in pounds per 1,000 square feet) into the specific dial numbers for each major spreader brand the manufacturer tested against.
If your exact spreader model isn’t listed on the bag, the safest approach is to find the closest listed model from the same brand and use that as a starting point, then verify with a calibration test rather than trusting the number blindly. A five-minute calibration check saves you from either wasting half a bag of product in the first third of your lawn or leaving the back half under-fertilized.
Converting Between Brand Scales
If you own an off-brand or generic spreader with no published cross-reference on any bag you own, you can still get a reasonably close setting by comparing your spreader’s dial range to one of the reference brands above. A spreader with a 1–10 dial that behaves similarly to an Agri-Fab (based on similar gate size and hopper capacity) should land in a similar numeric range for the same material. This isn’t perfect, but it beats guessing blind, and it gives you a sensible starting point to fine-tune with a short calibration walk.
How Much Seed & Fertilizer Per 1,000 Sq Ft
Spreader dial settings only get you halfway there — the other half is knowing how much product you actually need to put down per square foot of lawn in the first place. Application rates are almost always expressed in pounds per 1,000 square feet, and getting this number wrong is arguably a bigger source of lawn damage than an uncalibrated spreader, since it determines how much total product goes down regardless of how evenly it’s distributed.
| Product Type | Typical Rate per 1,000 Sq Ft | Notes |
|---|---|---|
| New grass seed (cool-season, bare soil) | 15–20 lb | Higher rate for establishing a new lawn from scratch |
| Overseeding (existing thin lawn) | 4–6 lb | Half or less of a new-lawn rate to avoid overcrowding |
| Warm-season seed (Bermuda, Zoysia) | 1–2 lb | Warm-season seed is much finer and lighter per pound |
| Granular starter fertilizer | 3–5 lb | Matches most bag labels for new seed applications |
| Standard granular lawn fertilizer | 2.5–5 lb | Varies by nitrogen percentage in the specific blend |
| Pelletized lime | 20–50 lb | Depends heavily on your soil test results and current pH |
Calculating Total Bag Needs for Your Lawn
Once you know your lawn’s square footage (length times width, or a rough estimate using a property map), multiply it by the per-1,000-square-foot rate and divide by 1,000. A 5,000 square foot lawn getting overseeded at 5 pounds per 1,000 square feet needs 25 pounds of seed total — enough to know exactly which size bag to buy before you’re standing in the garden center trying to do math in your head.
It’s worth rounding up slightly rather than down when buying seed or fertilizer, since running out mid-lawn means either stopping to make an emergency store run or finishing the job at a lower, less effective rate. A little leftover product in a sealed bag stores fine until next season; a lawn with a visibly under-treated section does not fix itself.
Half-Rate, Double-Pass Application
Professional crews rarely apply the full rate in a single direction of passes. Instead, they set the spreader to half the target rate and make two passes in perpendicular directions — one north-south, one east-west. This criss-cross approach evens out any minor inconsistency in walking speed or overlap, since a slightly-too-fast section on the first pass often gets balanced out by the second pass covering the same ground from a different angle. It takes a bit longer than a single-direction pass, but the resulting evenness is noticeably better, particularly for seed, where uneven density creates visibly patchy germination a few weeks later.
Spreading Technique Tips for an Even Lawn
Even a perfectly calibrated spreader can leave stripes if the walking or driving pattern is off. The trick professional lawn crews use is the “border and fill” method: walk the perimeter of the lawn first at half rate, then fill in the interior in straight, slightly overlapping passes at full rate. This avoids the double-dose along edges that happens when people simply walk back and forth in rows from one side to the other.
For anyone overseeding thin or bare patches, a criss-cross pattern — one pass north-south, a second pass east-west at half rate each — gives noticeably more even coverage than a single-direction pass at full rate. This technique is covered in more depth in our guide to spreading grass seed evenly, along with tips for adjusting speed on slopes where material tends to drift downhill.
If you’re specifically overseeding an existing lawn rather than starting from bare soil, timing and pattern both matter — our dedicated resource on overseeding a lawn with a spreader walks through mowing height, seed-to-soil contact, and watering schedule alongside the spreader settings themselves.
Best Spreaders for Small Yards
Most spreader buying guides are written with half-acre-plus suburban lots in mind, which leaves a big gap for anyone working with a small urban or townhome lawn — think 1,000 to 3,000 square feet, sometimes broken up by a driveway, a narrow side yard, and a postage-stamp backyard. On a lot that size, nearly every spreader in this guide is technically oversized, and the buying priorities shift from capacity and speed toward maneuverability, storage footprint, and precision near hardscaping.
The single biggest complaint from small-yard owners isn’t that their spreader runs out of product too quickly — it’s the opposite. A large hopper on a small lot means you’re often applying at the low end of the gate setting just to avoid dumping the whole bag in three passes, and a wide broadcast pattern on a lawn edged by driveways, sidewalks, and a mailbox post means a large share of every pass lands somewhere other than grass. That wasted product isn’t just an annoyance; on a small lot it can represent a meaningful percentage of an entire bag of seed or fertilizer blown onto pavement or into a flower bed.
Why Smaller Hoppers Make Sense Here
A 25 to 50 pound hopper, which sounds modest compared to the 100-plus pound units built for acreage, is usually more than enough capacity for a full application on a lot under a quarter acre — and often enough for two or three applications before a refill is needed. The smaller frame that comes with a smaller hopper also matters more than people expect: a compact push spreader tucks into a garage corner, hangs on a hook, or slides under a deck, while a full-size 100-plus pound unit often ends up living outside under a tarp because there’s nowhere else to put it.
Precision Over Speed
Speed is rarely the constraint on a small lot — you can walk the entire yard in a few minutes regardless of spreader size. What matters far more is control near edges. A drop spreader, or a broadcast spreader with an edge-guard deflector that blocks the throw on one side, lets you run right along a property line, driveway, or garden bed without flinging product where it doesn’t belong. If your small lot is heavily bordered by beds or a shared property line with a neighbor who’d rather not have your fertilizer landing on their side, that edge control is worth prioritizing over hopper size or spread width every time.
Handheld as a Small-Yard Primary Tool
For genuinely tiny lots — under 1,000 square feet, or oddly shaped yards with lots of corners and narrow strips — a handheld crank spreader (covered in more detail in the next section) can actually work as a primary tool rather than just a touch-up device. It’s slower per square foot than any wheeled spreader, but on a lot that small the total time difference is a few minutes, and the maneuverability around tight corners, narrow side-yard strips, and oddly shaped beds often outweighs the speed a wheeled unit would offer.
What to Skip if Your Lawn Is Small
Skip anything marketed around tow-behind capability, ATV mounting, or hoppers over 80 pounds — those features solve problems small lots don’t have, and you’ll pay for capacity, weight, and bulk you’ll never use. Likewise, a pneumatic tire upgrade, while worthwhile on hilly acreage, matters less on a small, flat urban lot where the walking distance per pass is short enough that wheel type barely affects your pace.
Handheld & Backpack Spreaders
None of the featured picks in this guide are handheld models, but they deserve a section of their own because they solve a different problem than every wheeled spreader above: precise, small-scale application in places a push or tow-behind unit simply can’t reach or shouldn’t be used.
Crank (Belly-Grip) Spreaders
The classic handheld spreader is a plastic hopper worn on a strap or held against the stomach, with a hand crank that spins a small internal disc to fling material a few feet in front of and beside you. These typically hold 5 to 20 pounds of product — enough for spot treatments, not a full lawn — and give you direct, granular control over exactly where material lands, which makes them the tool of choice for patching bare spots, edging along a fence line, or seeding a narrow strip between a driveway and a property line where a wheeled spreader’s throw pattern would overshoot onto pavement.
Backpack Spreaders
A step up from the crank model, backpack spreaders hold considerably more material — often 20 to 50 pounds — in a frame worn like a hiking pack, with a hand-operated or battery-powered spinner mounted at waist height. These are common on commercial lawn crews working properties too small or too obstacle-heavy to justify unloading a full-size push spreader, and they’re worth considering for homeowners with a lot of scattered small areas to treat: raised beds, a community garden plot, a strip along a fence, or multiple small properties.
Battery-Powered Handheld Spreaders
Battery-powered handheld units have become more common in the last few years, replacing the hand crank with a small electric motor that spins the disc at a constant rate. The advantage is consistency — a hand crank’s spread rate depends entirely on how fast and how evenly you’re turning it, which introduces variability a motor eliminates. For anyone treating a lot of small, separate areas, a battery-powered handheld spreader can actually deliver a more even application than an inconsistently cranked manual version, though it adds cost and another battery to keep charged.
When a Handheld Spreader Makes Sense as a Supplement
Even homeowners with a full-size push or tow-behind spreader for the bulk of their lawn often keep a small handheld unit on hand for touch-up work: patching a bare spot left by a dead patch of grass, overseeding a spot where a dog has worn a path, or spot-treating a small area of weeds without running a full-size spreader across the whole yard for a problem confined to one corner. Buying a large bag of seed or fertilizer just to treat a five-foot bare patch is wasteful and impractical with a full-size spreader’s minimum effective coverage area — a handheld unit lets you use a small, precise amount exactly where it’s needed.
Limitations to Keep in Mind
Handheld and backpack spreaders are slow relative to their coverage area, and they’re physically tiring on anything beyond a small lot — cranking a hopper for twenty minutes to cover a quarter acre is a very different experience than pushing a wheeled unit across the same ground. They’re also harder to calibrate precisely, since walking speed, crank speed, and body position all affect the throw pattern in ways that are difficult to standardize. Treat them as a precision supplement to a wheeled spreader rather than a full replacement unless your total area genuinely is small enough that a wheeled unit doesn’t make sense.
Spreading Weed Control, Insecticide & Ice Melt
Spreaders aren’t limited to seed, fertilizer, and lime. Granular weed control (often combined with fertilizer as a “weed and feed” product), granular insecticides for grubs and surface-feeding pests, and rock salt or ice melt in winter climates all run through the same broadcast or drop mechanisms — but each comes with its own handling considerations that are worth understanding before you load one into the same spreader you use for seed.
Granular Weed Control and Weed-and-Feed Products
Weed-and-feed products combine a fertilizer carrier with a herbicide coating, and even distribution matters more here than with plain fertilizer, because an uneven pass doesn’t just create a visible stripe — it creates a strip of lawn that never got herbicide coverage, leaving weeds to keep growing right alongside a stripe of over-treated, potentially stressed turf. Calibration precision is especially important with pre-emergent herbicides, since these products need a continuous, unbroken barrier across the soil surface to work; gaps in coverage are effectively gaps in weed prevention.
Granular Insecticides
Grub control and other granular insecticides are typically applied at much lower rates per 1,000 square feet than fertilizer, which means your spreader’s gate needs to open to a precise, often quite narrow setting. A spreader with only broad, imprecise gate increments makes it hard to hit these lower application rates accurately, which is one more reason a spreader with a wide, fine-grained setting range earns its price premium if you’re running a full lawn care program rather than just fertilizer and seed.
Ice Melt and Rock Salt
In climates that see winter ice, the same broadcast spreader used for seed and fertilizer in the growing season can double as an ice melt spreader for driveways, walkways, and parking areas — provided you clean it thoroughly afterward. Rock salt and calcium chloride ice melt are highly corrosive to metal spreader components, far more so than fertilizer, and any spreader used for ice melt should be rinsed immediately after each use and dried completely before storage. Leaving salt residue in a hopper or gearbox over a winter season is one of the fastest ways to destroy an otherwise good spreader.
Should You Use One Spreader for Everything?
Using a single spreader across seed, fertilizer, herbicide, insecticide, and ice melt is common and generally fine, provided you rinse thoroughly between uses — particularly after anything containing salt or a chemical you don’t want cross-contaminating a food-safe application like vegetable garden fertilizing. Some homeowners prefer to keep a dedicated, cheaper spreader specifically for ice melt to avoid any risk of salt residue affecting seed or fertilizer applications later, which is a reasonable approach if you’re running a heavy winter ice melt routine and don’t want to risk corrosion in your primary lawn spreader.
Reading the Label for Spreader-Specific Rates
Herbicide and insecticide labels are legally binding application instructions, not just suggestions, and most list specific spreader settings for common brands the same way fertilizer bags do. Because these products are often applied at much lower rates than fertilizer, using a fertilizer-appropriate setting out of habit is a common — and potentially harmful — mistake. Always check the specific product label rather than assuming last month’s fertilizer setting will translate.
Organic vs. Synthetic Fertilizer Spreading: What Changes
The spreader you choose and how you calibrate it may need to change depending on whether you’re using organic or synthetic fertilizer products. These two categories of lawn food have fundamentally different physical characteristics that affect how they flow through a spreader, and using the same settings for both is a recipe for uneven application.
Synthetic Granular Fertilizers
Synthetic fertilizers are manufactured to have uniform particle size and density, which makes them the most predictable and easiest product to spread evenly. The granules are engineered to flow smoothly through spreader gates and distribute consistently across the spinner plate. Most spreader calibration charts and bag-label setting recommendations are designed primarily with synthetic fertilizers in mind, which means if you’re using a standard synthetic product from a major brand, the settings on the bag are likely to be accurate for your spreader model without much additional adjustment.
Synthetic fertilizers are also more concentrated than organic alternatives, meaning the application rate per 1,000 square feet is typically lower — often 2 to 4 pounds per 1,000 square feet compared to 10 to 20 pounds for some organic products. This lower rate means your spreader gate will be at a relatively narrow setting, and precision at those narrow settings matters more. A spreader with only broad, imprecise gate increments may struggle to consistently deliver the low rates synthetic fertilizers demand, resulting in either over-application (which can burn the lawn) or under-application (which won’t produce the desired results).
Organic and Natural Fertilizers
Organic fertilizers — including composted manure, bone meal, blood meal, feather meal, alfalfa meal, and blended organic lawn foods — present a very different set of spreading challenges. These products are rarely uniform in particle size; they often contain a mix of fine powders, irregular granules, and occasionally small fibrous bits that don’t flow as smoothly as synthetic prills. The irregular texture means bridging and clumping are more common, especially in humid conditions where organic materials absorb moisture from the air and become sticky inside the hopper.
Organic fertilizers are also applied at significantly higher rates than synthetics because their nutrient concentrations are lower. A typical organic lawn fertilizer might call for 10 to 20 pounds per 1,000 square feet, which means your spreader gate needs to open wider and you’ll be refilling the hopper more often during application. The combination of higher volume and stickier material means an agitator becomes even more important — without one, organic fertilizers are far more likely to bridge and stop flowing mid-pass than synthetics are.
Spreader Selection for Organic Products
If you’re committed to an organic lawn care program, prioritize a spreader with a robust agitator mechanism and a hopper made from a material that organic residues won’t cling to as stubbornly. Poly hoppers are generally easier to clean after organic applications than painted metal ones, since organic materials can bond to paint or corrode metal if left in contact. Rinsing the spreader immediately after each organic fertilizer application is more important than after synthetic applications, because organic residues that dry inside the gate mechanism are harder to remove later and can permanently affect calibration accuracy.
Setting Adjustments for Organic Materials
Most bag labels on organic fertilizers don’t include the detailed spreader-setting charts that synthetic brands print, which means you’re more likely to need to calibrate by trial and error. Start with a setting roughly 30 to 50 percent more open than you’d use for a synthetic fertilizer of similar weight, then run a calibration test on a measured area to verify the actual application rate. The denser, coarser nature of many organic products means they need a wider gate opening to achieve the same weight per square foot as a synthetic product, but over-opening the gate can dump product too quickly and overwhelm the spinner plate, leading to uneven distribution.
Spreader Accessories Worth Buying
Most spreaders come with the basics — hopper, frame, wheels, and spreading mechanism — but a handful of accessories can meaningfully improve accuracy, convenience, and longevity. None of these are strictly necessary for basic spreading tasks, but each solves a specific problem that experienced lawn owners frequently encounter.
Edge Guards and Deflectors
An edge guard is a simple shield that attaches to one side of a broadcast spreader, blocking the throw in that direction so material only flings outward on the opposite side. This lets you run a broadcast spreader right along a driveway, sidewalk, or flower bed edge without overspray — effectively giving you drop-spreader precision on one side while maintaining broadcast speed on the other. Many mid-range and premium spreaders include an edge guard, but if yours doesn’t and you have a lot of bordered edges to navigate, an aftermarket guard is worth the modest cost.
Hopper Covers and Rain Lids
If you’ve ever been caught mid-application by a sudden rain shower, you know the frustration of watching your spreader hopper fill with water and turn your carefully measured seed or fertilizer into a soggy, unspreadable mess. A hopper cover — essentially a fitted lid that sits over the open top of the hopper — prevents rain from entering and also reduces dust from fine products blowing back into your face during application. Not every spreader model has a manufacturer-made cover available, but universal-fit covers exist and are worth considering if you spread frequently in unpredictable weather.
Calibration Catch Pans
A calibration catch pan is exactly what it sounds like: a shallow tray or tarp placed under the spreader’s drop zone during calibration testing, so you can collect and weigh the product that comes out over a known distance. While you can achieve the same result with a tarp and a scale, a purpose-built catch pan with marked measurement zones makes the process faster and more repeatable, which means you’re more likely to actually do it rather than skip calibration and guess.
Hopper Screens and Filters
Some spreaders include a removable screen that sits inside the hopper opening, catching large debris or clumps before they can reach the gate and cause a clog. If your spreader doesn’t include one and you frequently spread products prone to clumping — organic fertilizers, pelletized lime that’s absorbed moisture, or seed blends with filler material — adding a simple mesh screen across the hopper opening can prevent the mid-pass clogs that disrupt coverage and waste time.
Replacement Pneumatic Tires
Pneumatic tires eventually wear down, develop slow leaks, or dry-rot after several seasons of sun exposure and temperature cycling. Having a spare set of replacement tires on hand — or at least knowing the tire size your spreader uses so you can order replacements quickly — prevents a flat tire from derailing a planned spreading day during a narrow weather window. Most spreader tires are standard sizes available at hardware stores or online, and keeping a spare tube or two is cheaper than replacing the entire wheel assembly.
DIY Calibration Methods: Getting Your Settings Right Without a Lab
Professional calibration involves precise scales, measured test plots, and careful math — but you can get close enough for excellent residential results with a few simple tools and a systematic approach. The key is consistency: run the same test the same way each time so your results are comparable.
The Tarp Method
Lay a clean tarp or plastic sheet of known dimensions — 10 feet by 10 feet gives you 100 square feet, a convenient fraction of the standard 1,000-square-foot measurement — on a flat surface. Fill your spreader with a weighed amount of product, set the gate to your intended setting, and make a single pass over the tarp at your normal walking speed. Collect and weigh everything that landed on the tarp. Multiply that weight by 10 to get the rate per 1,000 square feet, and compare it to the product label’s recommended rate. Adjust the gate setting up or down and repeat until you’re within about 10 percent of the target rate.
The Measured Strip Method
If a tarp isn’t practical, measure a straight, level strip of your lawn — say 50 feet long. Determine your spreader’s effective spread width (usually listed in the manual, or you can measure it by spreading a light pass on pavement and measuring the visible pattern). Multiply the strip length by the spread width to get the area covered. Weigh the hopper before and after making a single pass down the strip. The weight difference tells you how much product was applied to that measured area, and you can scale it up to 1,000 square feet to check against the label rate.
The Catch-Pan Method
For drop spreaders specifically, you can place catch pans or small trays directly under the drop openings and push the spreader a measured distance — say 10 feet — then weigh what’s collected. Because drop spreaders release material in a predictable, straight-down band, this method is more precise than broadcast calibration and gives you a very accurate reading of what your spreader is actually putting down at a given setting.
Why Calibration Matters More for Some Products Than Others
Seed calibration tolerates a wider margin of error than fertilizer or herbicide calibration because the consequences of over- or under-seeding are mostly cosmetic — a slightly thinner or thicker stand of grass that can often self-correct over a season. Fertilizer errors, particularly with high-nitrogen synthetic products, can burn the lawn within days and take weeks or months to recover from. Herbicide calibration errors are potentially the most serious, since over-application can damage desirable plants and under-application can fail to control weeds, effectively wasting the product and the time spent applying it. Prioritize your calibration efforts accordingly: always calibrate for herbicides and insecticides, calibrate for fertilizer unless you’re confident in your settings, and calibrate for seed when you’re establishing a new lawn where evenness matters most.
Troubleshooting Common Spreader Problems
Even well-built spreaders develop issues over time, and most of them are fixable without replacing the entire unit. Here are the most common problems, their typical causes, and what to do about them.
Uneven Spread Pattern (Striping)
If your lawn shows visible stripes of darker and lighter growth after fertilizing, or patches of thick and thin grass after seeding, the spread pattern is uneven. Common causes include walking at inconsistent speeds, overlapping passes by too much or too little, a bent or damaged spinner plate, or a clogged gate opening on one side. Start by checking that the spinner plate is level and undamaged, then clean the gate openings thoroughly. If the problem persists, run a calibration test to confirm the spread width and adjust your overlap accordingly. Remember that effective spread width is usually narrower than maximum spread width — overlapping by 20 to 30 percent of the effective width, not the total throw distance, is the standard professional practice.
Product Bridging in the Hopper
Bridging happens when product clumps together inside the hopper, forming an arch or bridge above the gate opening that prevents material from flowing down even though the gate is open. This is most common with fine seed, organic fertilizers, and any product that’s absorbed moisture. The solution is usually a combination of keeping the product dry before loading, using a hopper screen to break up clumps as you fill, and making sure the agitator is functioning properly. In humid conditions, consider loading only as much product as you’ll use in the next 20 to 30 minutes rather than filling the hopper completely, which reduces the time material sits in the hopper absorbing moisture.
Gate Drift (Setting Changes During Use)
On spreaders with a lever-operated gate, vibration during use can sometimes cause the setting to drift — gradually opening or closing from the position you set. This is especially problematic on rough terrain where the spreader bounces and jostles. Check whether your spreader’s gate lever has a tension adjustment or locking mechanism, and tighten it if possible. If drift continues, making a habit of glancing at the setting indicator every few passes lets you catch and correct drift before it affects a significant area.
Clogged Gate Openings
Gate openings clog when product residue — especially from fertilizers that contain fine dust or from products applied in damp conditions — builds up around the edges of the opening, gradually narrowing the gap. The result is a progressively lower application rate as the pass continues. Cleaning the gate mechanism thoroughly after each use prevents this buildup from hardening, but if you’re dealing with an already-clogged gate, a stiff brush and warm water usually clear it. Avoid using metal scrapers that can gouge the plastic and create rough edges where future clogs will form even more easily.
Spinner Plate Not Turning
On broadcast spreaders, the spinner plate that flings material outward is driven by the wheels through a gearbox. If the spinner stops turning while the wheels are moving, the issue is usually in the gearbox — stripped plastic gears, a broken drive pin, or debris jamming the mechanism. Enclosed gearboxes are less prone to this than exposed ones, but both can fail. Disassemble the gearbox (following the manufacturer’s instructions), clean out any debris, and inspect the gears for damage. Replacement gear kits are available for most major spreader brands and cost far less than a new spreader.
Wheel Slippage on Wet Grass
Pneumatic tires provide better traction than hard plastic wheels, but even they can slip on wet or steep terrain, causing the spinner to slow or stop momentarily and creating an uneven application. If wheel slippage is a recurring problem, try reducing the hopper load — a full hopper weighs more and increases the likelihood of wheel spin. On slopes, consider spreading across the slope rather than up and down it, which improves traction and also reduces the effect of gravity on your walking pace.
Post-Spreading Watering Schedule: What to Do Immediately After Application
What happens in the hours and days after spreading is just as important as the spreading itself. Different products require different post-application watering approaches, and getting this wrong can undo the work of a perfectly calibrated spreader pass.
Watering After Seeding
Newly spread grass seed needs consistent, light moisture to germinate — but not so much that the seed washes away or pools in low spots. The goal is to keep the top half-inch of soil consistently damp without creating standing water. This typically means watering lightly two to three times per day for the first two weeks, adjusting based on weather. A heavy, single daily watering can saturate the soil and cause seed to rot before germination; frequent, light watering keeps the seed hydrated without drowning it. A spreader-applied mulch or straw layer over the seed helps retain moisture and reduces the number of daily waterings needed.
Watering After Fertilizer Application
Most granular fertilizers need to be watered in within 24 to 48 hours of application to begin releasing nutrients into the soil. The standard recommendation is to apply about a quarter to a half inch of water — enough to dissolve the granules and carry the nutrients into the root zone, but not so much that they’re pushed past the root zone where they’re no longer accessible to the grass. If rain is forecast within a day of your fertilizer application, you can often skip the manual watering entirely and let nature handle it, which is one reason experienced lawn owners watch the weather forecast closely when planning fertilizer applications.
Watering After Herbicide or Insecticide Application
Granular weed control products often specify whether they need to be watered in or left dry on the leaf surface — and the instructions vary by product. Some pre-emergent herbicides need water to move the active ingredient into the soil where weed seeds are germinating; some post-emergent weed-and-feed products need to sit on weed leaves for a period before watering to allow foliar absorption. Read the specific product label every time, because assuming the watering instructions from your fertilizer apply to your herbicide is a common way to reduce or eliminate the herbicide’s effectiveness.
Watering After Lime Application
Pelletized lime benefits from watering after application, as moisture helps the pellets break down and begin integrating into the soil. However, lime works slowly — over weeks and months rather than days — so the urgency of immediate watering is lower than with fertilizer. A normal rainfall or irrigation cycle within a few days of application is generally sufficient to start the breakdown process.
Environmental Considerations: Runoff, Drift, and Responsible Spreading
Spreading seed, fertilizer, and lawn chemicals carries environmental responsibilities that go beyond achieving a green lawn. Understanding how products move through the environment after they leave your spreader helps you apply them in ways that benefit your lawn without unintended consequences downstream.
Nutrient Runoff and Water Quality
Fertilizer that lands on pavement instead of grass doesn’t stay there — rain washes it into storm drains, which typically lead directly to local streams, rivers, and lakes without treatment. Once in the water, the same nitrogen and phosphorus that feed your grass feed algae, contributing to blooms that deplete oxygen and harm aquatic life. The simple act of sweeping or blowing fertilizer granules off driveways and sidewalks immediately after spreading — rather than hosing them off — prevents a significant amount of nutrient pollution. Similarly, spreading fertilizer on frozen ground or immediately before a heavy rain increases runoff risk because the nutrients can’t absorb into frozen soil and heavy rain moves them off the lawn before they can infiltrate.
Drift and Neighboring Properties
Broadcast spreaders on windy days can send seed, fertilizer, or herbicide granules well beyond your property line. Fine grass seed is especially prone to wind drift — Kentucky bluegrass and Bermuda grass seed in particular can travel surprising distances in a breeze. Beyond the waste of product, drifting herbicides can damage or kill neighboring plants that weren’t intended as targets, and drifting fertilizer can create awkward situations with neighbors whose landscaping preferences differ from yours. Calm days are always better for spreading, and if wind is unavoidable, a drop spreader eliminates drift concerns entirely at the cost of slower coverage.
Buffer Zones Near Water Features
If your property includes a pond, stream, or drainage ditch, maintaining an unfertilized buffer zone of at least 10 to 15 feet from the water’s edge is a widely recommended practice that prevents direct nutrient loading into the water. A drop spreader makes it easy to stop applications precisely at the buffer edge; a broadcast spreader requires more care and often a deflector shield to keep product out of the water. The buffer zone itself can be planted with native grasses or groundcovers that don’t require fertilization and that help filter runoff before it reaches the water.
Integrated Pest Management and Reduced Chemical Use
The best environmental approach to lawn chemicals is using as little as necessary to achieve your goals, which circles back to spreader calibration. A precisely calibrated spreader applying exactly the recommended rate of fertilizer, herbicide, or insecticide uses less total product over a season than an uncalibrated spreader that over-applies — and costs less to operate. Soil testing before fertilizing and targeted spot treatments for weeds and pests rather than blanket applications further reduce the total chemical load on your property and the surrounding environment.
DIY vs. Professional Lawn Service: When a Spreader Pays for Itself
One of the most common calculations homeowners make when considering a spreader purchase is whether doing it themselves actually saves money compared to hiring a lawn care service. The answer depends on lawn size, how many applications you run per year, and which products you use — but the math often tilts in favor of DIY ownership faster than people expect.
Cost Breakdown: DIY vs. Service
| Lawn Size | Typical Annual Service Cost | DIY Annual Cost (Products Only) | Spreader Payback Period |
|---|---|---|---|
| 1/4 acre | $300–$500 | $80–$150 | 1 season with a $60–$100 spreader |
| 1/2 acre | $500–$800 | $150–$250 | 1 season with a $100–$200 spreader |
| 1 acre | $800–$1,500 | $250–$450 | Less than 1 season with a $200–$400 spreader |
| 2+ acres | $1,500–$3,000+ | $400–$800 | Often within the first application cycle |
These numbers assume a full-season program of four to six applications (spring fertilizer, pre-emergent, summer feeding, fall overseeding, winterizer) and don’t include the value of your time. If you enjoy lawn work and treat it as a weekend activity rather than a chore, the time cost is effectively zero in financial terms. If you’d rather spend those weekend hours doing anything else, the convenience of a service may be worth the premium.
What Professional Services Offer That DIY Can’t Easily Replicate
Professional lawn care companies have access to commercial-grade products that aren’t available to homeowners, including certain herbicide formulations and slow-release fertilizer technologies. They also bring experience calibrating equipment across hundreds of lawns, which translates to fewer calibration errors than a homeowner still learning their spreader’s quirks. For homeowners with complex lawn issues — persistent disease problems, difficult soil conditions, or invasive weeds that resist common treatments — a professional’s diagnostic ability can justify the service cost on its own.
What DIY Offers That Services Can’t
When you spread your own products, you control exactly what goes onto your lawn and when. Organic-only homeowners, for instance, may struggle to find a lawn service that uses exclusively organic products at a reasonable price. DIY also allows for precise timing around weather windows — if a rain-free 48-hour window opens unexpectedly, you can spread that day rather than waiting for the service’s next scheduled visit. And for homeowners who split their lawn care between DIY and professional (handling fertilizer and seed themselves while contracting out pest control or aeration, for example), owning a spreader for the DIY portions still pays for itself quickly.
Spreader Cost Breakdown
Spreader prices span a wide range, from under thirty dollars for a basic handheld crank unit to several hundred dollars for a commercial-grade tow-behind or ATV-mounted model. Understanding where that money goes — and where it’s worth spending more — helps avoid both overpaying for features you won’t use and underpaying for a build quality that will fail within a season or two.
| Spreader Category | Typical Price Range | What Drives the Price |
|---|---|---|
| Handheld crank spreader | $15–$40 | Hopper size, plastic vs. reinforced construction |
| Backpack spreader | $60–$150 | Capacity, manual vs. battery-powered spinner |
| Basic push spreader (25–50 lb) | $40–$100 | Frame material, wheel type, gate precision |
| Mid-size push spreader (60–100 lb) | $90–$220 | Gearbox quality, pneumatic tires, agitator design |
| Commercial-grade push spreader | $200–$400 | Stainless steel frame, sealed gearbox, pro-grade durability |
| Tow-behind spreader (budget) | $100–$200 | Plastic vs. metal frame, hopper size |
| Tow-behind spreader (premium) | $200–$450 | Universal hitch, larger capacity, tire quality |
| Tow-behind combination aerator/spreader | $300–$600 | Added aeration tines and weight tray hardware |
| ATV/UTV electric spreader | $300–$700+ | Electric spread control, mount hardware, hopper size |
Where It’s Worth Paying More
The gearbox and agitator are the two components most worth paying for. A sealed, enclosed gearbox keeps grit, fertilizer dust, and moisture away from the gears that drive the spinning disc or agitator bar, and this is the single most common failure point on cheap spreaders — once those gears strip or seize from unprotected exposure, the spreader is effectively junk. Pneumatic tires are the second upgrade worth prioritizing if your lawn has any slope or uneven ground, since they keep your walking pace steady in a way hard plastic wheels can’t, and a steady pace is what keeps your calibrated application rate accurate.
Where You Can Save Without Sacrificing Much
Hopper material — polyethylene versus a fancier composite — makes little practical difference as long as the plastic is UV-stabilized and doesn’t turn brittle after a season in the sun. Cosmetic features like colored frames, branded decals, or app-connected “smart” spreader gimmicks add cost without adding function for the vast majority of residential users. If your budget is tight, put the money into the gearbox and tires and accept a plainer-looking frame.
Hidden Costs Beyond the Spreader Itself
The spreader purchase price is only part of the real cost of a lawn care routine. Seed, fertilizer, and lime add up over a season, and a poorly calibrated or leaky spreader effectively raises those costs by wasting product on every application. Factoring in a few seasons of product waste from a bargain-bin spreader against the higher upfront cost of a well-built mid-tier model often tips the math in favor of spending more initially.
Renting vs. Buying a Spreader
Not every homeowner needs to own a spreader outright, and for some situations — a one-time lawn renovation, an unusually large area treated only once a year, or a specialty tow-behind aerator-spreader combo used only during fall overseeding — renting can make more financial sense than buying.
When Renting Makes Sense
If you’re only spreading seed or fertilizer once or twice a year on a small to medium lawn, a rental from a local hardware store or equipment rental center can cost less over a season than buying and storing a spreader you’ll use for twenty minutes twice a year. This is especially true for larger, pricier equipment like tow-behind aerator-spreader combos or ATV-mounted units, where the purchase price is high enough that infrequent use makes ownership hard to justify. Renting also lets you try a specific model or capacity before committing to a purchase, which is useful if you’re unsure whether your lawn genuinely needs tow-behind capacity or would be fine with a push spreader.
When Buying Makes Sense
If you’re running a full seasonal lawn care rotation — spring fertilizer, summer grub control, fall overseeding, and winter ice melt — the frequency of use quickly outweighs the rental math, and owning a spreader you can grab on short notice (rather than scheduling around a rental center’s hours and availability) becomes a real convenience. Ownership also means the spreader is already calibrated to your habits and stored where you can access it immediately when a weather window opens for spreading, rather than losing that window to a rental pickup trip.
Cost Comparison Over a Season
| Usage Pattern | Typical Rental Cost | Better Option |
|---|---|---|
| One-time seeding project | $20–$40 for a day rental | Renting, unless you’ll reuse it seasonally |
| Twice-yearly fertilizer application | $40–$80/year in rentals | Buying a basic push spreader ($50–$100) pays off within 1–2 years |
| Full seasonal lawn care rotation | $150–$250/year in rentals | Buying almost always cheaper within the first year |
| Annual fall aeration + overseeding | $50–$100 per rental session | Renting is often fine if this is the only large-scale need |
What to Check Before Renting
Ask whether the rental unit has been cleaned and calibrated recently, since a poorly maintained rental spreader carries over the same gate-drift and clogging problems as a poorly maintained owned one. It’s also worth confirming the rental center’s cutoff for hopper capacity and whether the spreader is broadcast or drop style, since showing up expecting a wide-throw broadcast unit and getting a narrow drop spreader (or vice versa) can throw off your time estimate for the job.
A Middle Ground: Shared Ownership
For neighbors or small groups of homeowners with similar-sized lots and similar lawn care schedules, splitting the cost of a mid-tier spreader and sharing it can capture most of the convenience of ownership at a fraction of the individual cost — as long as everyone agrees on a cleaning routine so the unit doesn’t get handed off with dried fertilizer residue clogging the gate for the next person.
Maintenance & Storage
Spreaders take a beating from fertilizer salts and moisture, both of which corrode metal gears and frames if left unaddressed. Rinsing the hopper and agitator with water after every use — even a quick hose-down — prevents the buildup that eventually seizes the mechanism. Our detailed guide on how to clean a lawn spreader covers the full process, including how to clear a clogged gate opening without damaging the calibration mechanism.
For long-term storage, keep the spreader somewhere dry, ideally with the hopper propped slightly open so residual moisture can evaporate rather than sit against metal components. A light coat of dry lubricant on the gearbox before winter storage goes a long way toward preventing rust from seizing it shut by spring.
Spreader Repair and Parts Replacement: Fixing Instead of Replacing
When a spreader stops working properly, the default assumption is often that it’s time to buy a new one. But many common spreader failures are repairable with replacement parts that cost a fraction of a new unit. Knowing which parts are worth replacing and which signal the end of a spreader’s useful life saves money and keeps functional equipment out of the landfill.
Commonly Replaced Parts
Gearbox assemblies: The gearbox is the heart of a broadcast spreader, converting wheel rotation into spinner disc movement. On many mid-range and premium spreaders, the gearbox is available as a replacement part and can be swapped out with basic hand tools. If your spreader was expensive and the frame and hopper are still in good condition, a gearbox replacement extends its life by several seasons for roughly 30 to 50 percent of the cost of a new unit.
Spinner plates and impellers: The disc that flings material outward can become bent, cracked, or worn over time, particularly if the spreader has been used for heavy materials like pelletized lime or ice melt. A warped spinner plate produces an uneven throw pattern even if everything else is working correctly. Replacement plates are inexpensive and easy to install on most models.
Wheels and tires: Pneumatic tires eventually need replacement tubes or entire tire assemblies. Plastic wheels can crack at the hub or wear down their tread, especially on rough or paved surfaces. Replacement wheels are widely available and typically cost $15 to $40 per pair.
Gate linkages and control cables: The mechanical connection between the control lever and the gate opening can stretch, corrode, or break. Replacement cables and linkage kits restore smooth gate operation and are usually model-specific but readily available for major brands.
Agitator pins and bars: The agitator that keeps product flowing inside the hopper is subject to constant friction from granular materials. Agitator pins wear down or break off over time, especially in spreaders used heavily for coarse materials. Replacement agitator assemblies are available for most models and dramatically improve flow consistency when the original has worn.
When Repair Doesn’t Make Sense
If the hopper itself is cracked, the frame is bent or rusted through, or multiple major components have failed simultaneously, the cumulative repair cost can approach or exceed the price of a new spreader. Budget spreaders under $50 are rarely worth repairing because the replacement parts often cost nearly as much as a new unit. In these cases, recycling the metal components and replacing the spreader is the more practical choice.
Finding Replacement Parts
Manufacturer websites, Amazon, and specialty lawn equipment parts retailers carry replacement components for most major spreader brands. The model number is usually printed on a sticker on the hopper or frame, and having that number ready when searching for parts ensures you get the correct fit. Some older or discontinued models may require searching for used parts or compatible substitutes, but for current-production models from EarthWay, Agri-Fab, Brinly, Chapin, and Lesco, parts availability is generally good.
Common Mistakes to Avoid
- Skipping calibration entirely — using a “close enough” setting is the single biggest cause of striping and burn spots.
- Spreading on windy days — light seed and fine fertilizer drift off target, wasting product and creating uneven coverage.
- Walking too fast — a rushed pass throws off the calibrated application rate, especially on broadcast models.
- Ignoring the agitator — a jammed or worn agitator causes clumping mid-hopper, leading to bursts of over-application.
- Storing with product still in the hopper — leftover fertilizer or seed absorbs moisture and corrodes the mechanism over time.
- Using the same setting for different products — seed, fertilizer, and lime each need their own calibrated setting; assuming one setting works for everything is a fast track to uneven results.
- Overfilling the hopper — a hopper filled to the brim is heavier to push or tow and more prone to spillage over bumps; filling to about 80 percent capacity is more manageable.
- Neglecting to sweep hard surfaces — fertilizer granules left on driveways and sidewalks wash into storm drains and contribute to water pollution; a quick sweep after spreading is both neighborly and environmentally responsible.
- Spreading frozen or crusted product — fertilizer or seed that’s been stored improperly and has absorbed moisture will clump and spread unevenly; always check product consistency before loading the hopper.
- Assuming the spread width matches the label — manufacturer-stated spread widths assume ideal conditions; actual effective width is often narrower, and assuming otherwise leads to gaps between passes.
Frequently Asked Questions
What’s the difference between a broadcast spreader and a drop spreader?
A broadcast spreader flings material outward in a wide fan pattern for faster coverage, while a drop spreader releases material straight down in a tight, controlled band for more precision near beds and walkways.
How big of a lawn justifies a tow-behind spreader?
Generally, lawns over half an acre benefit most from a tow-behind unit, since the time saved compared to pushing a spreader adds up quickly on larger properties.
Can I use the same spreader for seed, fertilizer, and lime?
Yes, most broadcast and drop spreaders can handle all three, but each material requires a different calibration setting since particle size and density vary significantly.
Why does my spreader leave visible stripes in the lawn?
Stripes usually come from inconsistent overlap between passes. Using the border-and-fill method or a criss-cross pattern helps eliminate gaps and double-coverage strips.
Should I spread grass seed in the morning or evening?
Either works, but calm conditions matter more than time of day — avoid spreading during windy periods regardless of morning or evening timing.
How often should I clean my spreader?
Rinse it after every use if you’re applying fertilizer, since fertilizer salts are corrosive and will damage metal components if left to sit.
Do electric ATV-mounted spreaders work for residential lawns?
They can, but they’re generally overkill unless you’re managing a large rural property, food plot, or acreage where a push or tow-behind spreader would take too long.
What capacity spreader do I need for a quarter-acre lawn?
A push spreader in the 50 to 80 lb range is typically sufficient for a quarter-acre lawn without needing multiple refills.
Is a pneumatic-tire spreader worth the extra cost?
Yes, especially on uneven or hilly lawns — pneumatic tires roll more smoothly and maintain a steadier walking pace, which directly affects application consistency.
Can I overseed and fertilize in the same pass?
It’s possible with a starter fertilizer blended for new seed, but running separate passes at properly calibrated settings for each product generally gives more even, predictable results.
How do I know if my soil needs lime before I spread it?
The only reliable way is a soil pH test. Guessing leads to either unnecessary lime application or insufficient correction of genuinely acidic soil. County extension offices and commercial labs offer affordable soil testing.
Can I spread grass seed over snow?
This practice, sometimes called “dormant seeding” or “frost seeding,” can work for some cool-season grasses in late winter when the ground is frozen but snow cover is light and melting cycles are beginning. However, results are less predictable than fall seeding, and seed loss to birds and runoff is higher. A properly timed fall seeding through a calibrated spreader is almost always more reliable.
Why is my spreader throwing more material to one side than the other?
An asymmetric spread pattern usually indicates a bent spinner plate, a clogged gate opening on one side, or the spreader not being held level during use. Check the spinner plate for damage first, clean the gate openings thoroughly, and make sure you’re pushing or towing the spreader on level ground without tilting it.
How long does grass seed last in the bag, and does old seed affect spreader performance?
Grass seed viability declines over time — most seed stays viable for 2 to 3 years if stored cool and dry, but germination rates drop each year. Old seed that’s absorbed moisture may clump and flow poorly through a spreader. If your seed is more than two years old, consider a germination test (sprouting a sample on a damp paper towel) before loading it into your spreader and expecting good results.
Final Verdict
For most suburban lawns, the EarthWay 2050P strikes the best balance of reliability, calibration accuracy, and price. Larger properties are better served by a tow-behind model like the Brinly BS36BH-A, while anyone managing rural acreage should look at the ATV-mounted Buyers Products spreader. Whichever you choose, calibration and technique matter just as much as the hardware itself — dial in your settings, walk a consistent pattern, and rinse the hopper after every use.
Remember that a spreader is only one piece of a successful lawn care system. The right seed for your climate and grass type, a soil test that tells you what amendments are actually needed, and consistent post-application watering all contribute to results that go far beyond what any spreader alone can deliver. Invest in the tool, but invest equally in understanding how to use it — the combination of good equipment and good technique is what separates a lawn that looks fine from one that looks intentional.
Shop the EarthWay 2050P on Amazon