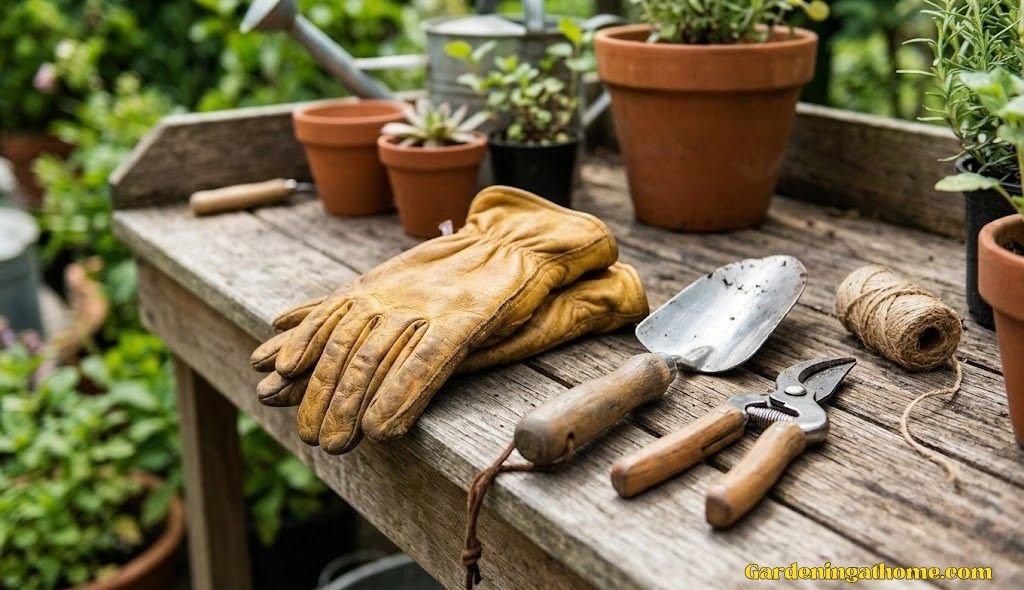
The Right Way to Clean Leather Gardening Gloves (Without Ruining Them)
A complete, no-guesswork guide to washing, drying, and conditioning your leather gloves so they stay soft, strong, and ready for the next season in the dirt.
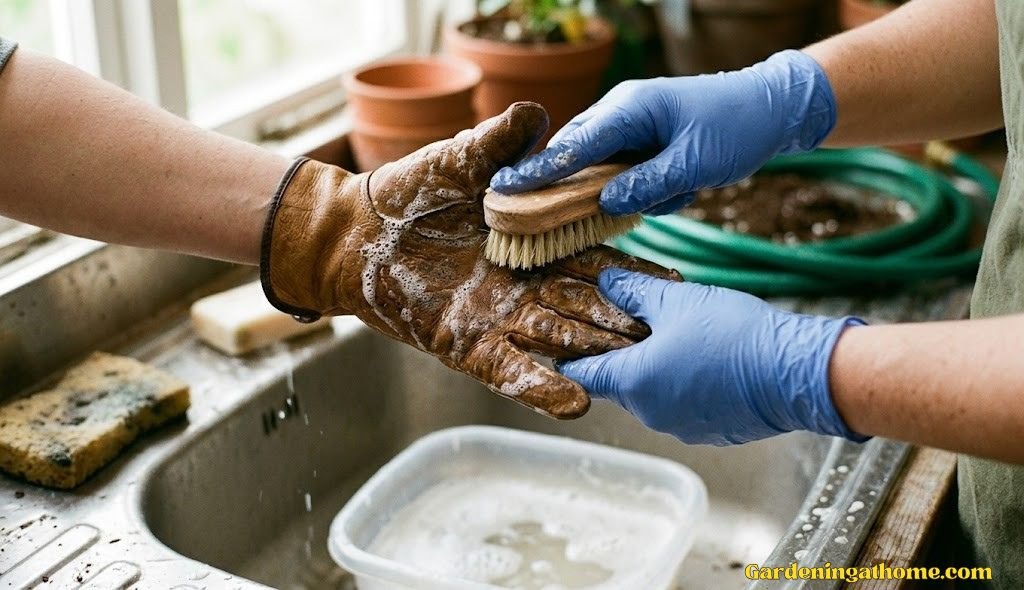
A gentle brush, mild soap, and a little patience is all real leather needs.
Why Leather Gardening Gloves Deserve a Little Extra Care
Leather gardening gloves are one of those tools people buy once and expect to last for years — and they can, but only if they’re treated like the natural material they are. Unlike synthetic or cotton gloves that you can toss in the wash without a second thought, leather is skin. It was once part of a living animal, and it behaves the way skin behaves: it absorbs moisture, it dries out, it cracks under stress, and it needs to be replenished with natural oils to stay flexible. Clean them the wrong way even once, and you can undo years of careful use in a single afternoon.
This matters more for gardeners than almost anyone else, because gardening gloves are subjected to a punishing combination of dirt, sweat, sap, fertilizer residue, and repeated wetting and drying cycles. A pair of leather gardening gloves that costs more upfront than a disposable pair is only a good investment if you actually maintain them. The good news is that maintaining leather gloves isn’t complicated. It just requires a different mindset than washing a cotton t-shirt — slower, gentler, and more deliberate.
Think about what your gloves go through in a single gardening session. You’re kneeling in damp soil, gripping thorny rose canes, pulling weeds with wet roots, and handling everything from compost to fertilizer. All of that grime works its way into the grain of the leather. Left uncleaned, dirt particles act like sandpaper every time you flex your hand, slowly abrading the fibers from the inside. Cleaning isn’t just about appearance — it’s what keeps the leather structurally sound.
There’s also a comfort argument. Stiff, dirty leather gloves lose their flexibility, which means less dexterity when you’re doing delicate work like transplanting seedlings or pruning. A properly cleaned and conditioned glove moves with your hand instead of against it. That difference becomes obvious the first time you put on a pair that’s been cared for versus one that’s been neglected for two seasons.
Throughout this guide, we’ll walk through everything from quick between-use wipe-downs to full hand washing, tough stain removal, proper drying, and the conditioning step that most people skip — even though it’s arguably the most important part of the entire process.
It’s also worth setting expectations before diving in: leather care isn’t a one-time fix. It’s a habit, similar to sharpening pruning shears or oiling a wooden tool handle. The gardeners who get the most life out of their gloves aren’t necessarily buying the most expensive pair — they’re the ones who build a light, consistent maintenance routine into their gardening schedule rather than waiting until the gloves are visibly falling apart. That mindset shift is really the foundation everything else in this guide builds on.
Know Your Leather Type Before You Clean Anything
Not all leather gardening gloves are made the same way, and the cleaning method that works beautifully on one type can quietly ruin another. Before you reach for soap and water, take a minute to figure out exactly what you’re working with.
Full-Grain Leather
This is the toughest and most water-resistant type you’ll find in gardening gloves, typically used on palms and fingers that need serious puncture resistance for handling thorny plants or rough branches. Full-grain leather has a tight, smooth surface that tolerates a damp cloth wipe-down very well, though it still shouldn’t be soaked.
Top-Grain Leather
Slightly thinner and more flexible than full-grain, top-grain leather is sanded and finished to remove imperfections. It’s common on mid-range gloves because it balances durability with a softer feel. It handles light washing reasonably well but dries out faster than full-grain if you skip conditioning.
Suede or Split Leather
Suede is the underside of the hide, and it has a soft, napped texture. It is far more absorbent than smooth leather, which means it stains more easily and takes noticeably longer to dry. Suede gloves should never be soaked and generally respond better to brushing than to washing.
Leather-Palm Combination Gloves
Many gardening gloves pair a leather palm with a fabric or knit back for breathability. These require a hybrid approach — you can be a little more generous with water on the fabric portion, but the leather palm still needs the gentler treatment described in this guide.
| Leather Type | Water Tolerance | Best Cleaning Method | Drying Time |
|---|---|---|---|
| Full-Grain | Moderate | Damp cloth wipe-down | Fast (2–4 hrs) |
| Top-Grain | Moderate | Light hand wash | Moderate (4–6 hrs) |
| Suede/Split | Low | Dry brushing, spot clean only | Slow (8–12 hrs) |
| Leather-Palm Combo | High (fabric back), Low (palm) | Hybrid wash | Moderate (4–8 hrs) |
If you’re not sure what you have, check the manufacturer’s tag or the original product listing. When in doubt, treat the gloves as suede — it’s the more conservative assumption and won’t cause damage even if the leather turns out to be sturdier than expected.

Not Sure Your Current Gloves Are Worth Saving?
Browse our top-rated leather gardening gloves and start fresh with a pair built to last.
Shop Leather Gardening GlovesSigns Your Leather Gloves Are Overdue for a Clean
Most gardeners wait too long to clean their gloves simply because leather doesn’t show dirt the way fabric does. A grubby cotton glove looks obviously dirty; a grubby leather glove often just looks “worn in.” Here’s what to actually watch for.
- Stiffness when flexing your fingers. If your gloves feel noticeably harder to close into a fist than they did when new, dried sweat and soil have likely built up in the fibers.
- A faint sour or musty smell. This is a sign of trapped moisture and bacteria, usually from being put away damp after a session.
- Visible dirt caked into seams and creases. Especially around the knuckles, where the leather flexes most and traps particles.
- Discoloration or dark patches. Sweat and soil oils can darken leather unevenly over time, which cleaning and conditioning can often even out.
- Sap or resin residue that feels tacky. Common after pruning or handling certain shrubs, and it only gets harder to remove the longer it sits.
- Surface cracking, especially at the knuckle bend points. This is a later-stage warning sign that the leather has dried out and needs conditioning urgently, not just cleaning.
As a general rule of thumb, a light wipe-down after every few uses and a deeper clean every four to six weeks during active gardening season will keep most of these issues from ever becoming serious.
What You’ll Need Before You Start
Gathering everything ahead of time keeps the process quick and prevents you from reaching for something harsh mid-clean because it’s what’s closest at hand.
| Supply | Purpose | Notes |
|---|---|---|
| Soft-bristle brush | Removing dry dirt before wet cleaning | A dedicated nail brush or shoe brush works well |
| Mild soap (saddle soap or gentle dish soap) | Cleaning without stripping natural oils | Avoid anything with bleach or strong degreasers |
| Microfiber or soft cotton cloth | Wiping and buffing | Old t-shirt scraps work fine |
| Lukewarm water in a bowl | Diluting soap and rinsing | Never hot water — it accelerates drying and cracking |
| Leather conditioner or natural oil | Restoring flexibility after cleaning | Mink oil, neatsfoot oil, or a dedicated leather balm |
| Old towel | Blotting excess moisture | Never wring the gloves |
If you’re building a small glove-care kit for the season, it’s worth grabbing a proper leather conditioner rather than improvising with kitchen oils, which can go rancid or darken the leather unpredictably. A dedicated product is formulated to absorb evenly and won’t leave a greasy film on your palms.
Method 1: The Everyday Wipe-Down (Do This Every Few Uses)
This is the fastest maintenance habit you can build, and it prevents the vast majority of deep cleaning from ever being necessary. It takes under five minutes and should become as routine as rinsing your trowel.
Step 1: Knock Off Loose Dirt
Before any moisture touches the gloves, turn them over and tap them together firmly, or use the soft brush to sweep away loose soil and debris. Doing this dry prevents you from grinding dry particles into the leather once it’s damp.
Step 2: Lightly Dampen a Cloth
Wet your cloth with lukewarm water and wring it out until it’s just damp, not dripping. Excess water sitting on the surface is what leads to water spots and stiffening later, so less is genuinely more here.
Step 3: Wipe With the Grain
Wipe in one consistent direction rather than scrubbing in circles, following the natural grain lines of the leather. This lifts dirt without forcing it deeper into the pores, and it’s gentler on the surface finish.
Step 4: Air Dry Completely Before Storing
Never put gloves away while they’re even slightly damp. Lay them flat, palm up, somewhere with good airflow and out of direct sun until fully dry to the touch, inside and out.
Do this consistently and you’ll rarely need to move on to a full hand wash — but when you do, the next section walks through it in detail.
Method 2: Deep Hand Washing (For Heavier Buildup)
When wiping alone isn’t cutting it — usually every four to six weeks of regular use — a proper hand wash resets the leather without the damage that a washing machine can cause. This is more involved than the wipe-down, but it’s still gentle if you follow the order below.
Step 1: Mix a Mild Soap Solution
Combine a small amount of gentle dish soap or saddle soap with lukewarm water until it’s just barely sudsy. You want a light solution, not a thick lather — too much soap residue is difficult to rinse out and can leave leather feeling gummy once dry.
Step 2: Apply With a Soft Cloth, Never Submerge
Dip your cloth into the solution, wring it out well, and work it over the surface of the glove in small sections. Full submersion is one of the most common mistakes — it saturates the fibers and leads to shrinking, warping, and a much longer, riskier drying process.
Step 3: Rinse With a Fresh, Barely-Damp Cloth
Switch to a second cloth dampened with plain lukewarm water and go back over the same sections to lift away soap residue. Leftover soap left to dry on the leather can cause dull patches and stiffness later.
Step 4: Blot, Don’t Wring
Press a dry towel against the leather to absorb surface moisture. Wringing or twisting leather gloves — even gently — stresses the fibers and creates permanent creasing.

Keep the Leather Soft After Every Wash
A quality leather conditioner replenishes the oils that washing removes — this one is a gardener favorite.
Shop Leather ConditionersRemoving Tough Stains: Sap, Rust, Soil, and Grass
Gardening produces a specific lineup of stains that regular soap and water won’t fully lift. Each one needs a slightly different approach, and treating them the wrong way can set the stain permanently or damage the leather’s finish.
Step 1: Treat Sap and Resin While Still Fresh
Sap hardens quickly, so speed matters. Dab a small amount of rubbing alcohol onto a cotton swab — never pour it directly onto the glove — and gently work it into the sticky area until it lifts. Follow immediately with a clean, water-dampened cloth to remove any alcohol residue, since alcohol left on leather too long can dry it out.
Step 2: Lift Rust and Metal Stains With a Vinegar Solution
Mix equal parts water and white vinegar, dab it onto the rust mark with a cloth, and let it sit for one to two minutes before wiping clean. Rinse the area afterward with plain water to neutralize the acidity, since leaving vinegar on leather too long can affect its color.
Step 3: Lift Dried Soil and Mud With a Soft Brush First
Let mud dry completely rather than trying to wipe it while wet, which just smears it deeper into the grain. Once dry, brush it off, then follow with the standard damp-cloth wipe-down from Method 1.
Step 4: Treat Grass Stains With Diluted Soap and a Gentle Scrub
Grass stains contain plant pigment (chlorophyll) that can bind to the leather’s surface. A slightly stronger — but still diluted — soap solution applied with light circular motions on just the stained spot, followed by a clean rinse, typically lifts most of it without needing anything harsher.
| Stain Type | Recommended Treatment | Avoid |
|---|---|---|
| Sap / Resin | Rubbing alcohol on a swab, spot-treated | Soaking the whole glove in alcohol |
| Rust | Diluted white vinegar, rinsed after | Leaving vinegar on for extended periods |
| Dried Mud / Soil | Brush off dry, then damp wipe | Wiping while still wet |
| Grass | Diluted soap, gentle circular motion | Bleach-based stain removers |
| Fertilizer Residue | Damp cloth, rinse thoroughly | Letting it sit for multiple sessions |
Drying Leather Gloves the Right Way
Drying is where a lot of otherwise careful cleaning gets undone. Leather dries unevenly if it’s rushed, and heat is the single biggest enemy of flexible, crack-free leather.
Step 1: Reshape the Gloves While Still Damp
Gently push the fingers back into their natural shape and smooth out any folds before you set the gloves down to dry. Leather holds whatever shape it dries in, so this step prevents permanently creased knuckles or flattened fingertips.
Step 2: Stuff Lightly With Paper Towel or a Clean Cloth
Loosely stuffing the fingers and palm with absorbent paper helps the gloves hold their shape and speeds up drying from the inside, where trapped moisture lingers longest. Don’t pack it in tightly — you want airflow, not compression.
Step 3: Air Dry Away From Direct Heat and Sunlight
Place the gloves flat or draped over a rounded object in a well-ventilated room at normal room temperature. Radiators, heaters, hair dryers, and direct sun all cause leather to dry too fast, which is what leads to that stiff, cardboard-like texture and eventual cracking.
Step 4: Wait the Full Dry Time Before Wearing
Depending on the leather type and humidity, full drying can take anywhere from four to twelve hours. Check the inside lining too — it’s common for the outer surface to feel dry while moisture is still trapped inside, especially in leather-palm combination gloves.
Conditioning: The Step Most People Skip (and Shouldn’t)
Cleaning removes dirt, but it also removes some of the natural oils that keep leather supple. Conditioning replaces those oils, and it’s the single biggest factor in whether your gloves last two seasons or ten.
Step 1: Confirm the Gloves Are Fully Dry
Conditioning damp leather traps moisture beneath the product layer, which can lead to mildew. Always wait until the gloves are completely dry, inside and out, before applying anything.
Step 2: Apply a Small Amount of Conditioner With a Soft Cloth
Work a dime-sized amount into the leather using small circular motions, focusing on high-flex areas like the knuckles and finger joints where cracking typically starts first. A little goes a long way — over-applying can leave the surface feeling greasy and attract more dirt.
Step 3: Let the Conditioner Absorb Fully
Leave the gloves untouched for at least thirty minutes to a few hours, depending on the product’s instructions, so the oils have time to penetrate rather than just sit on the surface.
Step 4: Buff Away Any Excess
Once absorbed, buff the surface gently with a dry cloth to remove any residue left on top. This restores a natural sheen without leaving the gloves feeling oily to the touch.
How often you condition depends on how frequently you garden. As a general guideline, once every four to eight weeks during heavy use, or any time you notice the leather starting to feel dry or stiff, is a reasonable schedule to follow.

Build Your Glove-Care Kit
A dedicated soft-bristle brush makes the wipe-down and stain removal steps faster and safer for the leather.
Shop Cleaning BrushesCan You Machine Wash Leather Gardening Gloves?
This is one of the most common questions gardeners ask, and the honest answer is: it depends heavily on what your gloves are actually made of. There’s a popular gardening video that’s circulated widely showing a quick, low-heat delicates cycle used to freshen up gardening gloves between uses:
That approach works reasonably well for gardening gloves made primarily of cotton, canvas, or synthetic fabric with light leather-look accents. But for gloves made of genuine full-grain, top-grain, or suede leather, a washing machine — even on a gentle cold cycle — is generally too aggressive. The tumbling action bends and twists the leather repeatedly while wet, which is exactly the stress that leads to cracking, warping, and a hardened texture once dry. Genuine leather also tends to shrink slightly and lose its shape faster in a machine than with hand cleaning.
If you’re working with true leather gardening gloves rather than fabric ones, the hand washing method covered earlier in this guide gives you nearly all the same freshening benefit with far less risk. If your gloves are a hybrid — leather palm, fabric back — you can safely machine wash the fabric portions are exposed only if the leather sections are protected, but in practice this is difficult to control in a standard wash cycle, so hand cleaning remains the safer default for anything with real leather in it.
| Approach | Best For | Risk to Genuine Leather |
|---|---|---|
| Machine wash (delicate, cold) | Cotton, canvas, synthetic gloves | High |
| Hand wash (as described above) | Full-grain, top-grain, suede leather | Low, if done gently |
| Damp cloth wipe-down | All glove types, routine maintenance | Very low |
Common Mistakes That Ruin Leather Gloves
Mistakes to Avoid
- Soaking gloves fully in water instead of spot cleaning
- Drying them near a heater, radiator, or in direct sunlight
- Using harsh detergents, bleach, or heavily scented soaps
- Skipping conditioner after every wash
- Storing gloves while still slightly damp
- Scrubbing hard in circular motions instead of following the grain
What Actually Works
- Spot cleaning with a barely-damp cloth
- Air drying at room temperature, away from heat sources
- Mild soap in small, diluted amounts
- Conditioning after every deep clean
- Confirming full dryness before storage
- Wiping gently, with the grain, in one direction
If you take away just one thing from this section, let it be this: leather forgives dirt far more easily than it forgives improper drying. Most of the permanent damage people experience with leather gloves traces back to how they were dried, not how they were cleaned.
Storing Leather Gloves Between Uses
How you store gloves between gardening sessions matters almost as much as how you clean them. Leather kept in the wrong conditions can dry out or develop mildew even without ever being washed.
- Choose a cool, dry spot with airflow. A shed, garage, or mudroom shelf works better than a sealed plastic bin, which traps humidity.
- Avoid direct sunlight for extended storage. UV exposure fades and dries leather even when it’s not actively being worn.
- Keep them loosely shaped, not folded or crumpled. A hook or a flat shelf preserves the natural shape better than a drawer where gloves get squashed under other items.
- Use a small silica gel packet in humid climates. This helps absorb ambient moisture during off-season storage, particularly if you’re putting gloves away for winter.
- Condition before long-term storage. If you won’t be using the gloves for weeks or months, apply conditioner right before storing so the leather doesn’t dry out while sitting unused.
Gardeners who rotate between multiple pairs — say, a heavier thorn-resistant pair for roses and a lighter pair for general weeding — often find it easiest to keep a small designated hook or basket near the garden shed entrance specifically for gloves, which also makes it much more obvious when a pair needs attention.
Reviving Cracked or Stiff Leather Gloves
If your gloves have already gotten stiff or started showing surface cracks, they’re not necessarily beyond saving. Here’s a realistic approach to reviving them, along with an honest sense of when it’s too late.
For Mild Stiffness
A generous conditioning session — applying conditioner, letting it fully absorb, and repeating a second light application the next day — often restores meaningful flexibility. Flex the gloves gently by hand periodically while the conditioner absorbs to help work it into the fibers.
For Surface Cracking
Small surface cracks that haven’t gone through the full thickness of the leather can sometimes be minimized with repeated conditioning treatments over one to two weeks, though the texture will likely never be perfectly smooth again. This is a case where prevention through regular conditioning is far more effective than any after-the-fact fix.
For Deep Cracks or Structural Damage
Once cracks go through the leather or seams start separating, conditioning won’t reverse the damage. At this point, the gloves are more of a safety concern than a maintenance project, since thorns, tools, and rough bark can penetrate through the compromised area.
Worth Reviving
- Stiffness without visible cracks
- Minor surface dryness or dullness
- Slight discoloration from sweat or dirt
Time to Replace
- Cracks that go through the leather
- Separated seams or torn stitching
- Thin spots you can see light through
Leather vs. Other Glove Materials
Leather isn’t the right choice for every gardening task, and understanding how it stacks up against alternatives helps you decide whether it’s worth the extra maintenance for your specific needs.
| Material | Durability | Cleaning Effort | Best Use Case |
|---|---|---|---|
| Genuine Leather | Very high (with care) | Moderate to high | Thorny plants, heavy-duty pruning |
| Nitrile-Coated | Moderate | Low (rinse and go) | Wet soil, general weeding, planting |
| Latex | Low | Very low | Light, quick tasks, delicate handling |
| Cotton/Canvas | Moderate | Low (machine washable) | Light general-purpose gardening |
If you’re deciding between coated synthetic options, our detailed breakdown of nitrile vs. latex gardening gloves covers the tradeoffs in far more depth. For anyone specifically dealing with roses, brambles, or other thorny growth, leather remains the more protective option, and our guide to the best gardening gloves for thorny roses can help you pick a pair suited to that job specifically. If you’re weeding for hours at a time, a lighter option might serve you better — see our picks for the best gloves for weeding.
Households with kids helping in the garden should also consider sizing and material separately, since leather gloves rarely come in true kid-friendly sizing — our guide to the best gardening gloves for kids covers more appropriate options for younger hands.

Comparing Your Options?
See our full lineup of top-rated gardening gloves across every material and budget.
Shop All Gardening GlovesWhen to Repair vs. Replace
Leather gloves are repairable more often than people assume. A skilled cobbler or leather repair shop can often re-stitch torn seams, patch small holes, and even replace a worn palm panel while keeping the rest of the glove intact. Whether that’s worth it usually comes down to cost and how attached you are to a broken-in pair that fits exactly right.
| Condition | Recommended Action | Reasoning |
|---|---|---|
| Loose or popped stitching | Repair | Simple, inexpensive fix that restores full function |
| Single small puncture hole | Repair | Patchable without affecting overall fit |
| Widespread deep cracking | Replace | Structural integrity is compromised throughout |
| Thin, worn-through palm | Replace | No longer provides adequate protection |
| Persistent odor after washing | Replace | Often indicates bacteria embedded deep in the fibers |
If you do decide it’s time for a new pair, comparing options by intended use makes the decision easier. Take a look at our overall guide to the best gardening gloves, or, if you’re shopping specifically for leather again, our dedicated roundup of the best leather gardening gloves. Fit differs meaningfully between men’s and women’s hand shapes as well, so it’s worth checking our separate guides for the best gardening gloves for men and the best gardening gloves for women before buying.
A Seasonal Care Calendar for Leather Gardening Gloves
Leather responds differently depending on the season, and building your cleaning routine around the calendar rather than doing everything reactively tends to keep gloves in far better condition long-term. Here’s a general rhythm worth following if you garden through most of the year.
Early Spring: The Reset
This is the point where gloves usually come out of winter storage, and it’s worth giving them a full inspection before the first heavy-use session. Check the seams, flex the fingers to test stiffness, and give them a proper hand wash and conditioning treatment even if they look reasonably clean. Starting the season with fully conditioned leather means less catch-up maintenance once you’re busy with planting.
Late Spring Through Summer: Maintenance Mode
This is peak use season for most gardeners, so a light wipe-down after each significant session and a deeper wash every four to six weeks keeps pace with the dirt, sweat, and sap exposure that builds up quickly during warm months. Summer heat also means gloves dry faster after washing, but resist the temptation to leave them in direct sun to speed things up further, since that dries the leather too aggressively.
Fall: The Wind-Down Clean
As garden tasks slow down, this is a good time for one more thorough hand wash and a generous conditioning session before gloves head into storage for cooler months. Leather that goes into storage already dry, cracked, or under-conditioned tends to come out the following spring in noticeably worse shape.
Winter: Storage and Occasional Checks
Even in storage, it’s worth checking on leather gloves every few weeks during long winter breaks. Flex them gently to prevent the leather from setting into a stiff shape, and if the storage area is particularly dry, a light conditioning touch-up partway through winter can prevent the leather from drying out before spring.
| Season | Primary Task | Frequency |
|---|---|---|
| Early Spring | Full wash + condition + inspection | Once, before heavy use begins |
| Summer | Wipe-downs + periodic deep wash | Wipe after sessions, wash every 4–6 weeks |
| Fall | Thorough wash + heavy conditioning | Once, before storage |
| Winter | Storage checks + light conditioning | Every few weeks |
Leather Glove Care Myths, Debunked
A surprising amount of bad advice circulates around leather care, much of it borrowed from furniture or shoe care where the demands are quite different from gardening gloves that see daily dirt and moisture exposure. Clearing up a few of the most persistent myths can save you from accidentally damaging a good pair of gloves.
Myth: “More conditioner is always better.”
Over-conditioning is just as much of a problem as under-conditioning. Too much product saturates the fibers, leaves a tacky surface that attracts dirt, and can even soften the leather to the point where it loses structural support. A thin, even layer applied at a reasonable frequency is far more effective than a heavy application done rarely.
Myth: “If it’s dirty, soap and water will always fix it.”
Not every stain responds to soap. Sap, rust, and certain plant pigments need targeted treatments, and using soap alone — or worse, scrubbing harder when soap doesn’t work — often spreads the stain rather than removing it.
Myth: “Leather gloves don’t need maintenance if you don’t use them often.”
Leather dries out over time even sitting untouched in storage, particularly in low-humidity climates or heated indoor environments during winter. Infrequent use doesn’t exempt gloves from occasional conditioning.
Myth: “A hair dryer or direct sun is a harmless shortcut for drying.”
As covered earlier in this guide, both introduce heat that dries leather unevenly and too quickly, which is one of the most common causes of premature cracking. There genuinely isn’t a safe shortcut here — air drying at room temperature is slower but produces a far better long-term result.
Myth: “All leather gloves can be treated the same way.”
As covered in the leather types section earlier, full-grain, top-grain, suede, and combination gloves all tolerate moisture and cleaning products differently. Treating a delicate suede glove the same way you’d treat a rugged full-grain work glove is a common cause of avoidable damage.
Frequently Asked Questions
Can I put leather gardening gloves in the washing machine?
It’s not recommended for genuine leather gloves. The tumbling and repeated flexing while wet can cause cracking, shrinking, and warping. Hand washing, as described in this guide, is the safer approach for true leather. Fabric-based gardening gloves with only minor leather accents can typically handle a gentle delicates cycle.
How often should I clean my leather gardening gloves?
A quick wipe-down after every few uses, combined with a deeper hand wash every four to six weeks during active gardening season, is a reasonable schedule for most gardeners. Heavier use may call for more frequent attention.
What’s the best soap to use on leather gloves?
A mild, unscented dish soap diluted in lukewarm water works well, as does saddle soap formulated specifically for leather. Avoid anything containing bleach, strong degreasers, or heavy fragrance additives.
Can I use olive oil or coconut oil to condition leather gloves?
Kitchen oils can work in a pinch, but they’re not ideal for long-term use. They can go rancid, darken the leather unevenly, or leave a greasy residue. A dedicated leather conditioner is formulated to absorb evenly and won’t have those drawbacks.
Why do my leather gloves feel stiff after washing?
Stiffness after washing usually means the leather dried too quickly, was exposed to heat, or wasn’t conditioned afterward. Washing removes some natural oils along with the dirt, so skipping the conditioning step is a common cause of post-wash stiffness.
How do I remove tree sap from leather gardening gloves?
Dab a small amount of rubbing alcohol onto a cotton swab and gently work it into the sap until it lifts, then wipe the area with a clean, water-dampened cloth to remove any alcohol residue.
Is it normal for leather gloves to change color slightly over time?
Yes, gradual darkening from sweat, oils, and sun exposure is normal and generally considered part of leather’s natural patina. Even coloring, however, is something regular conditioning can help maintain.
Can I speed up drying time with a hair dryer?
It’s best to avoid this. Direct heat from a hair dryer causes leather to dry unevenly and too quickly, which typically leads to stiffness and cracking. Air drying at room temperature, even though it takes longer, produces a far better result.
How do I get a musty smell out of leather gardening gloves?
A musty smell usually indicates the gloves were stored while still slightly damp. A thorough hand wash followed by complete air drying in a well-ventilated space typically resolves it. Storing gloves with a small silica gel packet can help prevent it from recurring.
Should I clean the inside lining of my gloves too?
Yes, if the gloves have a fabric lining, it can be gently wiped or lightly dabbed with a diluted soap solution as well, since sweat accumulates there and contributes to odor over time. Make sure the lining is fully dry before storing.
Keep Your Gloves Ready for the Next Season
Cleaning leather gardening gloves properly isn’t complicated, but it does reward a little patience over shortcuts. A regular wipe-down habit, an occasional gentle hand wash, careful drying away from heat, and consistent conditioning are really all it takes to keep a good pair working for years rather than months. Treat the leather the way you’d treat any natural material that flexes with your hands every day, and it will keep doing its job season after season.
Shop Top-Rated Leather Gardening Gloves