The Essential Gardening Tools Every Beginner Actually Needs
A category-by-category guide to building a beginner-friendly tool kit — what to buy first, what to skip, and what actually makes gardening easier.
Walk into any garden center and the wall of tools can feel like its own kind of overwhelm — racks of trowels in five different shapes, pruners split into categories you didn’t know existed, and enough specialty gadgets to fill a shed twice over. If you’re just getting your hands into the soil for the first time, you don’t need any of that. You need a short, deliberate list of tools that match the tasks you’ll actually be doing, whether that’s tending a few pots on a balcony or digging your first bed in the backyard.
This guide breaks that list down by category: what each tool does, what separates a sturdy one from a flimsy one, and where you can safely delay a purchase until your garden tells you it’s needed. It’s part of our broader gardening at home series, so if you land here before you’ve settled on a layout, it’s worth pairing this with our walkthrough on how to start a garden from scratch first — the shape of your growing space changes which tools earn a spot in your kit and which ones can wait.
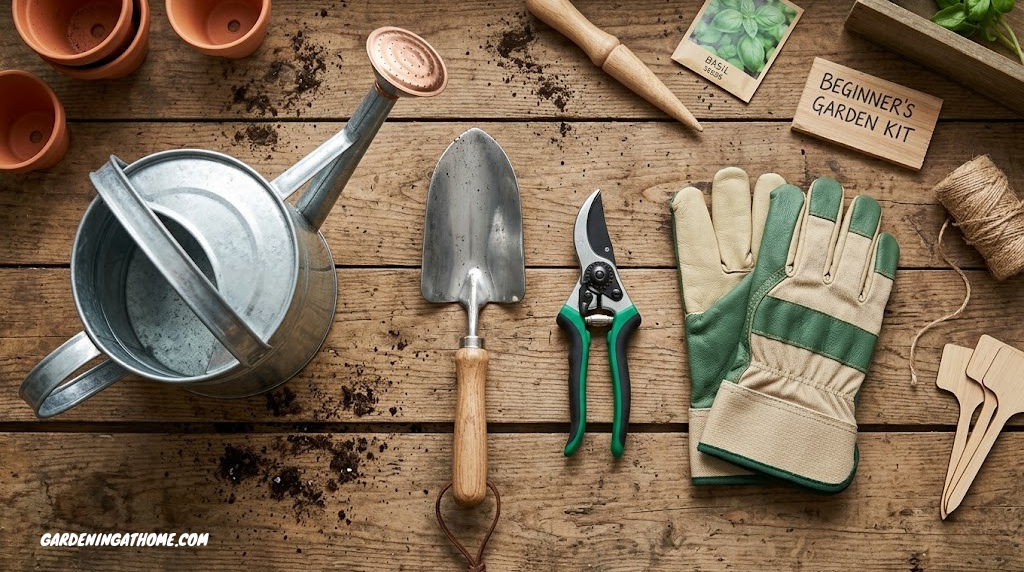
What tools does a beginner gardener actually need? For most new gardeners, a core kit of eight to ten tools covers nearly every task: a hand trowel, a hand cultivator, bypass pruners, a digging spade or fork, a rake or hoe, a watering can, gardening gloves, and a kneeling pad. Container and balcony gardeners can often stop there. Anyone working a larger in-ground bed should plan to add a wheelbarrow or garden cart and a basic soil test kit once those fundamentals are covered. The sections below go through each category in detail, including what to look for and which tools are genuinely optional for a first season.
Before diving into categories, here’s a scannable overview of the twelve tools that come up again and again on beginner checklists — use it as a reference while you read, or jump straight to a section using the menu beside this text.
| Tool | Category | Primary use |
|---|---|---|
| Hand trowel | Hand tool | Digging small holes, transplanting, container work |
| Hand cultivator / fork | Hand tool | Loosening soil and weeding around existing plants |
| Bypass pruners | Cutting tool | Trimming live stems, deadheading, light branches |
| Garden spade | Digging tool | Edging beds, slicing through soil, digging holes |
| Garden fork | Digging tool | Breaking up compacted soil, turning compost |
| Garden hoe | Digging tool | Weeding between rows, making seed furrows |
| Garden rake | Digging tool | Leveling soil, clearing debris before planting |
| Watering can | Watering tool | Controlled watering for containers and seedlings |
| Gardening gloves | Protective gear | Hand protection from thorns, soil, and blisters |
| Kneeling pad / kneeler | Protective gear | Joint comfort during ground-level tasks |
| Wheelbarrow or garden cart | Hauling tool | Moving soil, mulch, and plant material |
| Soil test kit | Measurement tool | Checking pH and nutrient levels before planting |
Why the Right Tools Matter
It’s tempting to either grab whatever’s lying around the house or buy one of everything on the garden center shelf, and both habits cause the same problem: gardening starts to feel like a chore instead of something you look forward to. A butter knife stands in for a trowel until it bends. Kitchen scissors hack through a rose cane until the blade goes dull and the cut tears the stem instead of slicing it cleanly. None of this is really about tools being “nice to have” — it’s about the right tool turning a five-minute task back into a five-minute task, instead of a fifteen-minute fight.
At the other extreme, a fully stocked tool wall can sit mostly unused. A soil thermometer, a bulb planter, and a dozen specialty gadgets all sound useful in the abstract, but most beginners never touch half of what they buy in their first season. The categories below are organized around the handful of jobs every gardener repeats constantly — digging, cutting, watering, hauling, and protecting your hands and knees — rather than around tasks you might never run into. Buy for the garden you actually have right now, and let it tell you what to add next.
Essential Hand Tools
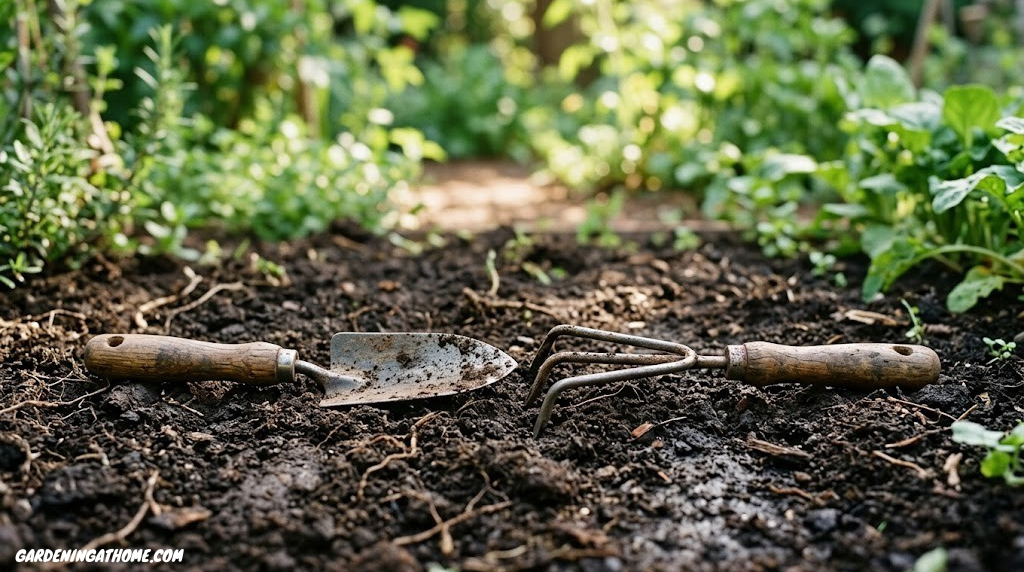
If you only buy two tools this season, make them a hand trowel and a hand cultivator. The trowel digs planting holes, scoops potting mix into containers, and lifts small transplants without disturbing their root ball. The cultivator — sometimes sold as a hand fork or cultivating claw — loosens compacted topsoil, works compost into the surface around existing plants, and pulls shallow-rooted weeds without the wide swing of a full-size hoe.
Quality shows up fastest in how the blade meets the handle. On a full-tang trowel, the metal blade and the shaft running into the handle are a single forged piece, so there’s no glued or riveted joint to work loose after a season of prying against compacted soil. On cheaper, stamped versions, the blade is a thin sheet of metal pressed into shape and bonded to a separate handle — fine for soft potting mix, but usually the first thing to bend or snap in heavier garden soil.
Forged, Full-Tang Tools
- Survives clay soil and rocky ground without bending
- Blade rarely separates from the handle
- Worth the extra cost if you’ll use it weekly
Stamped Sheet-Metal Tools
- Noticeably lighter weight, which some beginners prefer
- Blade can bend or flex under firm, compacted soil
- Best suited to container mix rather than garden beds
Shop Hand Trowels & Cultivator Sets
Look for full-tang construction and a grip wide enough to use comfortably for ten minutes at a stretch.
Check Price on AmazonCutting & Pruning Tools
A pair of bypass pruners is the one cutting tool nearly every beginner needs immediately — for deadheading spent flowers, trimming herbs, snipping soft stems, and cutting back perennials at the end of the season. Loppers (the long-handled, two-hand version of pruners) can wait. Most new gardeners don’t run into a branch thick enough to need them until their shrubs have had a couple of seasons to fill in.
The difference between bypass and anvil pruners comes down to how the blades meet:
| Tool | Cut style | Best for | Buy now or wait? |
|---|---|---|---|
| Bypass pruners | Scissor action | Live stems, deadheading, light shaping | Buy first |
| Anvil pruners | Blade on flat plate | Dry, dead wood; less precise on live growth | Optional second pair |
| Loppers | Long-handled bypass or anvil | Branches too thick for hand pruners | Wait until needed |
One more detail worth checking before you buy: blade material. High-carbon steel holds a sharp edge longer but needs a quick wipe-down after use to avoid rust; stainless steel resists rust with less maintenance but tends to dull a bit sooner. Either is fine for a first pair — just plan to budget a few minutes for blade care after a wet afternoon outside, covered in more detail later in this guide. Once you’re cutting woody stems on a regular plant, roses being the classic example, a dedicated guide like how to prune roses is worth reading for plant-specific timing and cut placement.
Digging & Bed Prep Tools
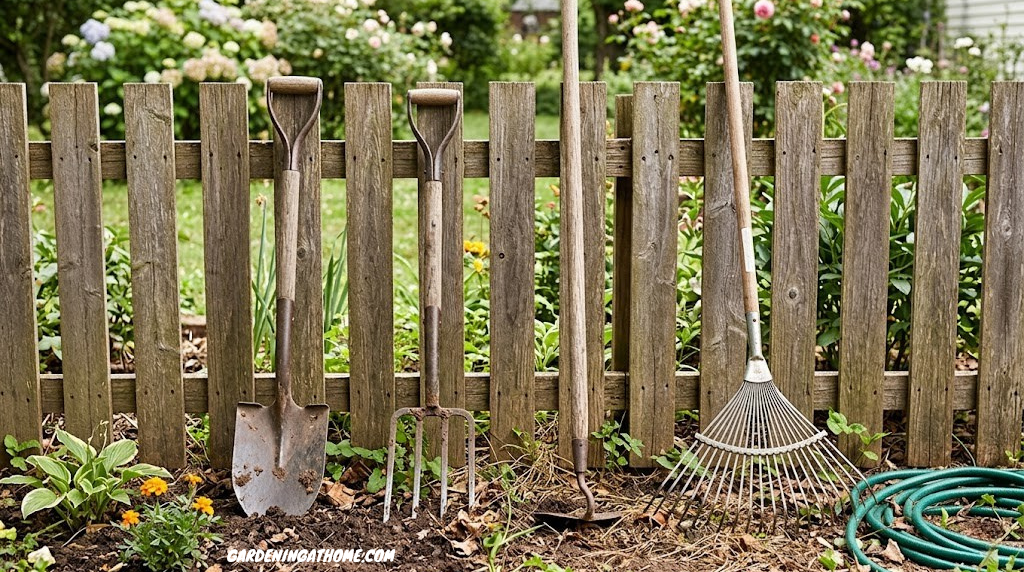
This category is entirely skippable for container and balcony gardeners — jump ahead to the container and balcony tools section if that’s your setup. For anyone working an in-ground bed, though, these four tools cover almost every bed-prep task you’ll run into:
- Garden spade — a flat, straight-edged blade for slicing through sod, edging beds, and digging clean, straight-sided holes. Usually the first tool to buy in this group.
- Garden fork — four sturdy tines for breaking up compacted or clay soil, turning compost, and dividing root-bound perennials without slicing through their roots the way a spade would.
- Garden hoe — a flat or angled blade on a long handle for slicing weeds off at the soil line and dragging shallow furrows for seeds, without bending over.
- Garden rake — specifically a bow rake (rigid, short metal tines) for leveling soil and breaking up clumps before planting. This is a different tool from a leaf rake, which has long flexible tines meant for gathering leaves, not moving soil.
If you’re prepping a single new bed this season, a spade and a bow rake will get you through most of it. Add the fork once you hit compacted or clay-heavy soil, and the hoe once weeding between rows becomes a recurring task rather than an occasional one. Building a raised bed instead of digging into existing ground? Our guide on choosing soil for raised beds covers a few extra considerations these general-purpose tools don’t address.
Watering Tools & Irrigation
A watering can is the right tool for containers, seedlings, and newly transplanted starts, where you want a controlled, gentle flow rather than the force of a hose. Look for a long spout — it lets you water at the base of a plant without the stream splashing soil up onto the leaves, and it reaches the back row of a windowsill or balcony planting without you needing to reposition every pot. A capacity of around 1.5 to 2 gallons is usually the sweet spot: enough to cover several containers per trip without becoming too heavy to carry comfortably when full.
For in-ground beds, a standard garden hose with an adjustable nozzle covers everything from a gentle shower setting for seedlings to a firmer jet for rinsing tools or washing down a patio. Soaker hoses and drip irrigation are worth knowing about, but they’re a layout-specific upgrade — hold off until your beds are planted and you know exactly where the water needs to go.
Plastic Watering Can
- Lightweight even when full
- Inexpensive and widely available
- Won’t rust, ever
Galvanized Steel Watering Can
- Noticeably heavier, especially filled
- Can develop surface rust if stored wet
- Holds up better to daily outdoor use and knocks
Protective Gear & Wearables

Gloves earn their place in any beginner kit, but the right material depends on the job. Leather-palmed gloves hold up against thorns, splinters, and rough mulch, while thinner nitrile-coated knit gloves give you enough dexterity to handle seeds, delicate transplants, and small hand tools without feeling like you’re working with oven mitts on. If you’re only buying one pair to start, the nitrile-coated style covers more day-to-day tasks for most beginners.
A kneeling pad — or a combination kneeler-stool that flips between a cushioned pad and a low seat with handles — protects your knees and lower back during the planting, weeding, and harvesting tasks that keep you at ground level. It’s an easy category to underestimate before your first long planting session and an easy one to regret skipping afterward.
Shop Gardening Gloves & Kneeler Sets
A foldable kneeler-stool combo is worth the small extra cost if you expect to be gardening for years, not just one season.
Check Price on AmazonHauling & Transport Tools
If your gardening is limited to a few containers or a single raised bed, this category can wait — a five-gallon bucket handles most short hauls just fine. Once you’re moving soil, mulch, or compost on a regular basis, though, a dedicated hauling tool stops being a convenience and starts saving your back.
The choice usually comes down to a single-wheel wheelbarrow or a two- or four-wheel garden cart. Both move bulky material faster than carrying it by hand; the better fit depends more on your terrain and storage space than on price.
Wheelbarrow
- Single wheel pivots tightly in narrow side yards
- Tips and dumps a load in one motion
- Compact footprint, often hangs on a wall
Garden Cart
- Two or four wheels stay stable on uneven ground
- Much harder to accidentally tip mid-load
- Takes up more floor space in a shed or garage
For a first purchase, a basic 6-cubic-foot poly wheelbarrow covers most beginner needs without the storage demands of a full-size cart. If your yard is mostly flat with wide paths, a two-wheel cart is worth considering instead — the added stability makes a real difference once a load gets heavy and off-balance.
Shop Wheelbarrows & Garden Carts
A 6-cubic-foot poly wheelbarrow is a sturdy, affordable starting point for most beginner yards.
Check Price on AmazonSoil & Measurement Tools
A basic soil pH and nutrient test kit tells you, in a few minutes, whether your soil leans acidic or alkaline and whether it’s running low on nitrogen, phosphorus, or potassium — information that explains a surprising number of “why won’t this plant grow” problems before they become visible. Drugstore-style kits with color-changing strips or capsules are accurate enough for a beginner’s first read on a new bed.
For a more detailed result, many local extension offices and private labs will test a mailed-in soil sample for a modest fee and return a full nutrient breakdown with amendment recommendations. It’s worth doing once in your first season, even if you stick with a basic home kit for routine checks afterward.
A soil thermometer is a nice-to-have rather than a must-have: it tells you when soil has warmed enough in spring for heat-loving seeds like beans or squash to germinate reliably, which can save a frustrating round of reseeding. It’s an easy tool to add later once the rest of your kit is in place.
Container, Balcony & Indoor Tools

Gardening in pots, window boxes, or on a small balcony doesn’t call for a shrunken version of the full in-ground kit — it calls for a different set of smaller, more precise tools built for tight spaces:
- Mini trowel — sized for a six-inch pot rather than a garden bed, easier to maneuver between crowded container plantings.
- Micro snips — small spring-loaded scissors for deadheading and light trims where full-size pruners are too bulky to fit.
- Narrow-spout watering can — directs water precisely at the soil in a crowded windowsill tray without splashing leaves or neighboring pots.
- Moisture meter probe — an easy way to check whether a container actually needs water before you pour, since potting mix can look dry on the surface while staying soaked underneath.
- Soft brush and saucer set — for dusting leaves indoors, where natural rain isn’t doing that job for you, and for catching drainage water before it reaches the floor.
If you’re working exclusively in containers, this list — paired with gloves and a basic watering can from earlier sections — is close to a complete kit on its own. Our guide to container gardening for beginners goes deeper into pot sizing and drainage if this is your primary setup.
Building Your Kit on a Budget
You don’t need to buy everything on this page in a single trip. Spreading purchases out over your first season — guided by what your garden is actually asking for — both saves money up front and keeps you from owning tools you never end up using. The table below groups everything covered so far into three rough buying phases.
| Phase | Tools | Typical cost |
|---|---|---|
| Start here | Hand trowel, gloves, bypass pruners, watering can | $35–$70 |
| Add once garden grows | Hand cultivator, kneeling pad, spade or fork | $30–$60 |
| Wait until needed | Hoe, rake, wheelbarrow or cart, soil test kit | $60–$150+ |
This roughly mirrors the core kit mentioned in the quick answer at the top of this guide: cover the “start here” row first, and you’ll be equipped for nearly any beginner task. Everything in the second and third rows earns its place once a specific job — compacted soil, a bigger bed, a recurring weeding chore — actually shows up, rather than sitting unused in a shed because it seemed like a good idea at checkout.
Spending a little more on the first row tends to pay off more than buying the cheapest version of everything across all three. A trowel or a pair of pruners you reach for every week is worth a few extra dollars for a sturdier build; a wheelbarrow you might use twice this season is a much safer place to economize.
Tool Care & Maintenance
A decent tool, looked after well, will easily outlast a premium tool left in a damp shed corner covered in dried mud. Maintenance for most hand tools comes down to the same three-step habit, repeated after each significant use:
Rinsing off soil and plant residue right after use keeps it from drying into a crust that’s much harder to remove later, and keeps damp organic material from sitting against metal long enough to encourage rust. A stiff brush and a bucket of water handle most of this in under a minute per tool.
Drying matters more than it sounds like it should. Tools put away wet — even rinsed clean — are the ones most likely to show surface rust within a season, especially on blades and any exposed steel. A few minutes of air-drying, or a quick towel pass on tools you’re putting away immediately, solves this.
A light coat of oil on metal parts — a few drops of household oil wiped on with a rag works fine — adds a thin barrier against moisture between uses. This matters most for blades on pruners, spades, and hoes, since a clean cutting edge stays sharp and rust-free far longer with this step than without it.
Two more habits round out tool care: sharpening pruner blades once or twice a season with a basic sharpening stone keeps cuts clean rather than crushed, which matters for plant health as much as convenience, and storing tools off the ground — hung on a wall or pegboard rather than leaned in a damp corner — prevents the slow rust and handle rot that comes from prolonged contact with wet soil or concrete.
Frequently Asked Questions
A hand trowel. It covers digging planting holes, scooping potting mix, and transplanting seedlings, which are the tasks nearly every gardener repeats most often.
Not right away. A spade handles edging, slicing sod, and digging holes for most first-season bed prep. A garden fork becomes useful once you’re working compacted or clay-heavy soil, turning compost, or dividing established perennials.
Bypass pruners use two curved blades that slide past each other for a clean cut on live stems. Anvil pruners press a single blade onto a flat plate, which suits dry, dead wood but can crush live growth.
A starter kit with a hand trowel, bypass pruners, gloves, and a watering can typically costs between $35 and $70, with another $30 to $60 for a cultivator, kneeling pad, and spade as the garden grows.
For light jobs like a single small pot, a large spoon can substitute for a trowel temporarily. It works less well for cutting, since kitchen scissors dull quickly against plant stems and leave a ragged cut.
Clean soil off after every use, dry the metal completely before storing, and apply a light coat of household oil to exposed surfaces periodically, especially before wet weather.
Start Smaller Than You Think You Need To
The biggest mistake beginner gardeners make with tools isn’t buying the wrong ones — it’s buying too many, too early, before the garden has told them what it actually needs. Start with the core kit from the quick answer at the top of this guide, add to it as specific tasks come up, and let your second season fill in the gaps your first season reveals. A smaller kit you use every week beats a full shed of tools that mostly just sit there.
If you haven’t settled on a layout yet, our guide on how to start a garden from scratch is the natural next stop, and once your beds or containers are in place, vegetable gardening for beginners walks through what to plant first.